
Repro Steps and Auto-masking Screenshots
How to automatically mask the screens reported in Repro Steps
Repro Steps is your go-to tool for understanding what led to a bug or crash in your app. This guide will help you make the most of Repro Steps.
What are "Repro Steps"?
Repro Steps capture and present all the actions a user takes in your app before encountering a bug or crash. These steps are grouped by the app view, and you can view user steps alongside relevant screenshots. It's like having a play-by-play visual and written record of the user's actions leading to the problem.
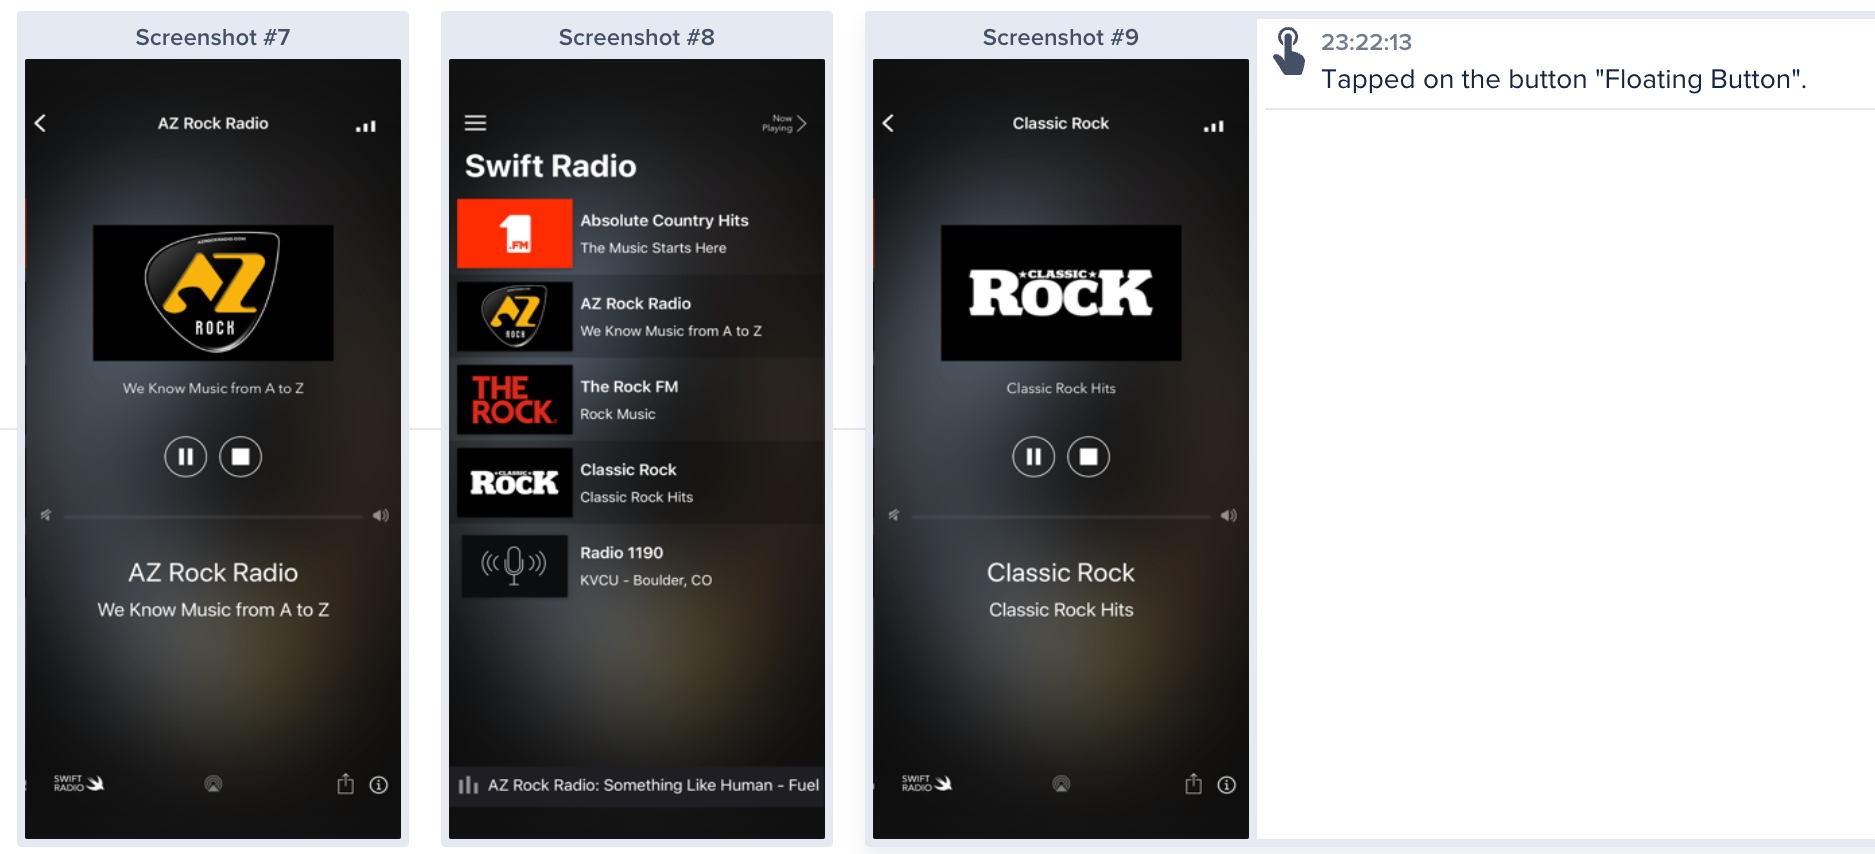
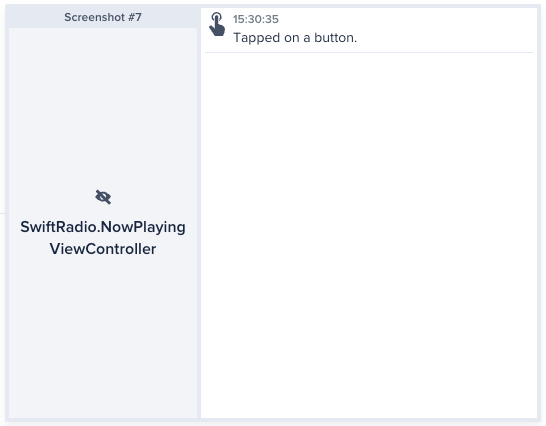
Repro steps captured by Instabug
Where can you find “Repro Steps”?
To find the Repro Steps, simply scroll down below the bug details. If you are on the crash reporting tool, you will find them in the occurrences page of a crash below the crash details. Check the screenshot below to find them
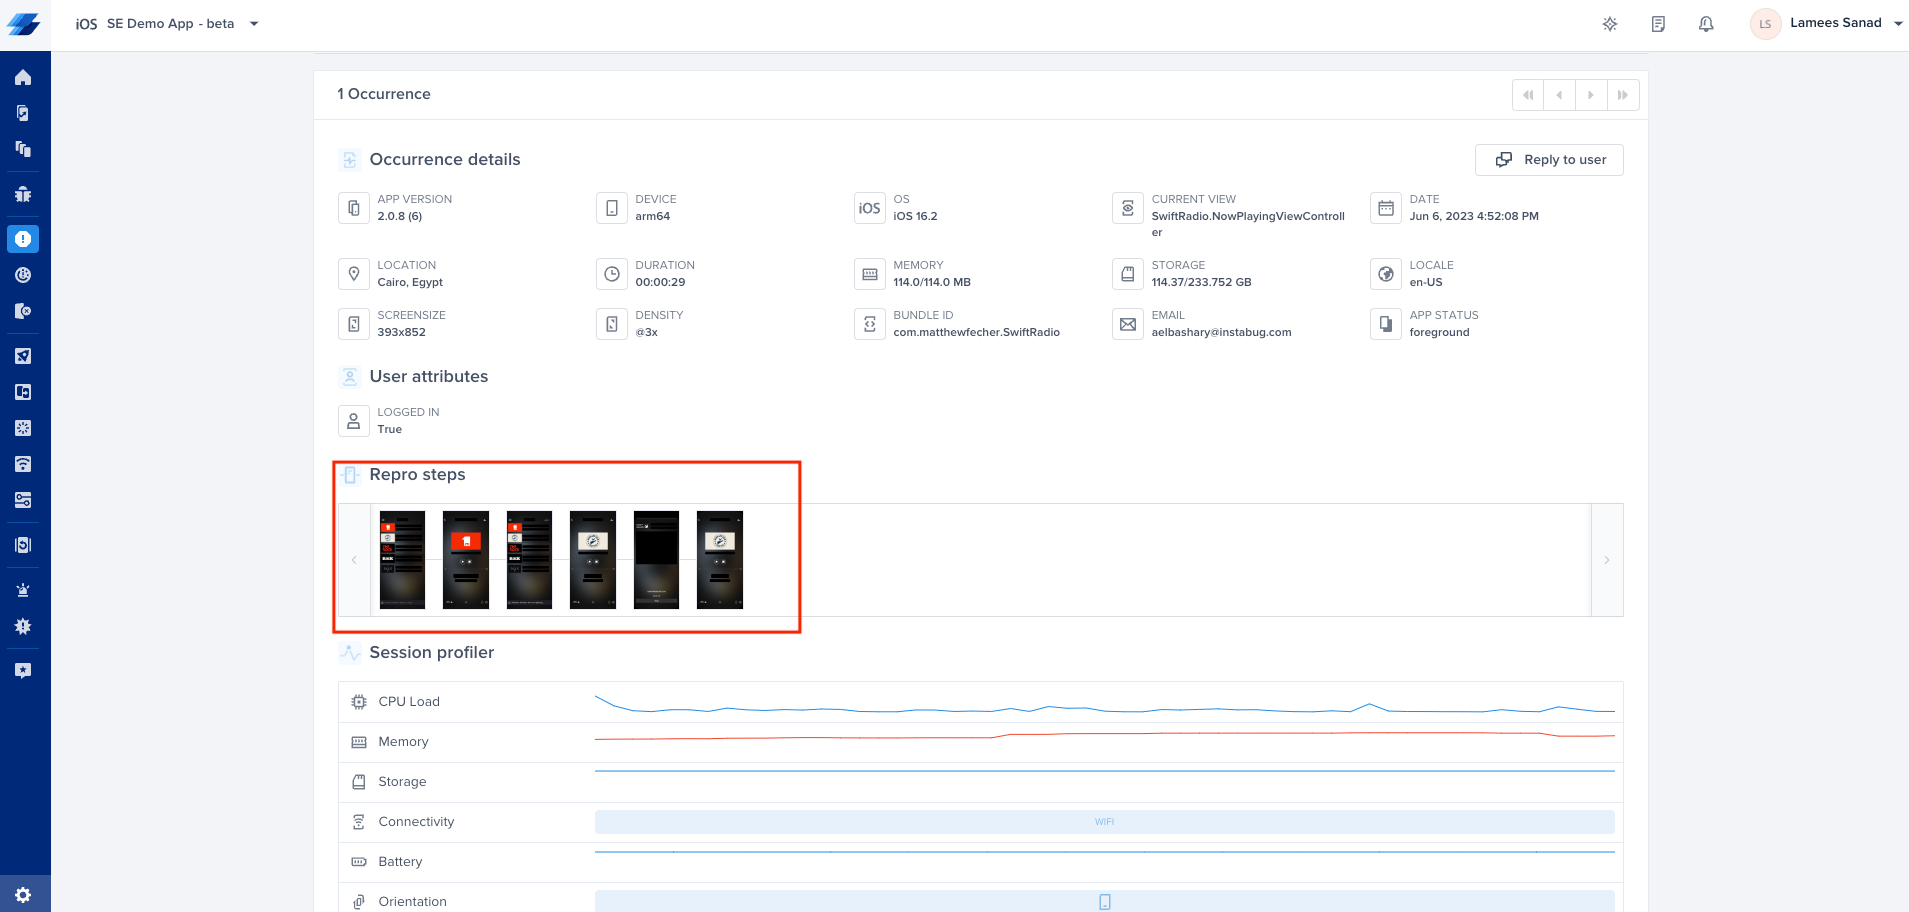
Location of Reprosteps inside a Crash Report
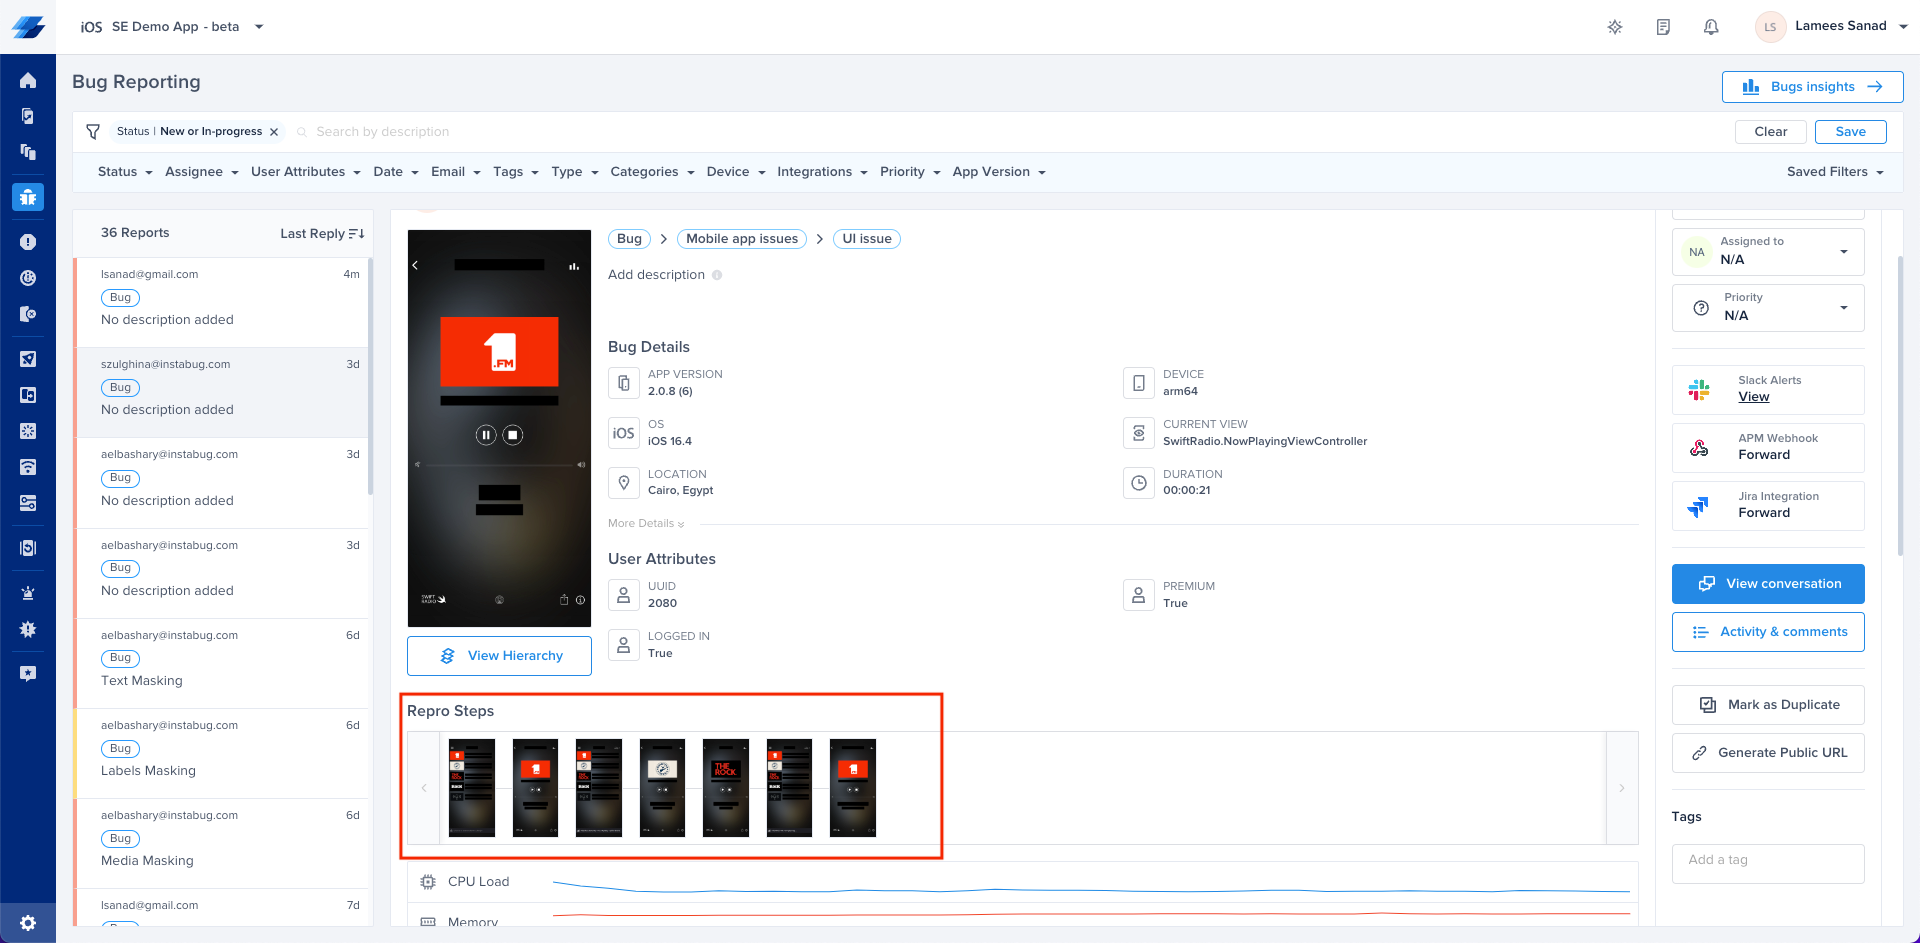
Location of Reprosteps inside a Bug Report
Understanding the Setup
Repro Steps are organized by the different screens in your app that users interact with. Each screen view visited by the user contains a set of chronological steps, giving you a clear picture of what led to the reported issue.
Understanding Logged Data and Captured Events
Logged data captures user interactions, such as swipes, scrolls, taps, and more. It provides insights into how users engage with your app. The captured events track app states, including background/foreground transitions, activity changes, and memory warnings. To know more about the logged data here
How can you enable Reprosteps?
Repro Steps is by default enabled with screenshots for bug reporting, and enabled without screenshots for crash reporting. So do you need to change anything here? If yes, you can use the following properties
Instabug.setReproStepsFor(.all, with: .enable)
[Instabug setReproStepsFor:IBGIssueTypeAll withMode:IBGUserStepsModeEnable];
You can change the value of the Issue Type.
//Bug Reporting and Crash Reporting
.all
//Bug Reporting Only
.bug
//Crash Reporting Only
.crash
//Bug Reporting and Crash Reporting
IBGIssueTypeAll
//Bug Reporting Only
IBGIssueTypeBug
//Crash Reporting Only
IBGIssueTypeCrash
You can change the value of the User Steps Mode.
//Enable with Screenshots
.enable
//Enable with NO Screenshots
.enabledWithNoScreenshots
//Disable
.disable
//Enable with Screenshots
IBGUserStepsModeEnable
//Enable with NO Screenshots
IBGUserStepsModeEnabledWithNoScreenshots
//Disable
IBGUserStepsModeDisable
Examples
Enable with Screenshots for both Bug Reporting and Crash Reporting:
Instabug.setReproStepsFor(.all, with: .enable)
[Instabug setReproStepsFor:IBGIssueTypeAll withMode:IBGUserStepsModeEnable];
Enable with No Screenshots for Crash Reporting.
Instabug.setReproStepsFor(.crash, with: .enabledWithNoScreenshots)
[Instabug setReproStepsFor:IBGIssueTypeCrash withMode:IBGUserStepsModeEnabledWithNoScreenshots];
Completely disable for both Bug Reporting and Crash Reporting.
Instabug.setReproStepsFor(.all, with: .disable)
[Instabug setReproStepsFor:IBGIssueTypeAll withMode:IBGUserStepsModeDisable];
User Privacy
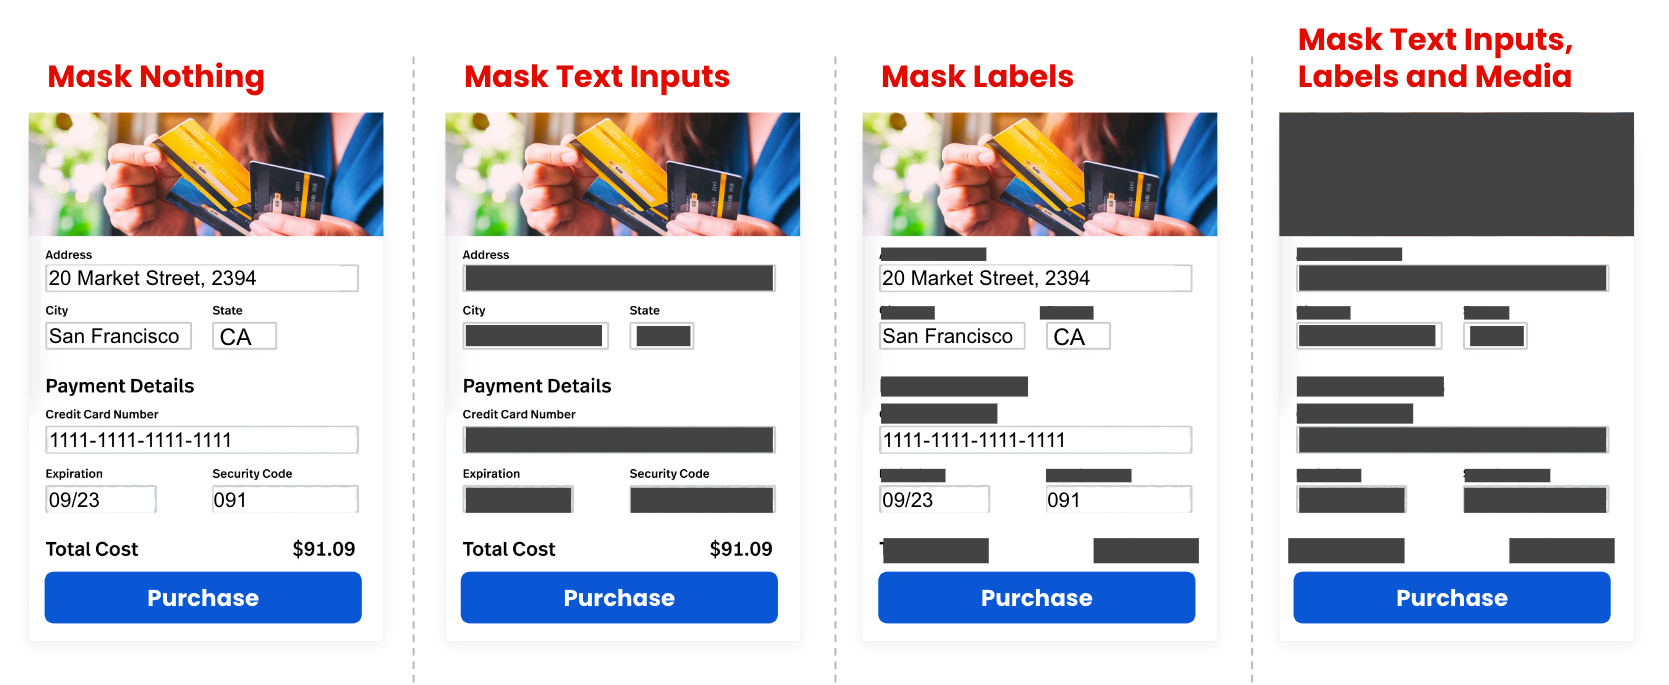
We understand user privacy is of key to you, specially having our SDK on production. In this guide, we will show you how to mark views containing sensitive information as private. By doing so, these views will be masked on screenshots captured to your users' devices (before being sent to Instabug servers) and automatically appear with a black overlay (over whole screen, labels, texts or media) in any screenshot on Instabug's dashboard to protect your user’s sensitive data.
Repro steps screenshots are disabled by default on crash reporting.
-
Identify the View: Determine which view in your app contains sensitive information that should be kept private. For example, a payment details screen or a user's personal profile.
-
Identify Sensitive Information: Determine which information on each view that you need to hide. Do you want to hide the whole screen? text fields? media? labels?
-
Deciding on the content of the screenshots
Instabug provides you with multiple ways to easily protect your users sensitive data, whether you want to hide the content of a whole specific screen or certain text fields, labels and media, we got you covered!-
Auto masking
You can automatically mask sensitive data when screenshots are captured, while protecting the user's privacy by default using auto masking feature. Keep in mind that this feature affects both Bug and Crash Reporting.
-
Masking text inputs
You can use this to hide any text fields captured on all your screenshotsInstabug.setAutoMaskScreenshots([.textInputs])[Instabug setAutoMaskScreenshots: IBGAutoMaskScreenshotOptionTextInputs]; -
Masking labels
This can be utilized to hide text labels including buttons and titlesInstabug.setAutoMaskScreenshots([.labels])[Instabug setAutoMaskScreenshots: IBGAutoMaskScreenshotOptionLabels]; -
Masking images and videos
If your users might be sharing private images or videos on the app, in which you wouldn't want access to, you can utilize the following property to hide it.Instabug.setAutoMaskScreenshots([.media])[Instabug setAutoMaskScreenshots: IBGAutoMaskScreenshotOptionMedia]; -
Masking nothing
You can also disable auto-masking all together if you need using the following propertyInstabug.setAutoMaskScreenshots([.maskNothing])[Instabug setAutoMaskScreenshots: IBGAutoMaskScreenshotOptionMaskNothing]; -
Mix and match
You can combine different masking options according to your needs. For example, if you want to mask both text Inputs and labels, you can use the following APIInstabug.setAutoMaskScreenshots([.textInputs, .labels])
-
-
Hide a whole screen
In case you need to add an extra layer of privacy and prevent sensitive information from being captured in screenshots. This property will hide the overall screen when the view appears in a screenshotview.instabug_privateView = trueview.instabug_privateView = YES;
-
Example of private view
Note: Protecting sensitive information and respecting user privacy are vital. By following these steps, you'll create a secure and trustworthy environment for your users.
Updated about 1 month ago