Report Types & Content
This page covers the content found in the reports sent to the bugs page of your dashboard and relevant APIs.
Report Types
There are three different types of reports that, while function similarly for the end-user, appear with different types on the dashboard in order to easily separate between incoming issues. All three types will reach your dashboard with the same amount of information and can be filtered so that you can look at specific types only.
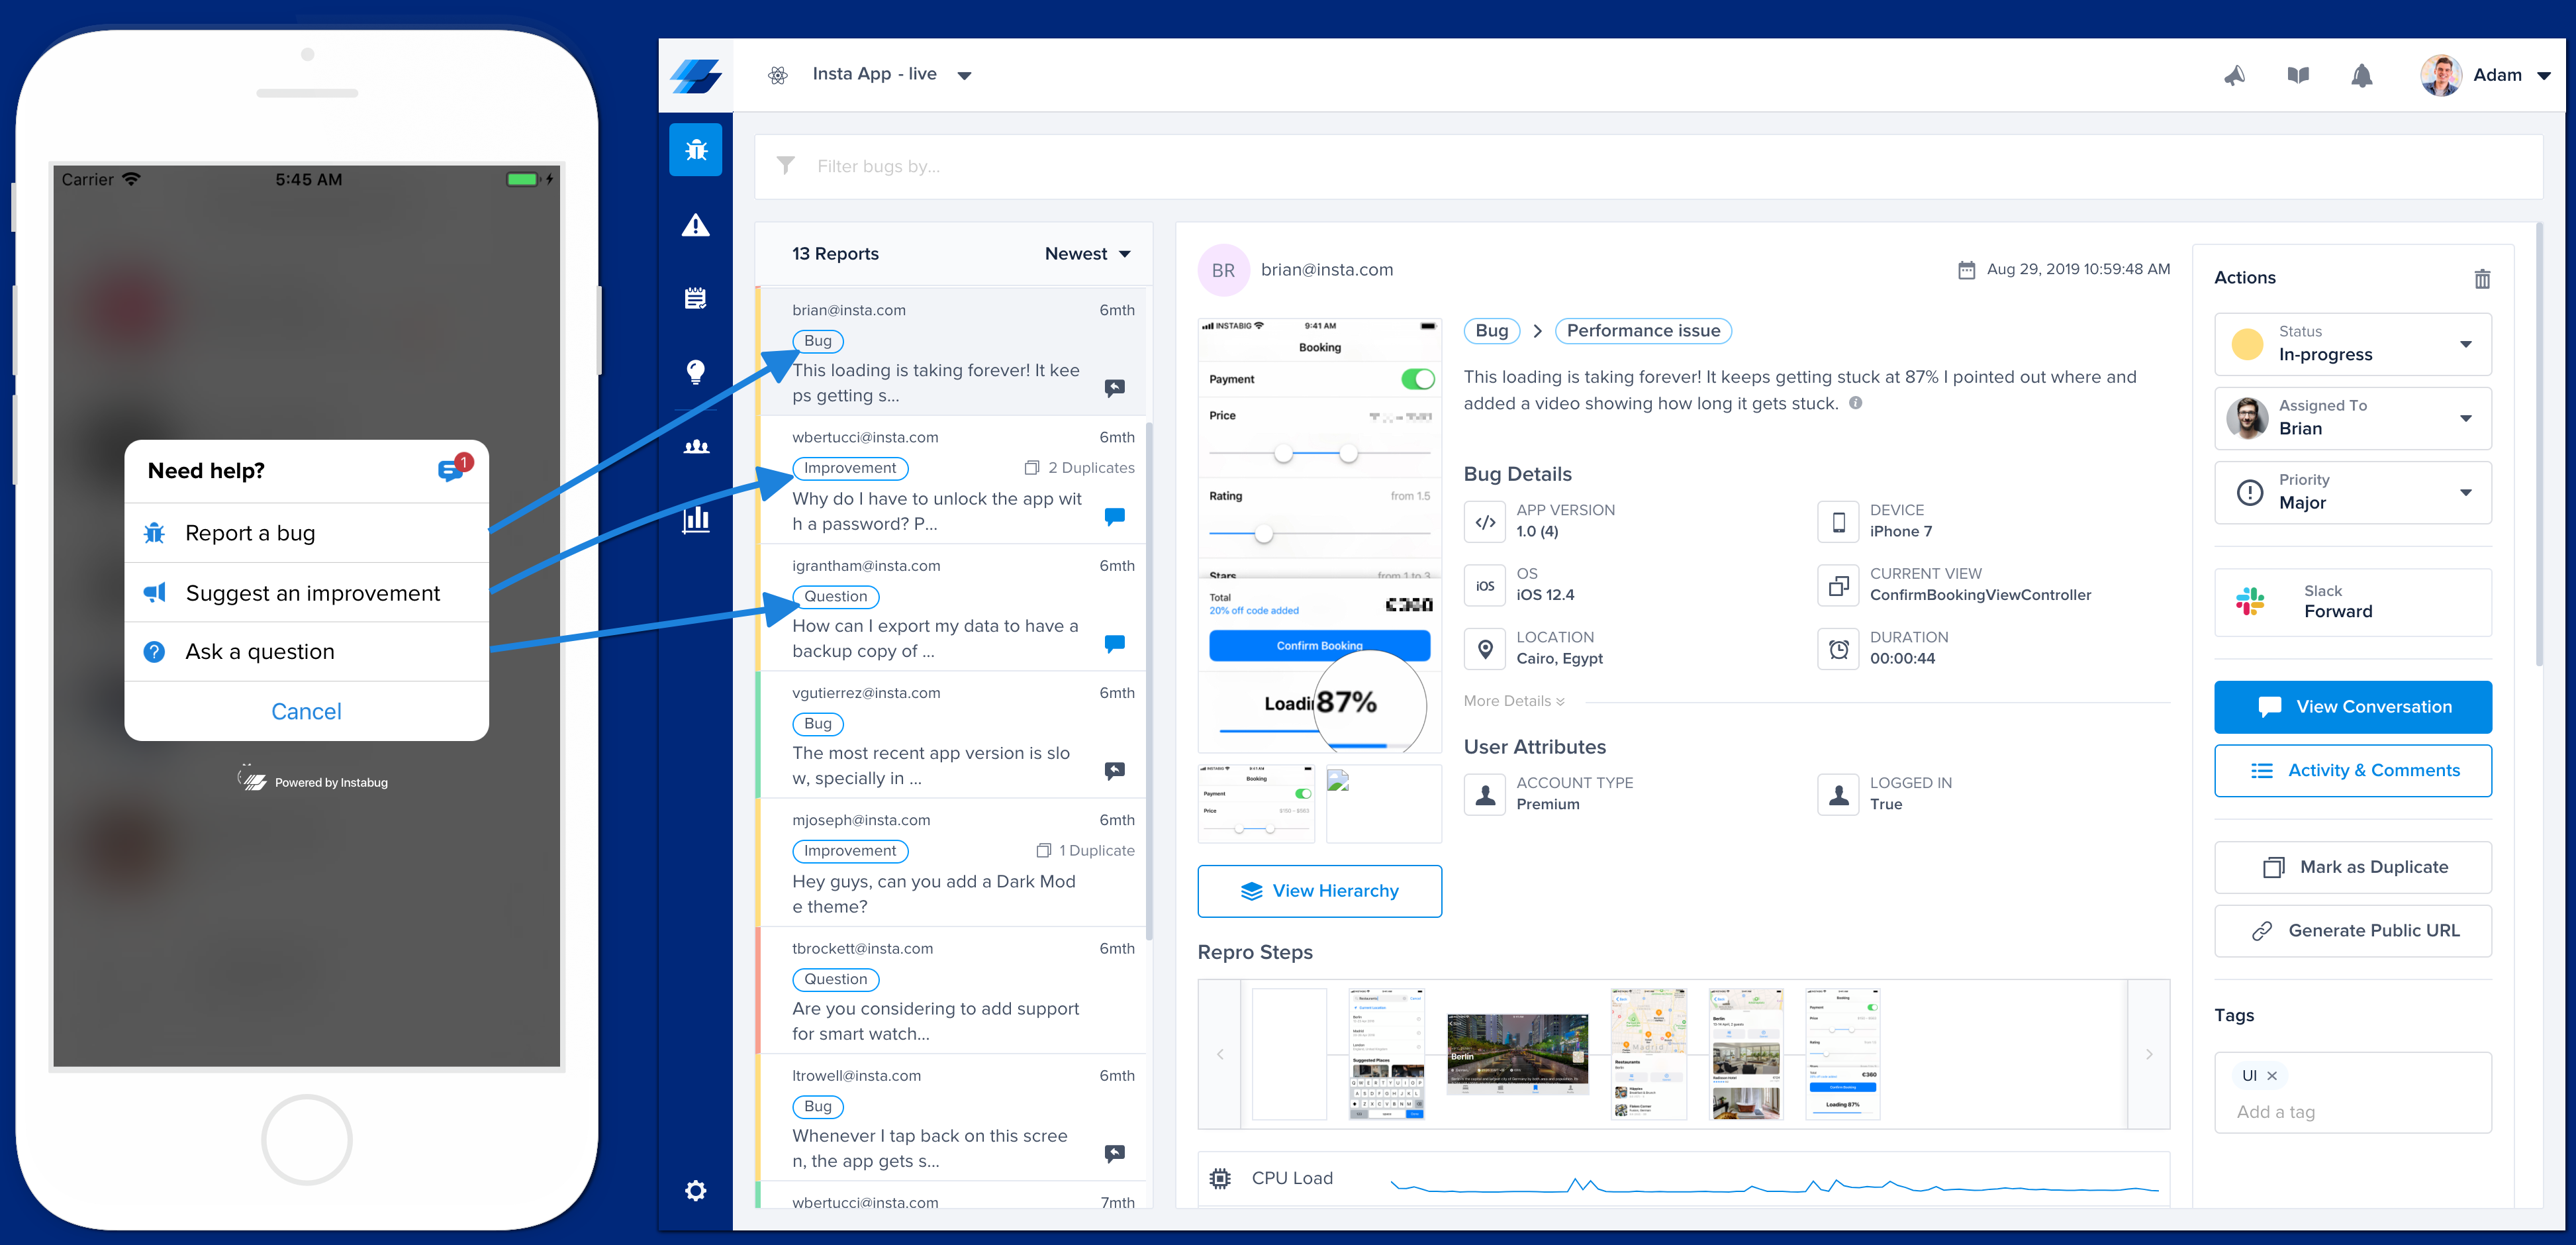
Bug
When the user selects "Report a bug" from the prompt options, the sent report will appear with type Bug. This type of report is primarily meant for reporting bugs that were found in the application.
![3. [MB] Compose Report (Bug).png 696](https://files.readme.io/de4fe48-3._MB_Compose_Report_Bug.png)
Improvement
Selecting "Suggest an improvement" from the prompt options will open the improvement suggestion form that your user can use to give you feedback on how you can improve the application in certain areas. These reports are shown on the dashboard with type "Improvement".
![4. [MB] Compose Report (Suggestion).png 696](https://files.readme.io/34f8e86-4._MB_Compose_Report_Suggestion.png)
Question
The third option in the prompt options is "Ask a question". The purpose behind this option is for users that don't quite have a bug or an idea for an improvement, but rather a question they'd like to ask you. These show on your dashboard with type "Question".
![5. [MB] Compose Report (Question).png 696](https://files.readme.io/e979760-5._MB_Compose_Report_Question.png)
Report Content
The reports (bugs, improvements, and questions) that your users submit from your app (from the Prompt Options) are sent to the bugs page of your dashboard.
With each report, you receive a plethora of details that will help you fix bugs and get more context about the comments you receive. Throughout this page, you will learn about all the information that comes in these reports, as well as any relevant APIs that you can use to customize the data that you receive, including:
- User Attributes
- Bug Report Fields
- Attachments
- Auto Screen Recording
- Logs
- Repro Steps
- Session Profiler
- View Hierarchy
- Tags
User Attributes
Default attributes as well as any custom user attributes that you set are automatically sent to your dashboard with all reports.
Default attributes listed in each report include:
- App version
- Device
- OS version
- App view
- Device location
- Session duration
More details about how to set custom user attributes can be found here.
Bug Report Fields
The image below shows the first view that your users see when reporting a bug after showing the SDK.
![3. [MB] Compose Report (Bug).png 696](https://files.readme.io/e4302db-3._MB_Compose_Report_Bug.png)
The first step of the bug reporting flow that your app users experience.
Email Address
By default, your users are required to enter a valid email address to submit a bug or feedback. To allow users to submit bugs and feedback without an email, use the following method.
BugReporting.setOptions([BugReporting.option.emailFieldOptional];
You can also remove the email field from the UI completely using the following API.
BugReporting.setOptions([BugReporting.option.emailFieldHidden];
Comment
By default, your app users can submit bugs and feedback without entering a description. To require users to leave a comment before they are able to send bugs or feedback, use the following method.
BugReporting.setOptions([BugReporting.option.commentFieldRequired]);
Attachments
Your users can submit two types of attachments with any report: default Instabug attachments (files that they can select from their device) and custom extra attachments (additional files that you can attach using code).
Instabug Attachments
When your app users show Instabug, the SDK automatically captures a screenshot of their current view. This is the default attachment that is sent with any report. Your users can annotate this screenshot by drawing on, magnifying, or blurring specific parts.
In addition, there are other attachment types that your users can choose to send with each report. All attachment types can be enabled or disabled.
The attachment options are:
- Extra screenshots.
- Images from phone gallery.
- Screen recording.
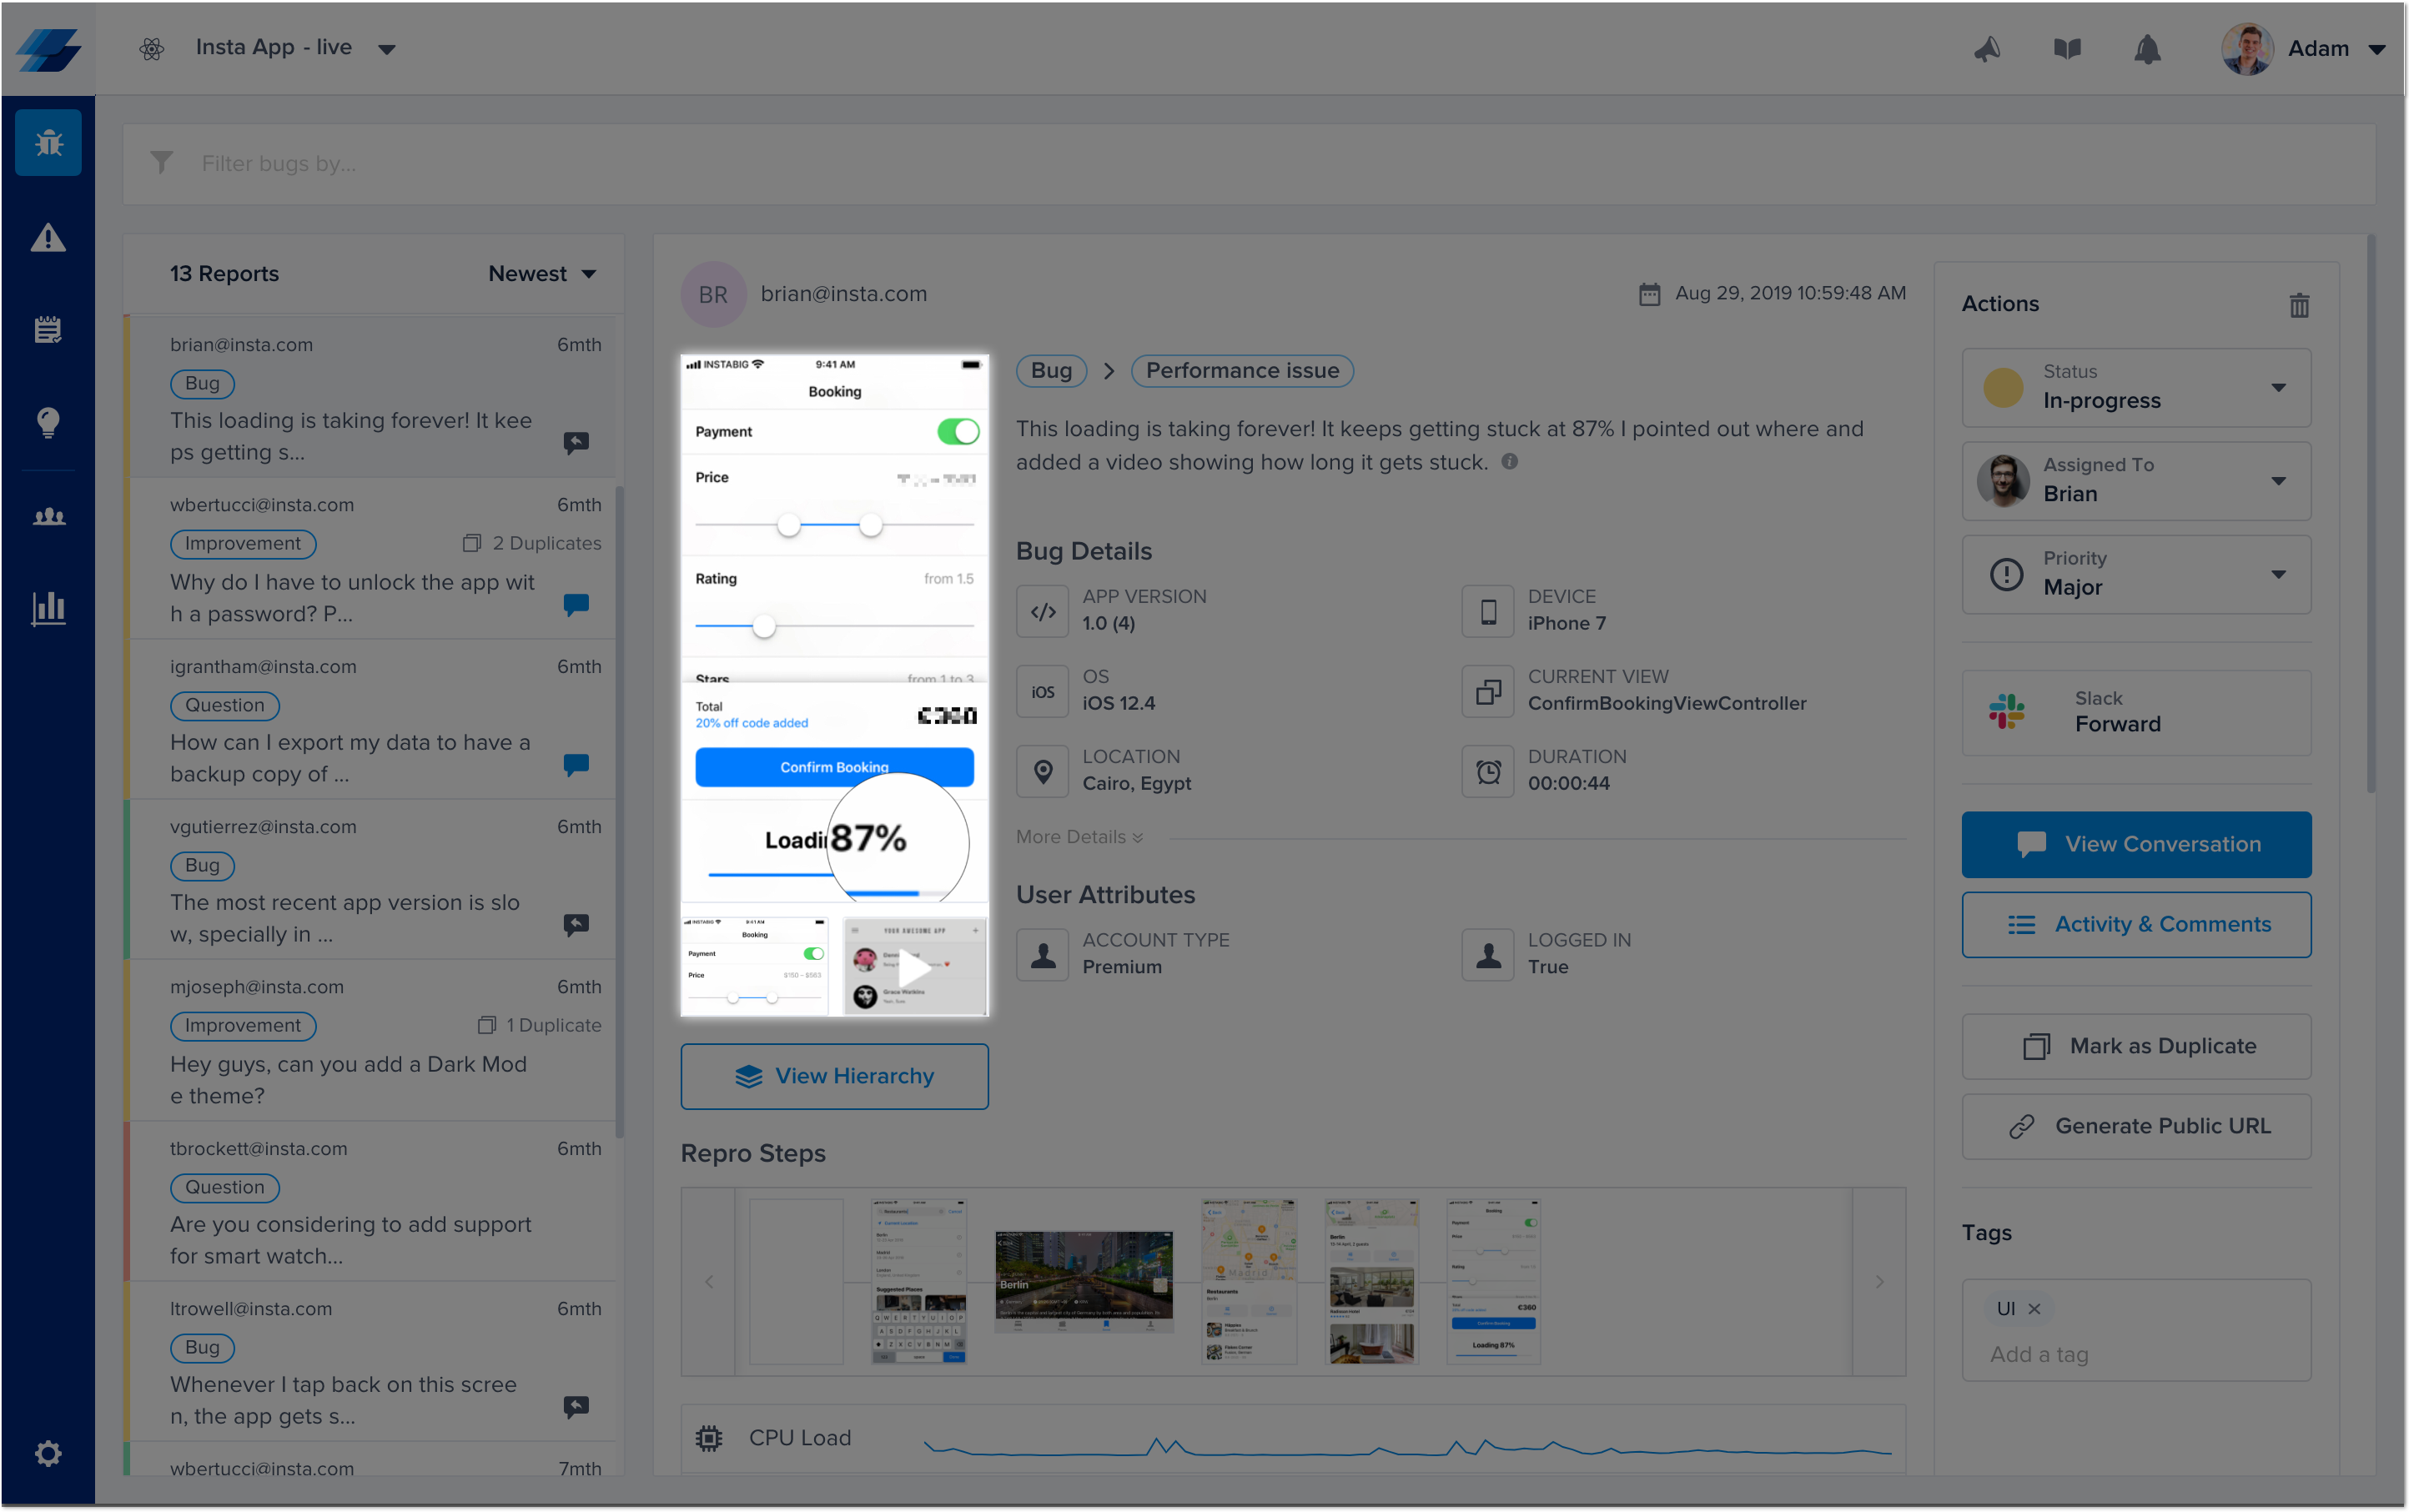
This is where your users' attachments appear in each report from the bugs page of your dashboard.
All attachment options are enabled by default if they are available in your current plan.
You can customize the attachment options that are available for your users to send by adding the following method call. Each of the parameters is a boolean used to indicate if a certain attachment type is enabled or not.
Instabug.setEnabledAttachmentTypes(screenshot, extraScreenshot, galleryImage, screenRecording);
Extra Attachments
You can also attach up to three custom files to reports, each up to 5MB.
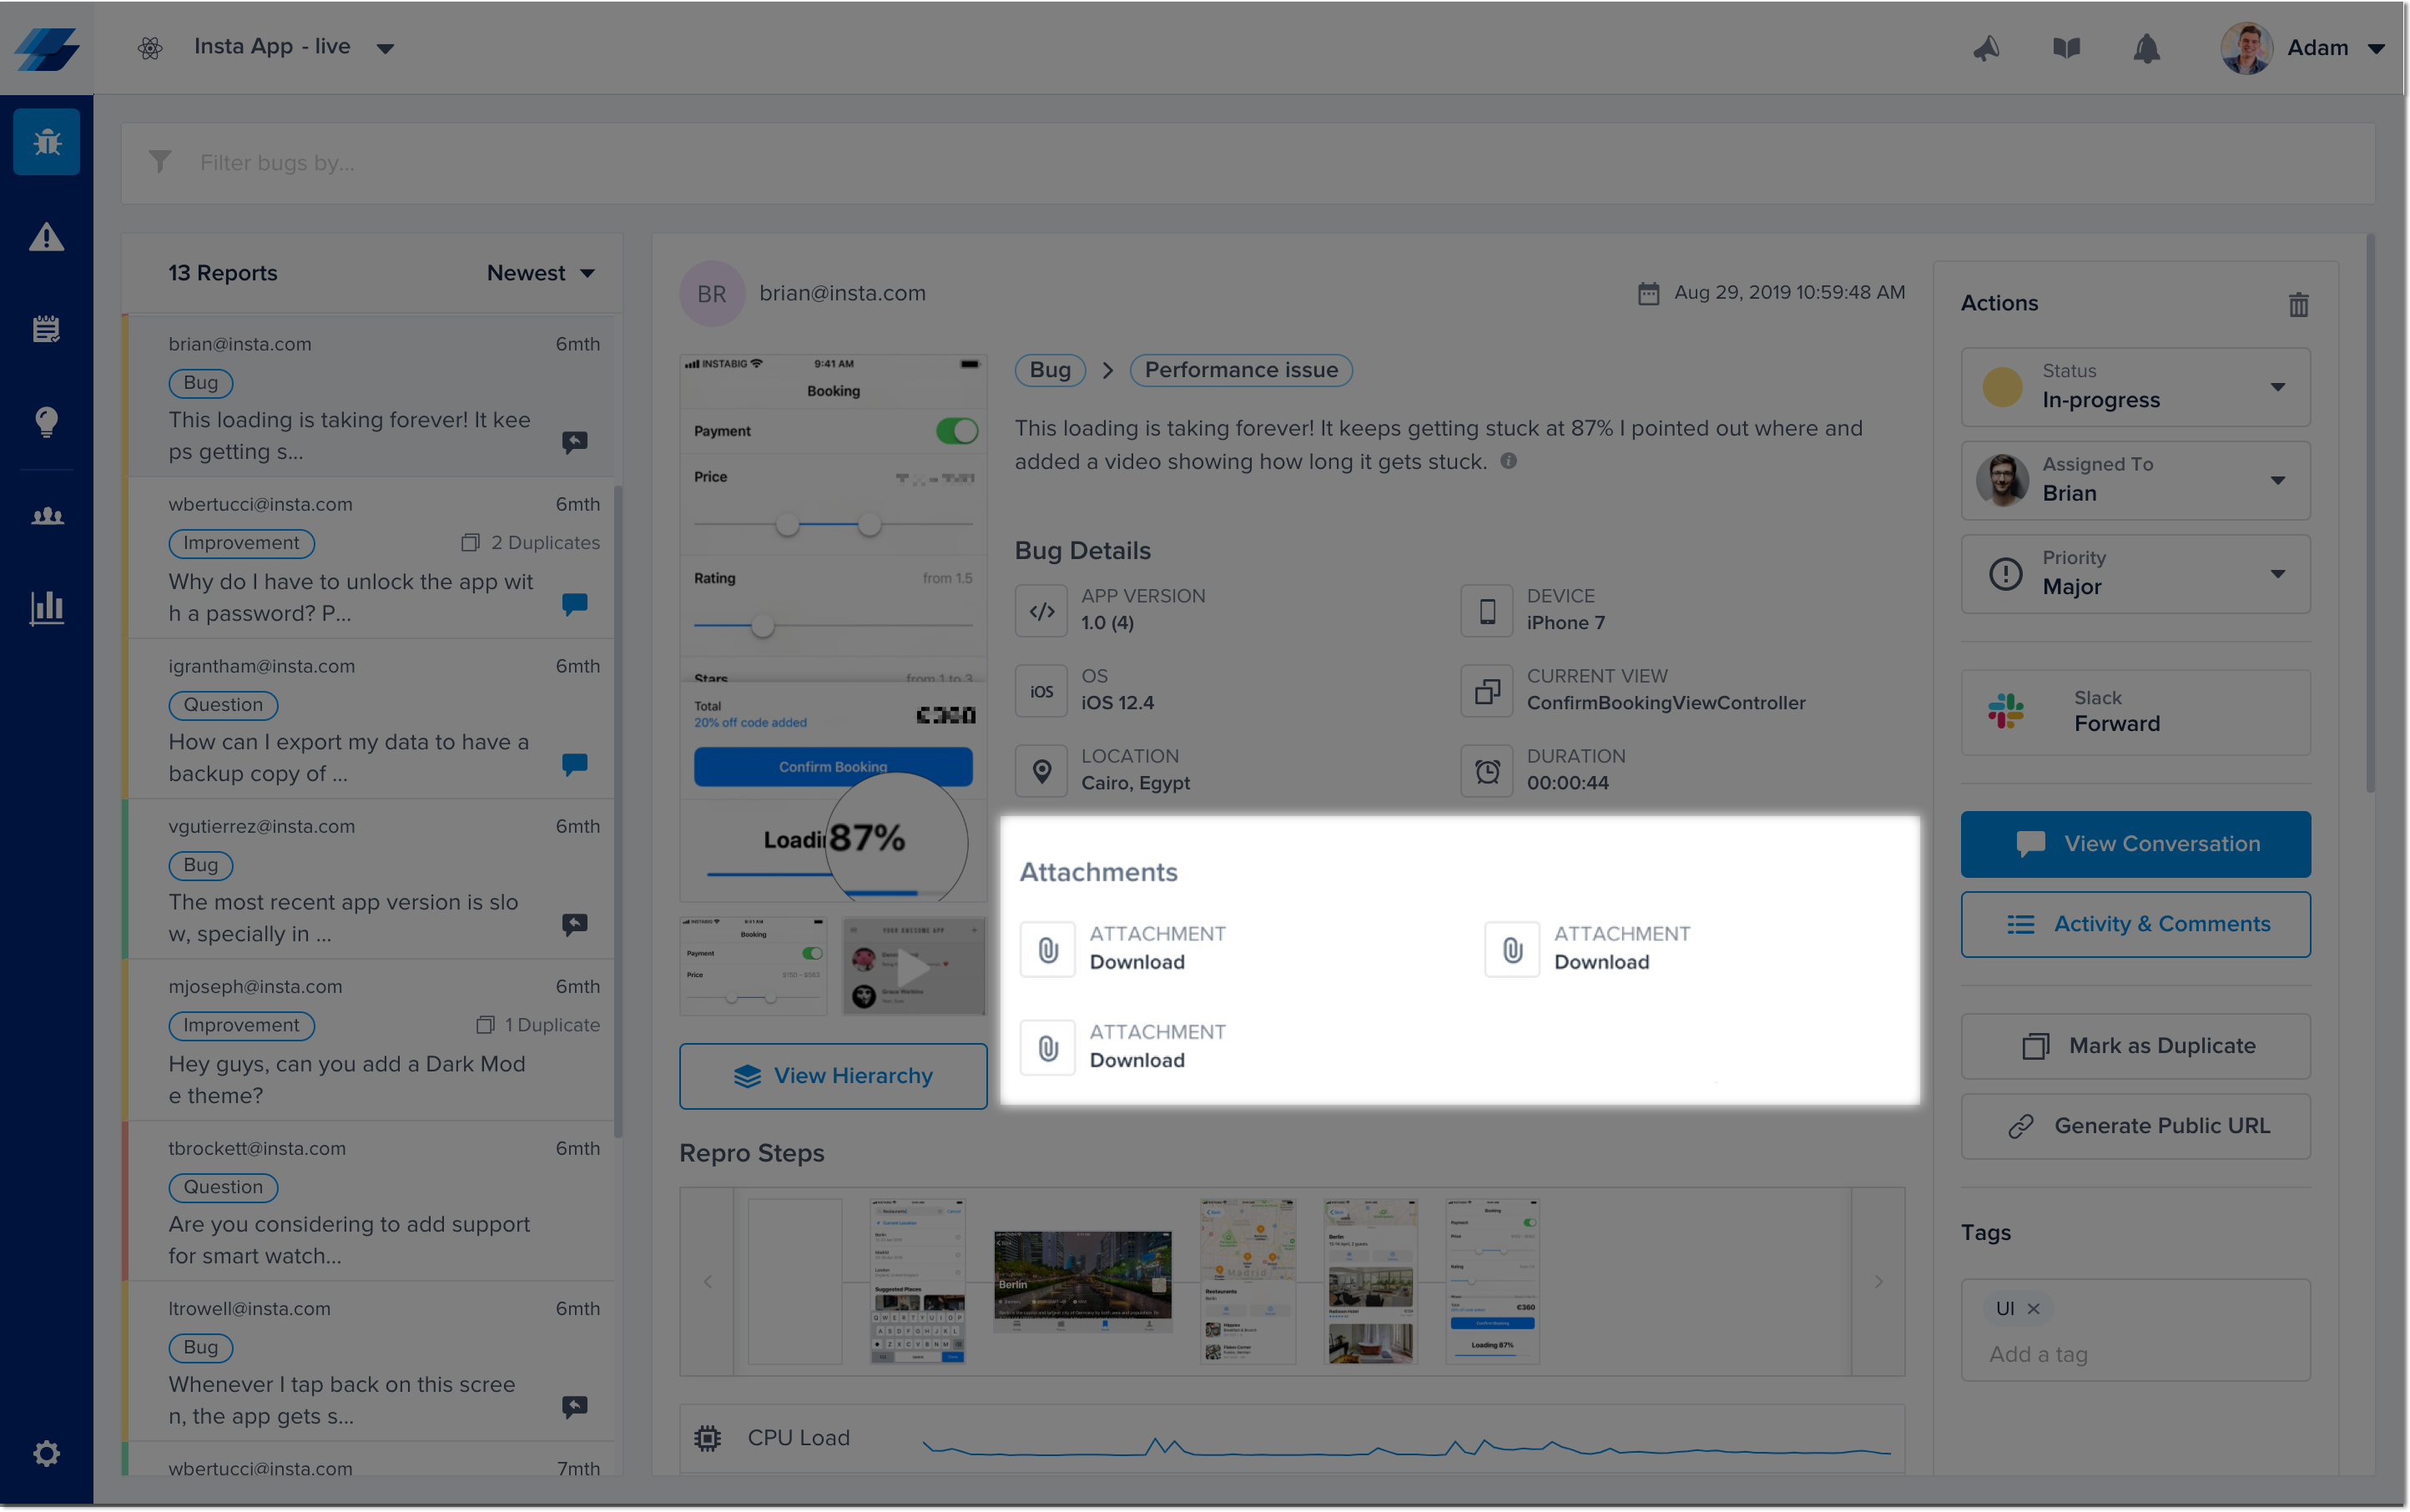
This is where the extra attachments appear in each report from the bugs page of your dashboard.
Use the following method to add a new file attachment.
Instabug.addFileAttachment(filePath)
Instabug.addFileAttachment(filePath, fileName)
A new copy of the file at filePath will be attached with each bug and feedback submitted. Extra files are only copied when reports are sent, so you can safely call this API whenever files are available on disk, and the copies attached to your reports will always contain the latest changes at the time of sending.
If more than three files are attached, the API overrides the first file. The file also has to be available locally at the provided path when the report is being sent.
Private View
You can make any view private so that it's hidden when a screenshot is taken. This completely hides any user data; any private view will appear with a black box covering it in any screenshot automatically. First, you'll need to tag the view you'd like to hide with a ref, like below.
<Text ref={c => this.textView = c} style={styles.welcome}>This is a private view!</Text>
Afterwards, to make the view private, you can use the following API.
Instabug.setPrivateView(this.textView);
Auto Screen Recording [Beta]
Used for Internal Testing
The main purpose behind this feature is to specifically use it for internal testing rather than on production.
You can also automatically capture a screen recording of your app up to the last 30 seconds before a report is sent. By default, this is disabled. Your users will also be prompted once the recording starts at the beginning of the session and will have the ability to remove the video from the attachments when sending the report. The auto screen recording attachment counts towards the limit of 4 attachments in total.
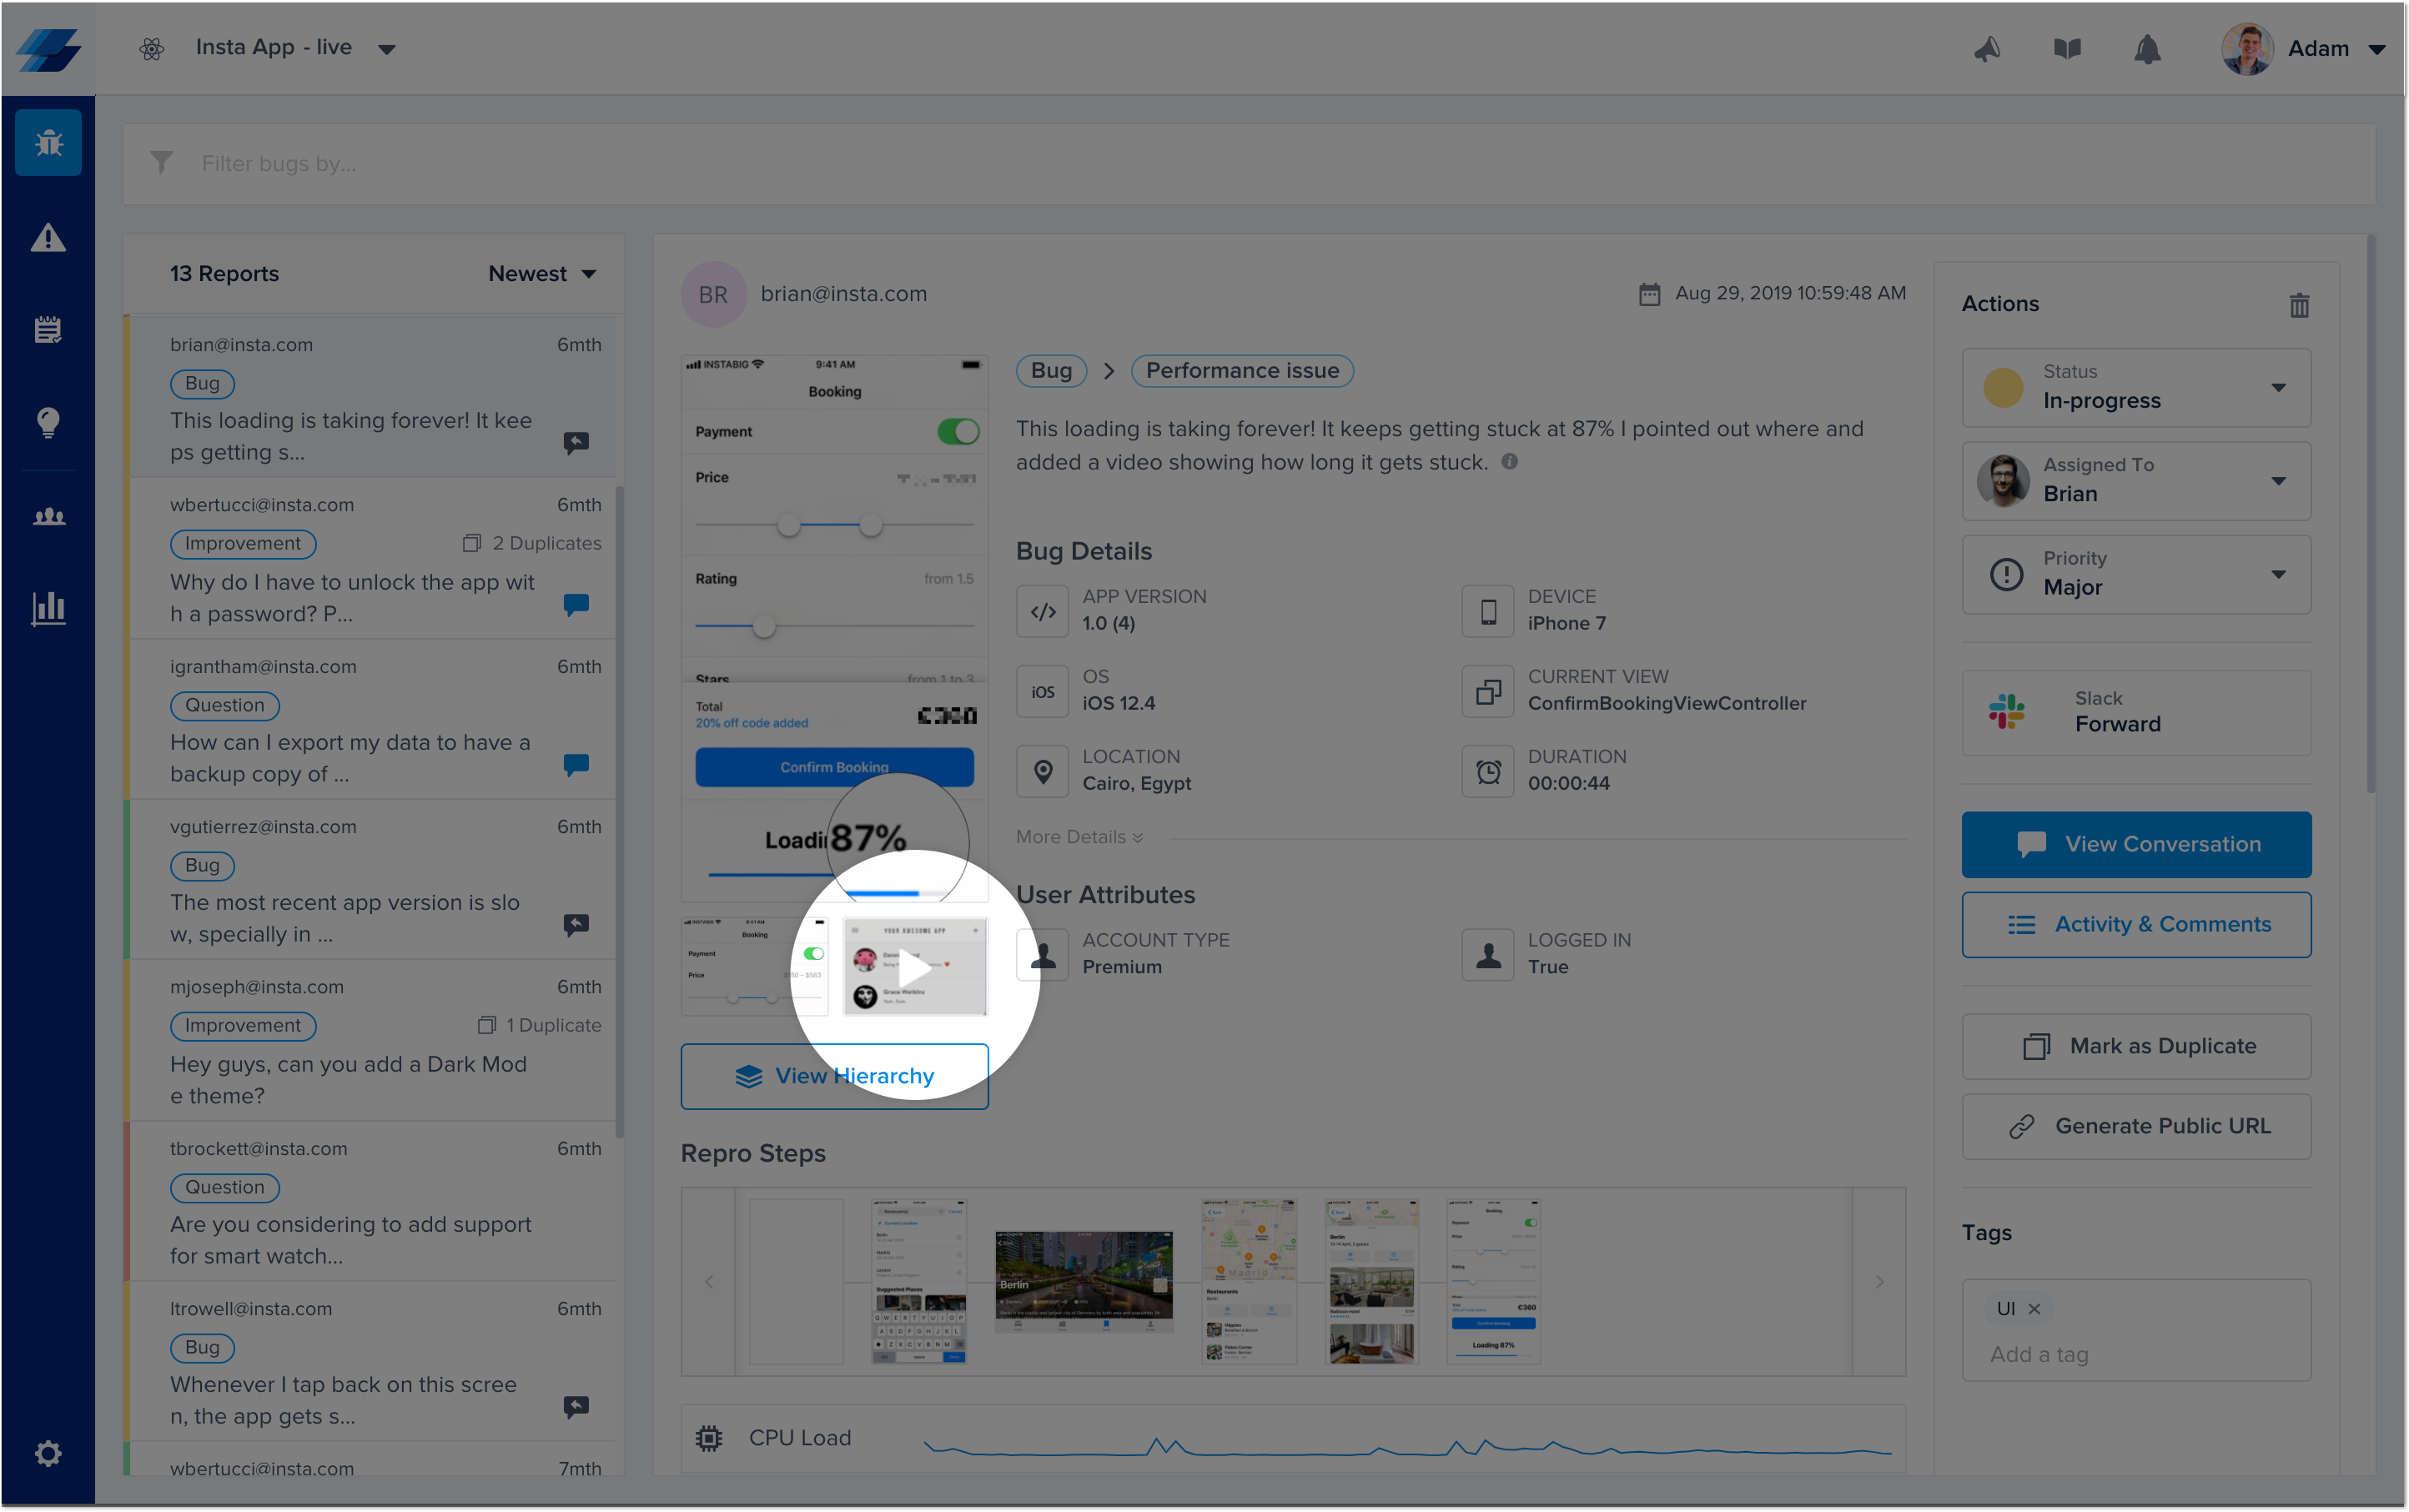
This is where you can find screen recordings in each report from the bugs page of your dashboard.
Setting Recording Duration
A limit can be set for the total duration of the auto screen recording. By default this is set to 30 seconds, which is also the maximum duration. The API for this is shown below.
BugReporting.setAutoScreenRecordingMaxDuration(20);
Disabling/Enabling Auto Screen Recording
If you'd like to enable or disable the auto screen recording feature, you can use the API below.
BugReporting.setAutoScreenRecordingEnabled(true);
Logs
A whole host of logs are sent with every report. These logs include:
- Console Logs: Default logs that are printed to the console when the application is running.
- Instabug Logs: Logs with different verbosity levels that you can add manually.
- Network Logs: A log of each network request.
- User Steps: Every step the user has taken in the form of log entries.
- Repro Steps: User steps prior to the bug report grouped by view.
- User Events: A manual log of actions that a user has taken.
More details regarding the logging can be found here. Different log types are enabled depending on your plan.
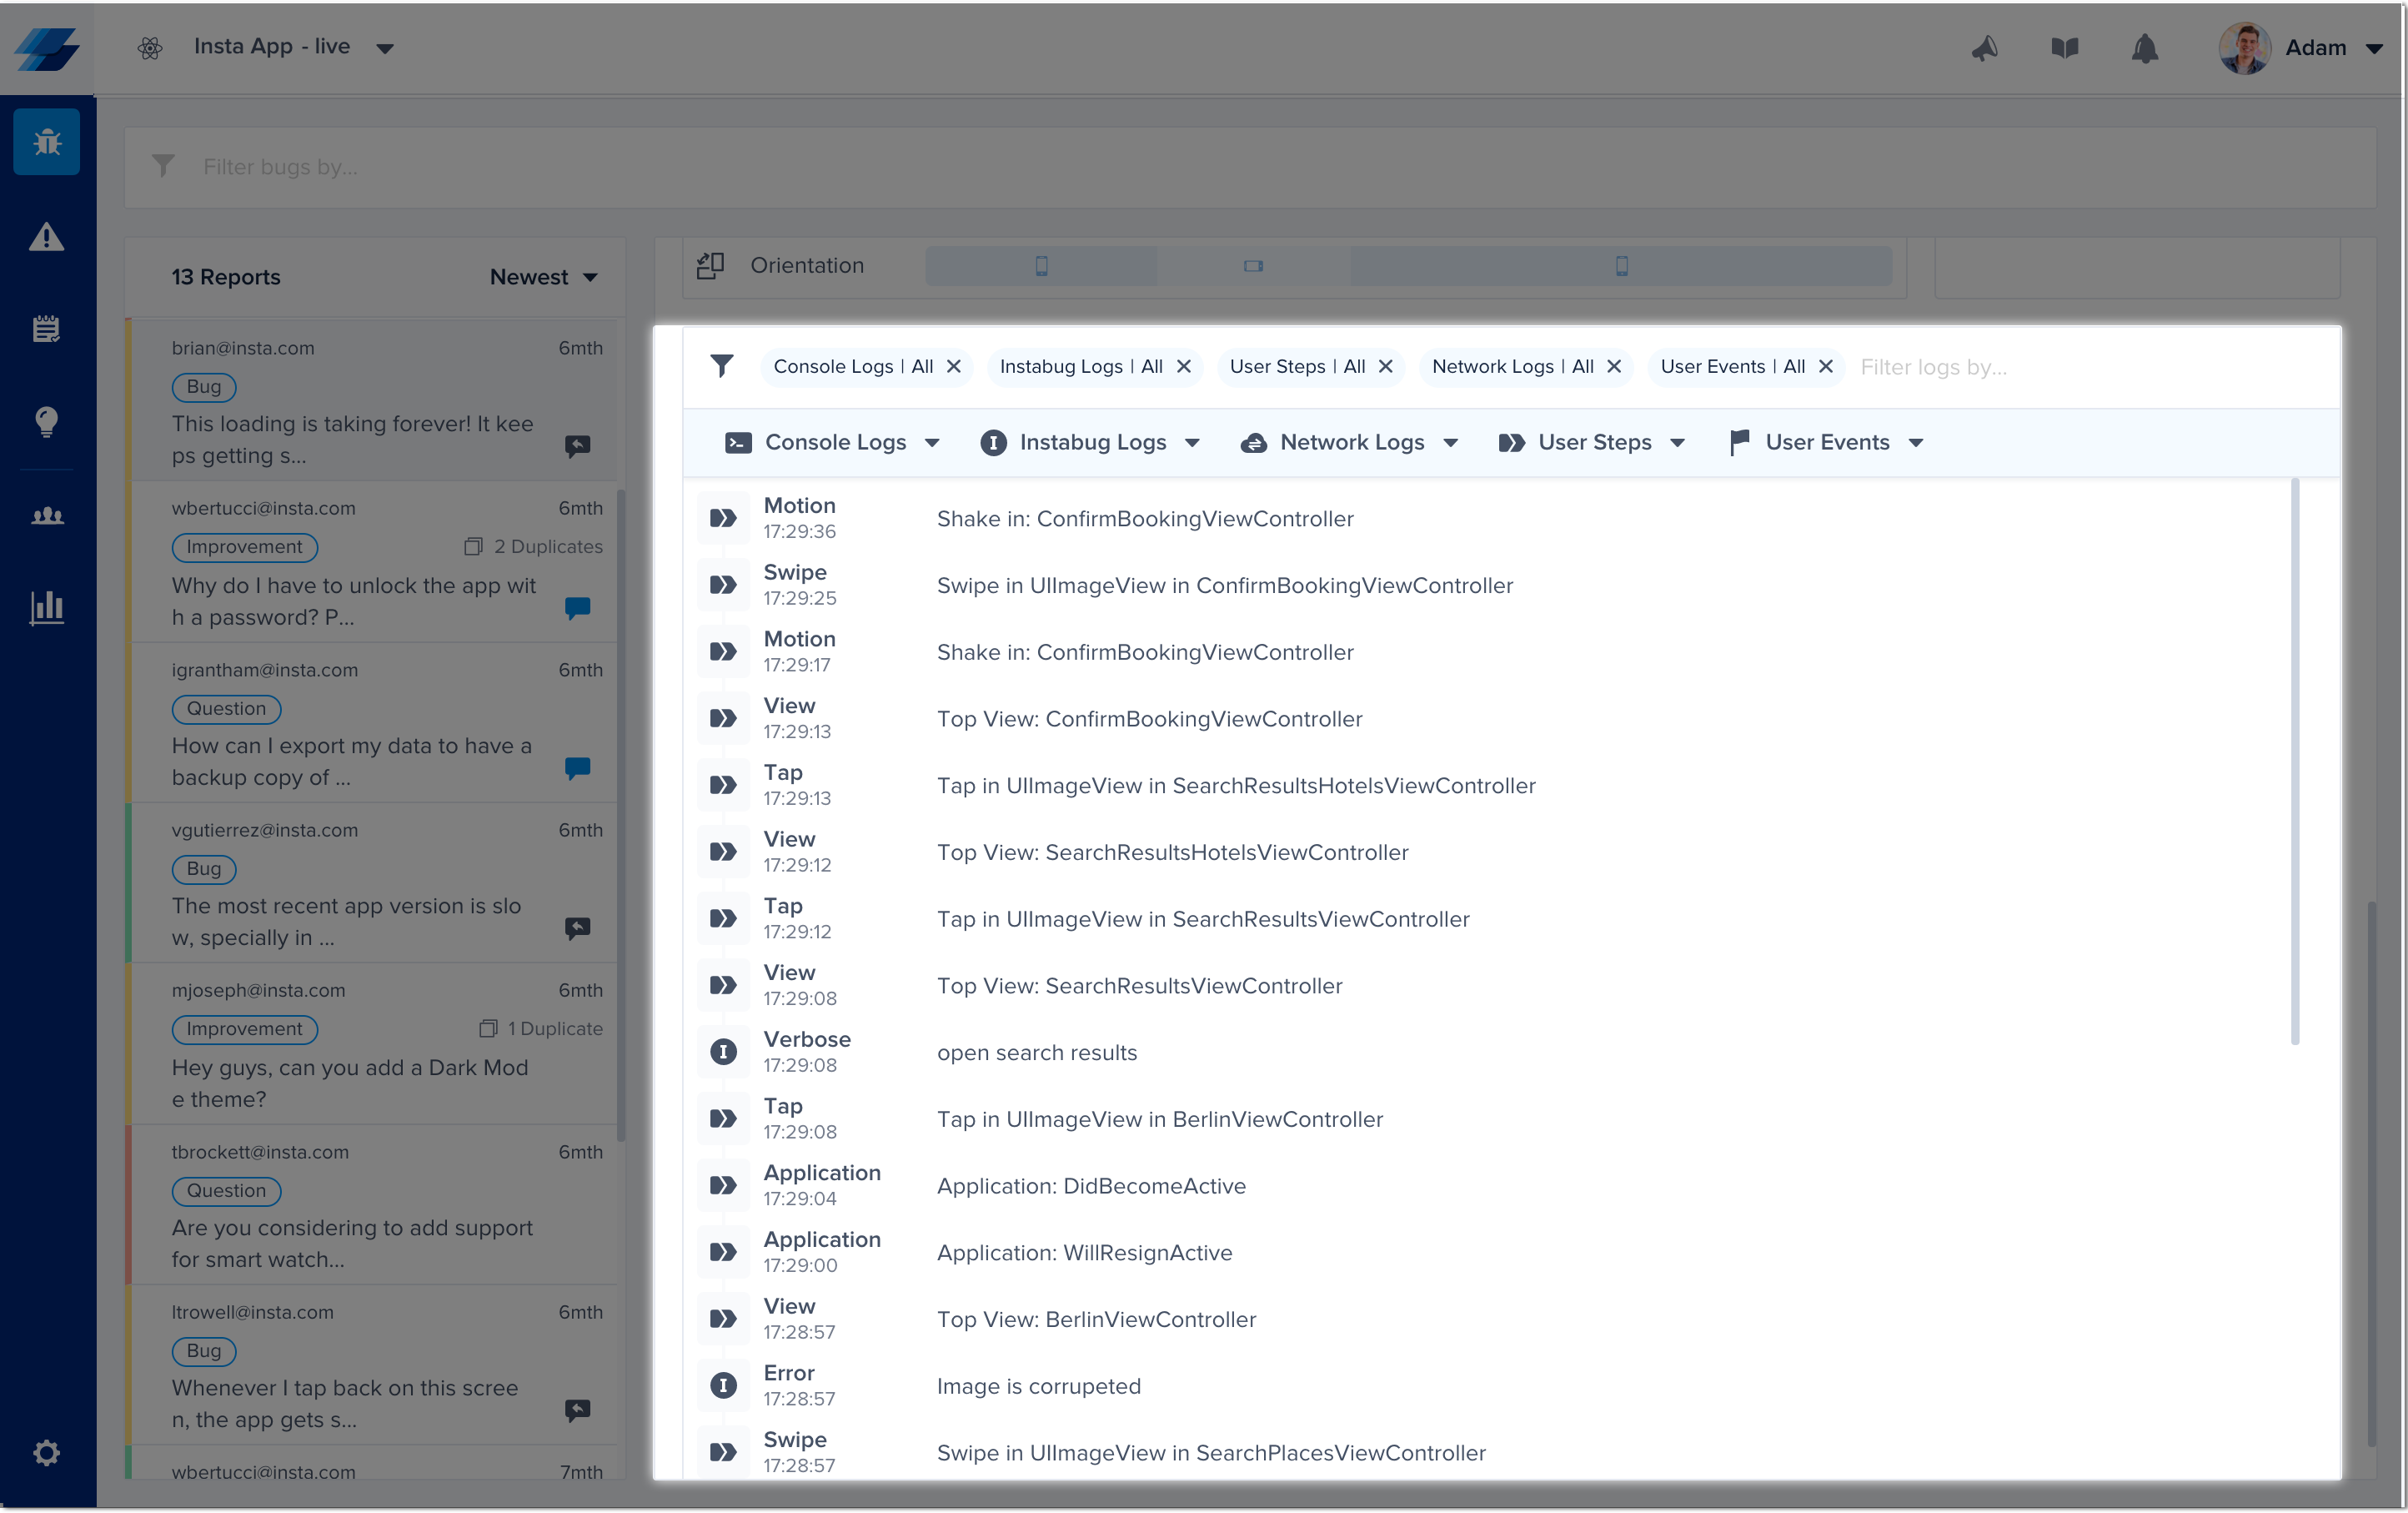
An example of the expanded logs view in your dashboard.
Repro Steps
Repro Steps help you reproduce a bug by displaying your users' actions in each view of your app. With each view, you will find a list of actions that tell you exactly what the user did in that view. More details can be found here.
This is enabled by default depending on your plan.
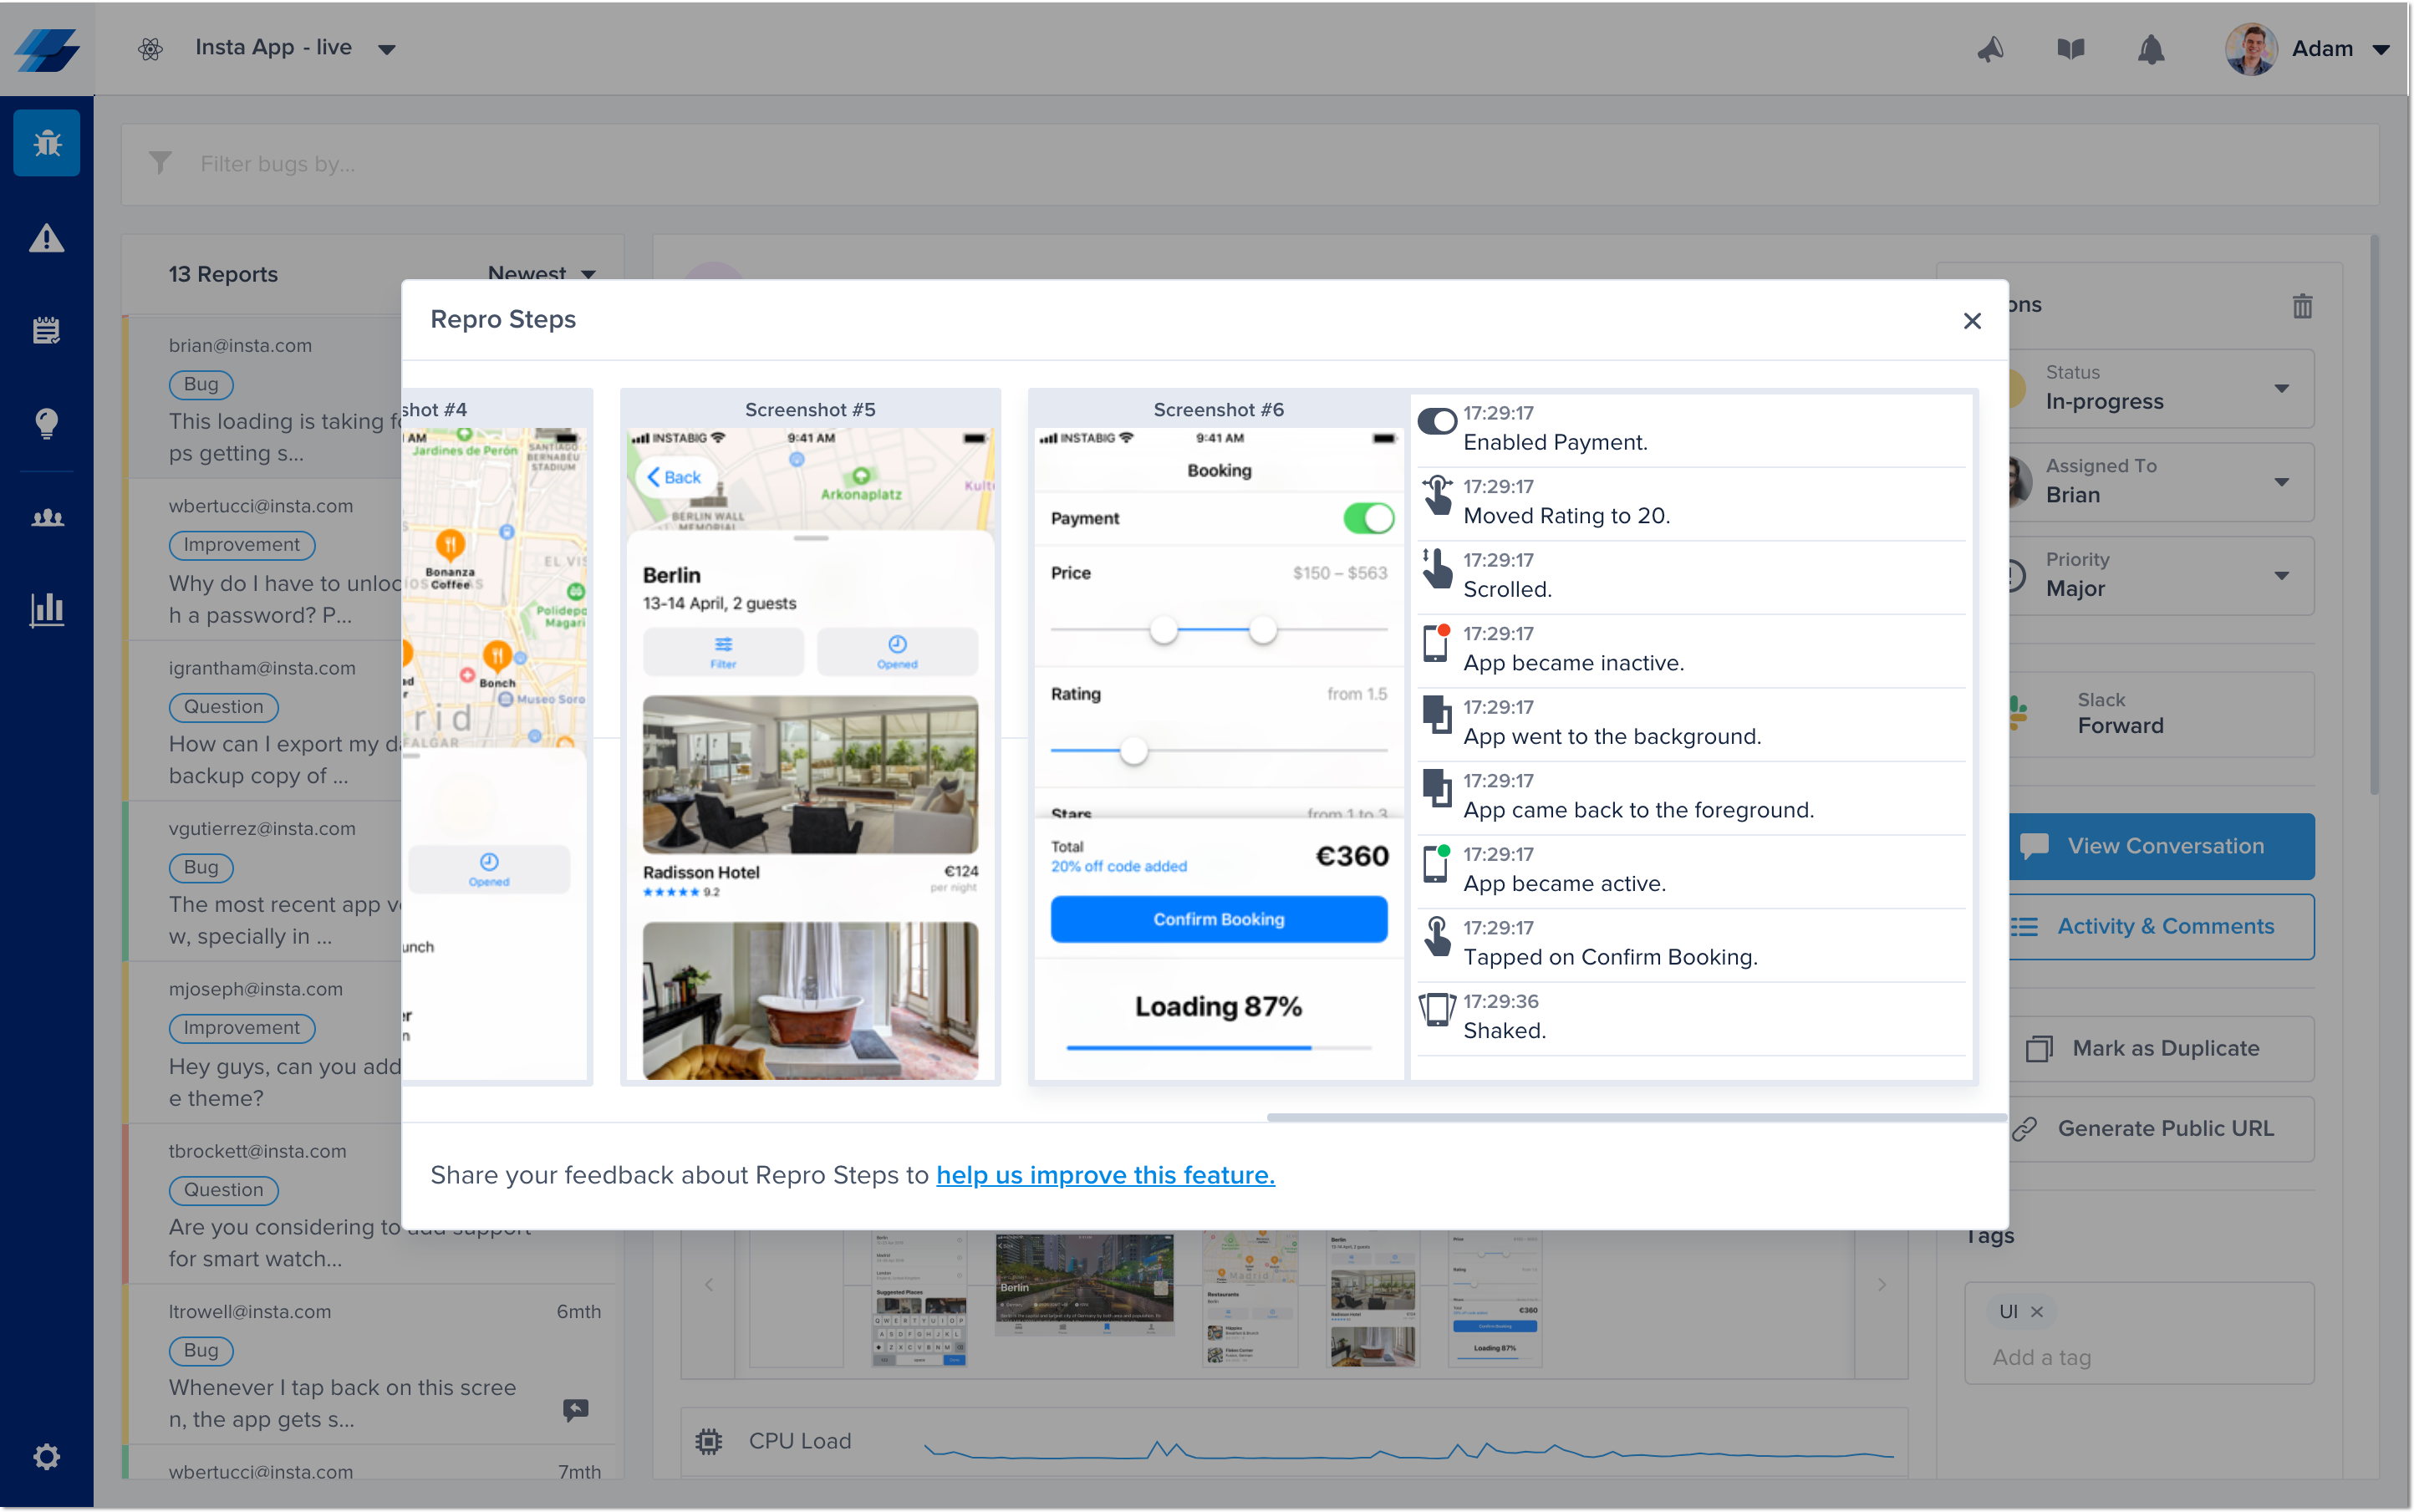
This is what Repro Steps look like in your dashboard.
Session Profiler
With each report, you'll receive a detailed environment profile covering the last 60 seconds before a bug or feedback was submitted. This Session Profiler includes device data like memory load and battery state. This is enabled by default depending on your plan.
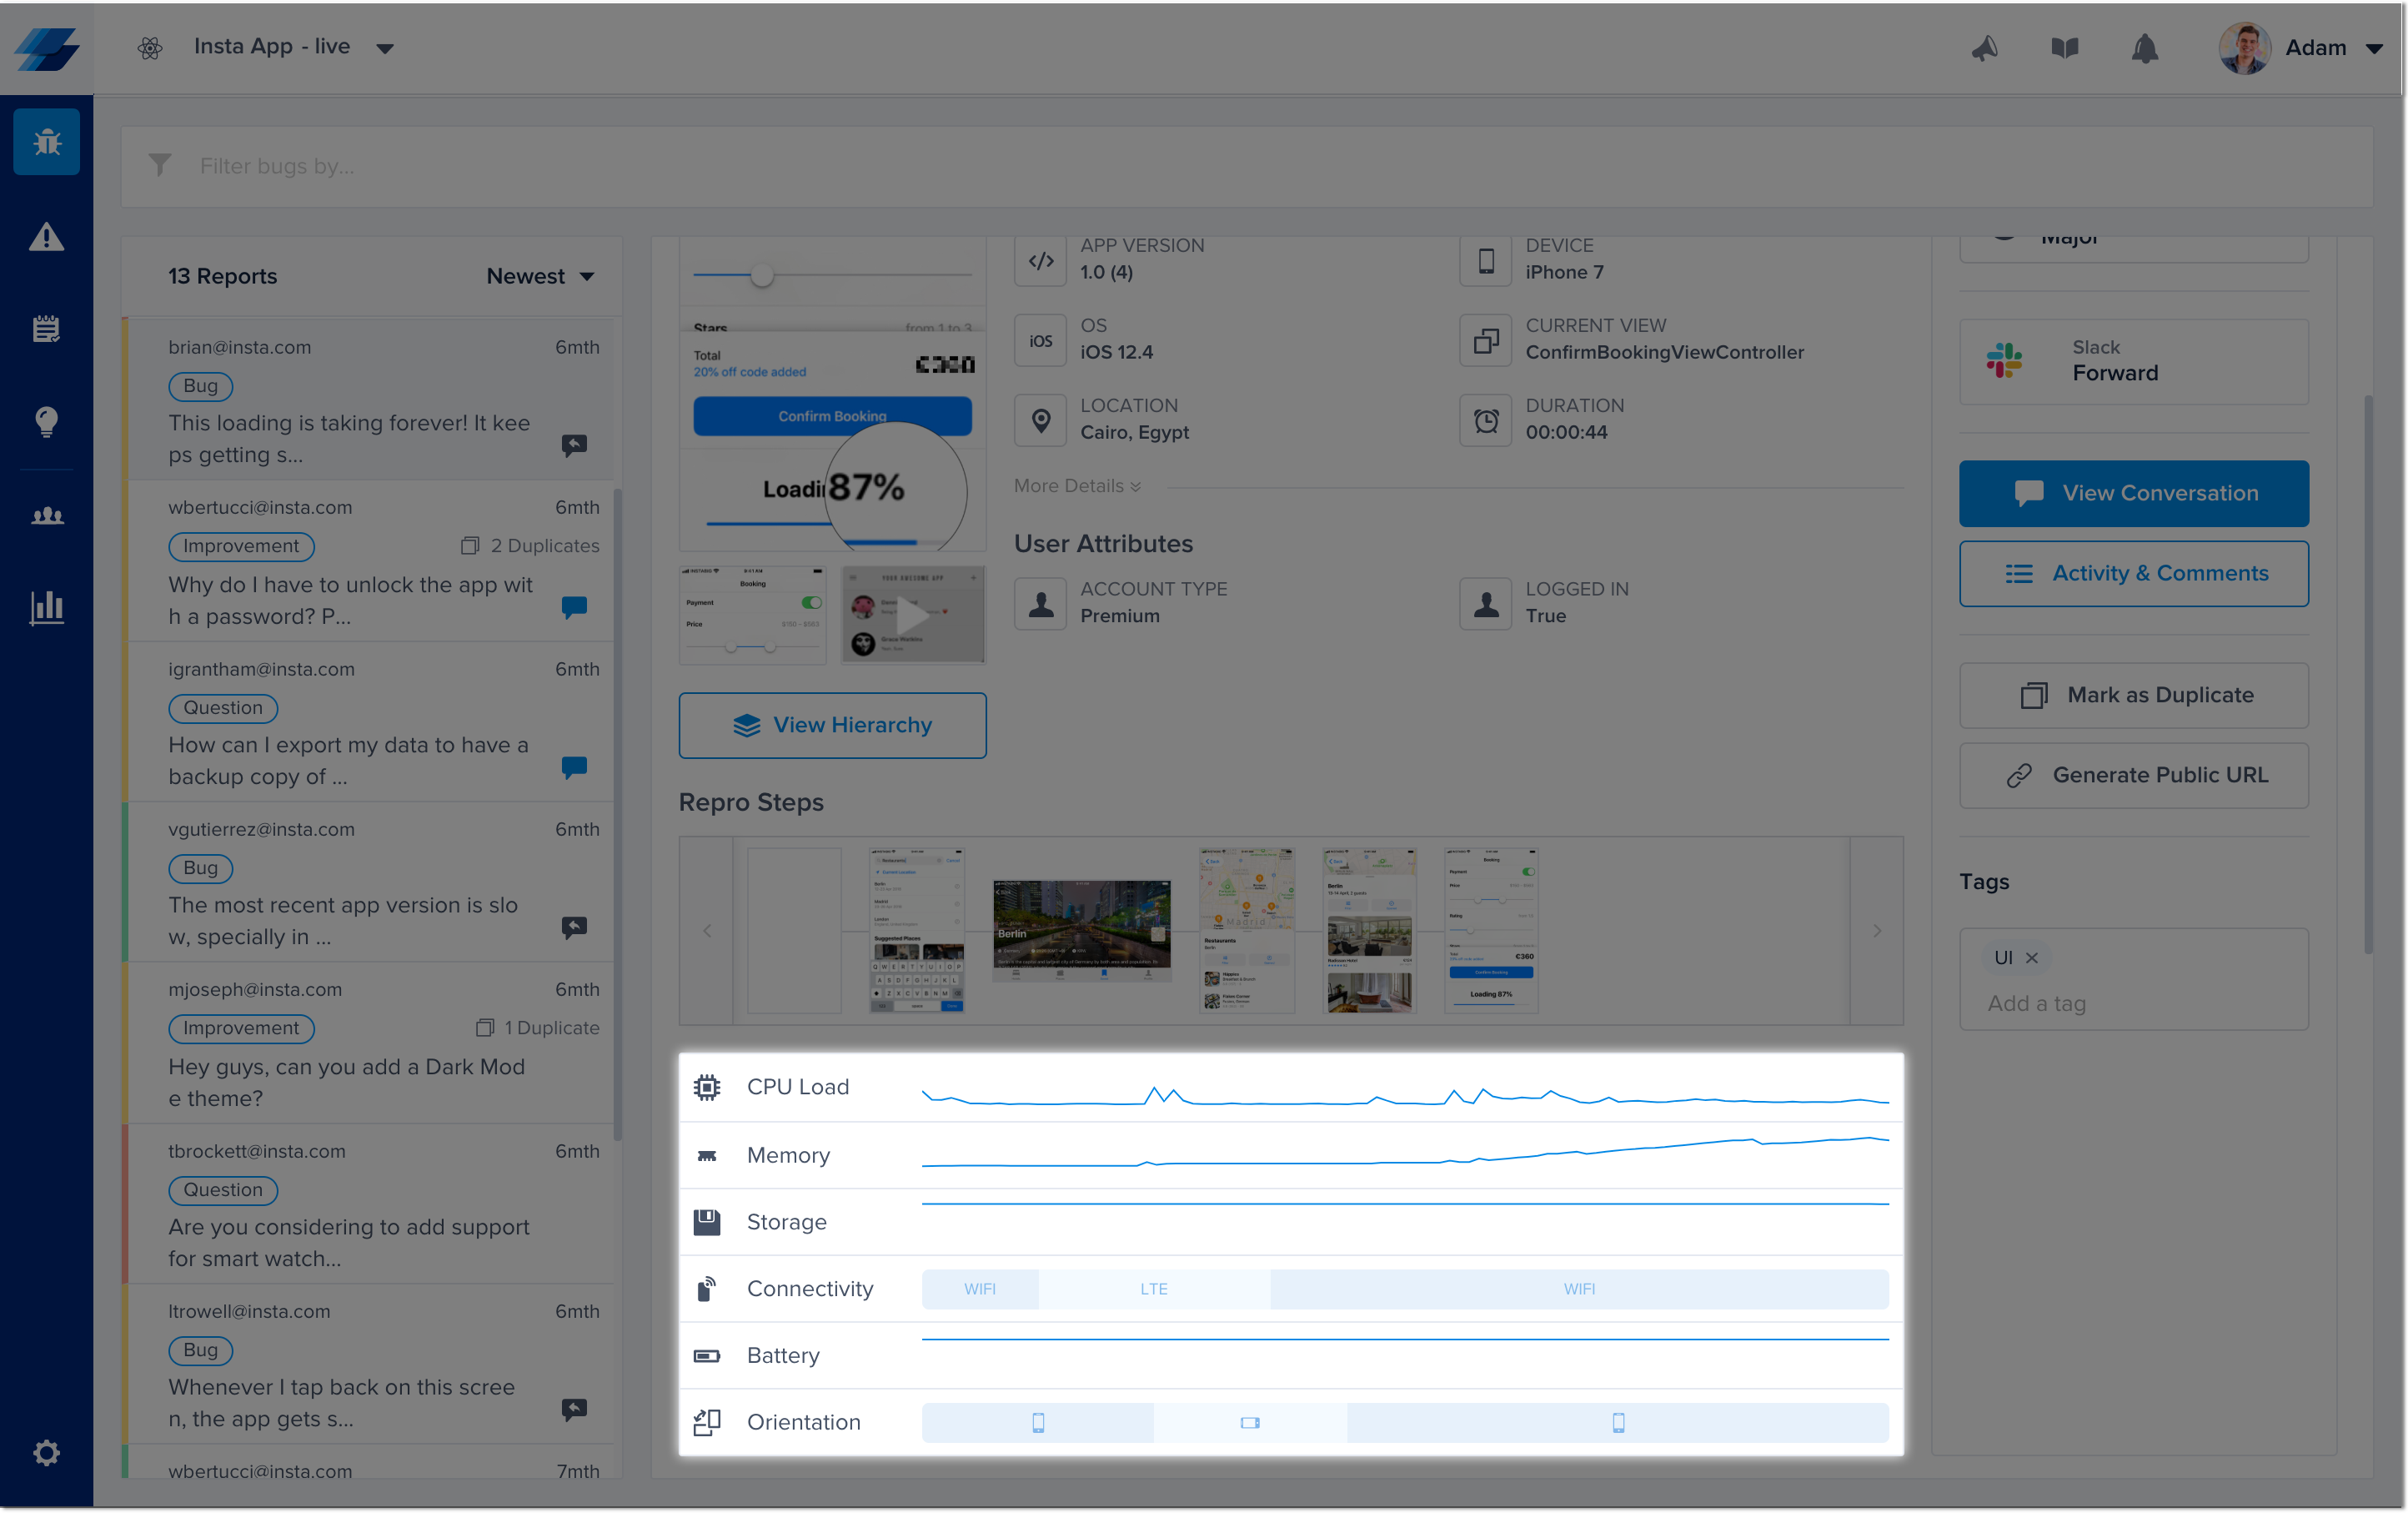
The Session Profiler is located below the Bug Details in each report from the bugs page of your dashboard.
View Hierarchy
With the View Hierarchy feature, you can visually inspect each layer in your app and see all the properties and constraints of each subview so you can spot errors at a glance.
This feature is critical for investigating UI bugs as it makes the process of finding the problem and fixing it faster and simpler. For example, if you receive a report that a certain UI view is missing, you can use View Hierarchy to easily discover if the missing view is hidden behind a higher layer, out of the parent view's bounds, or missing from the window.
Any editable text or text fields will automatically be replaced with asterisks.
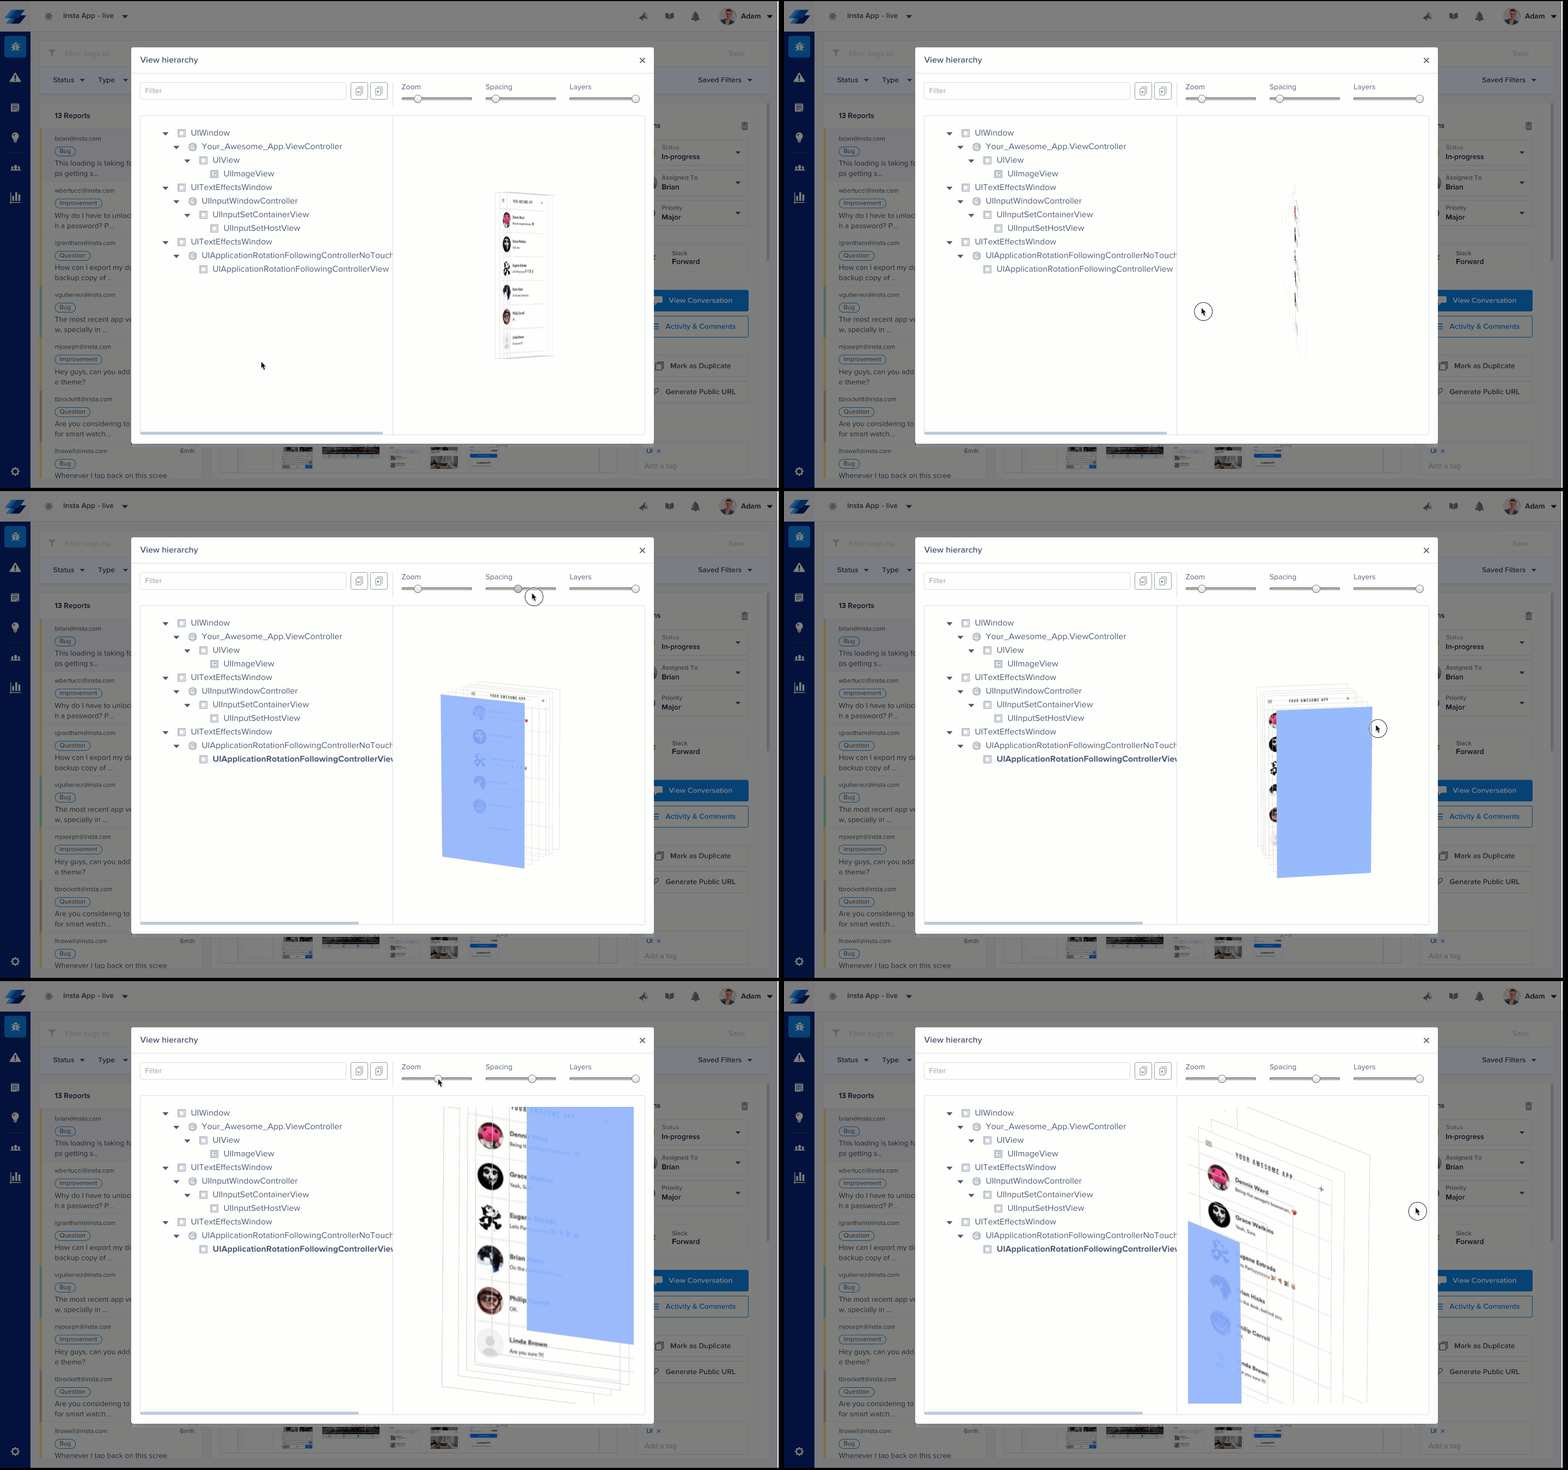
An example of View Hierarchy in action from a bug report in the Instabug dashboard.
View Hierarchy is disabled by default. If you need to enable View Hierarchy, you can do so as shown in the following example.
BugReporting.setViewHierarchyEnabled(true);
Enabled from SDK version 8.3.0
The View Hierarchy will only be visible for reports coming from an application running a minimum SDK version of 8.3.0.
Tags
You can add tags to the reports you receive to help you filter and triage bugs in your dashboard. More details regarding tags can be found here.
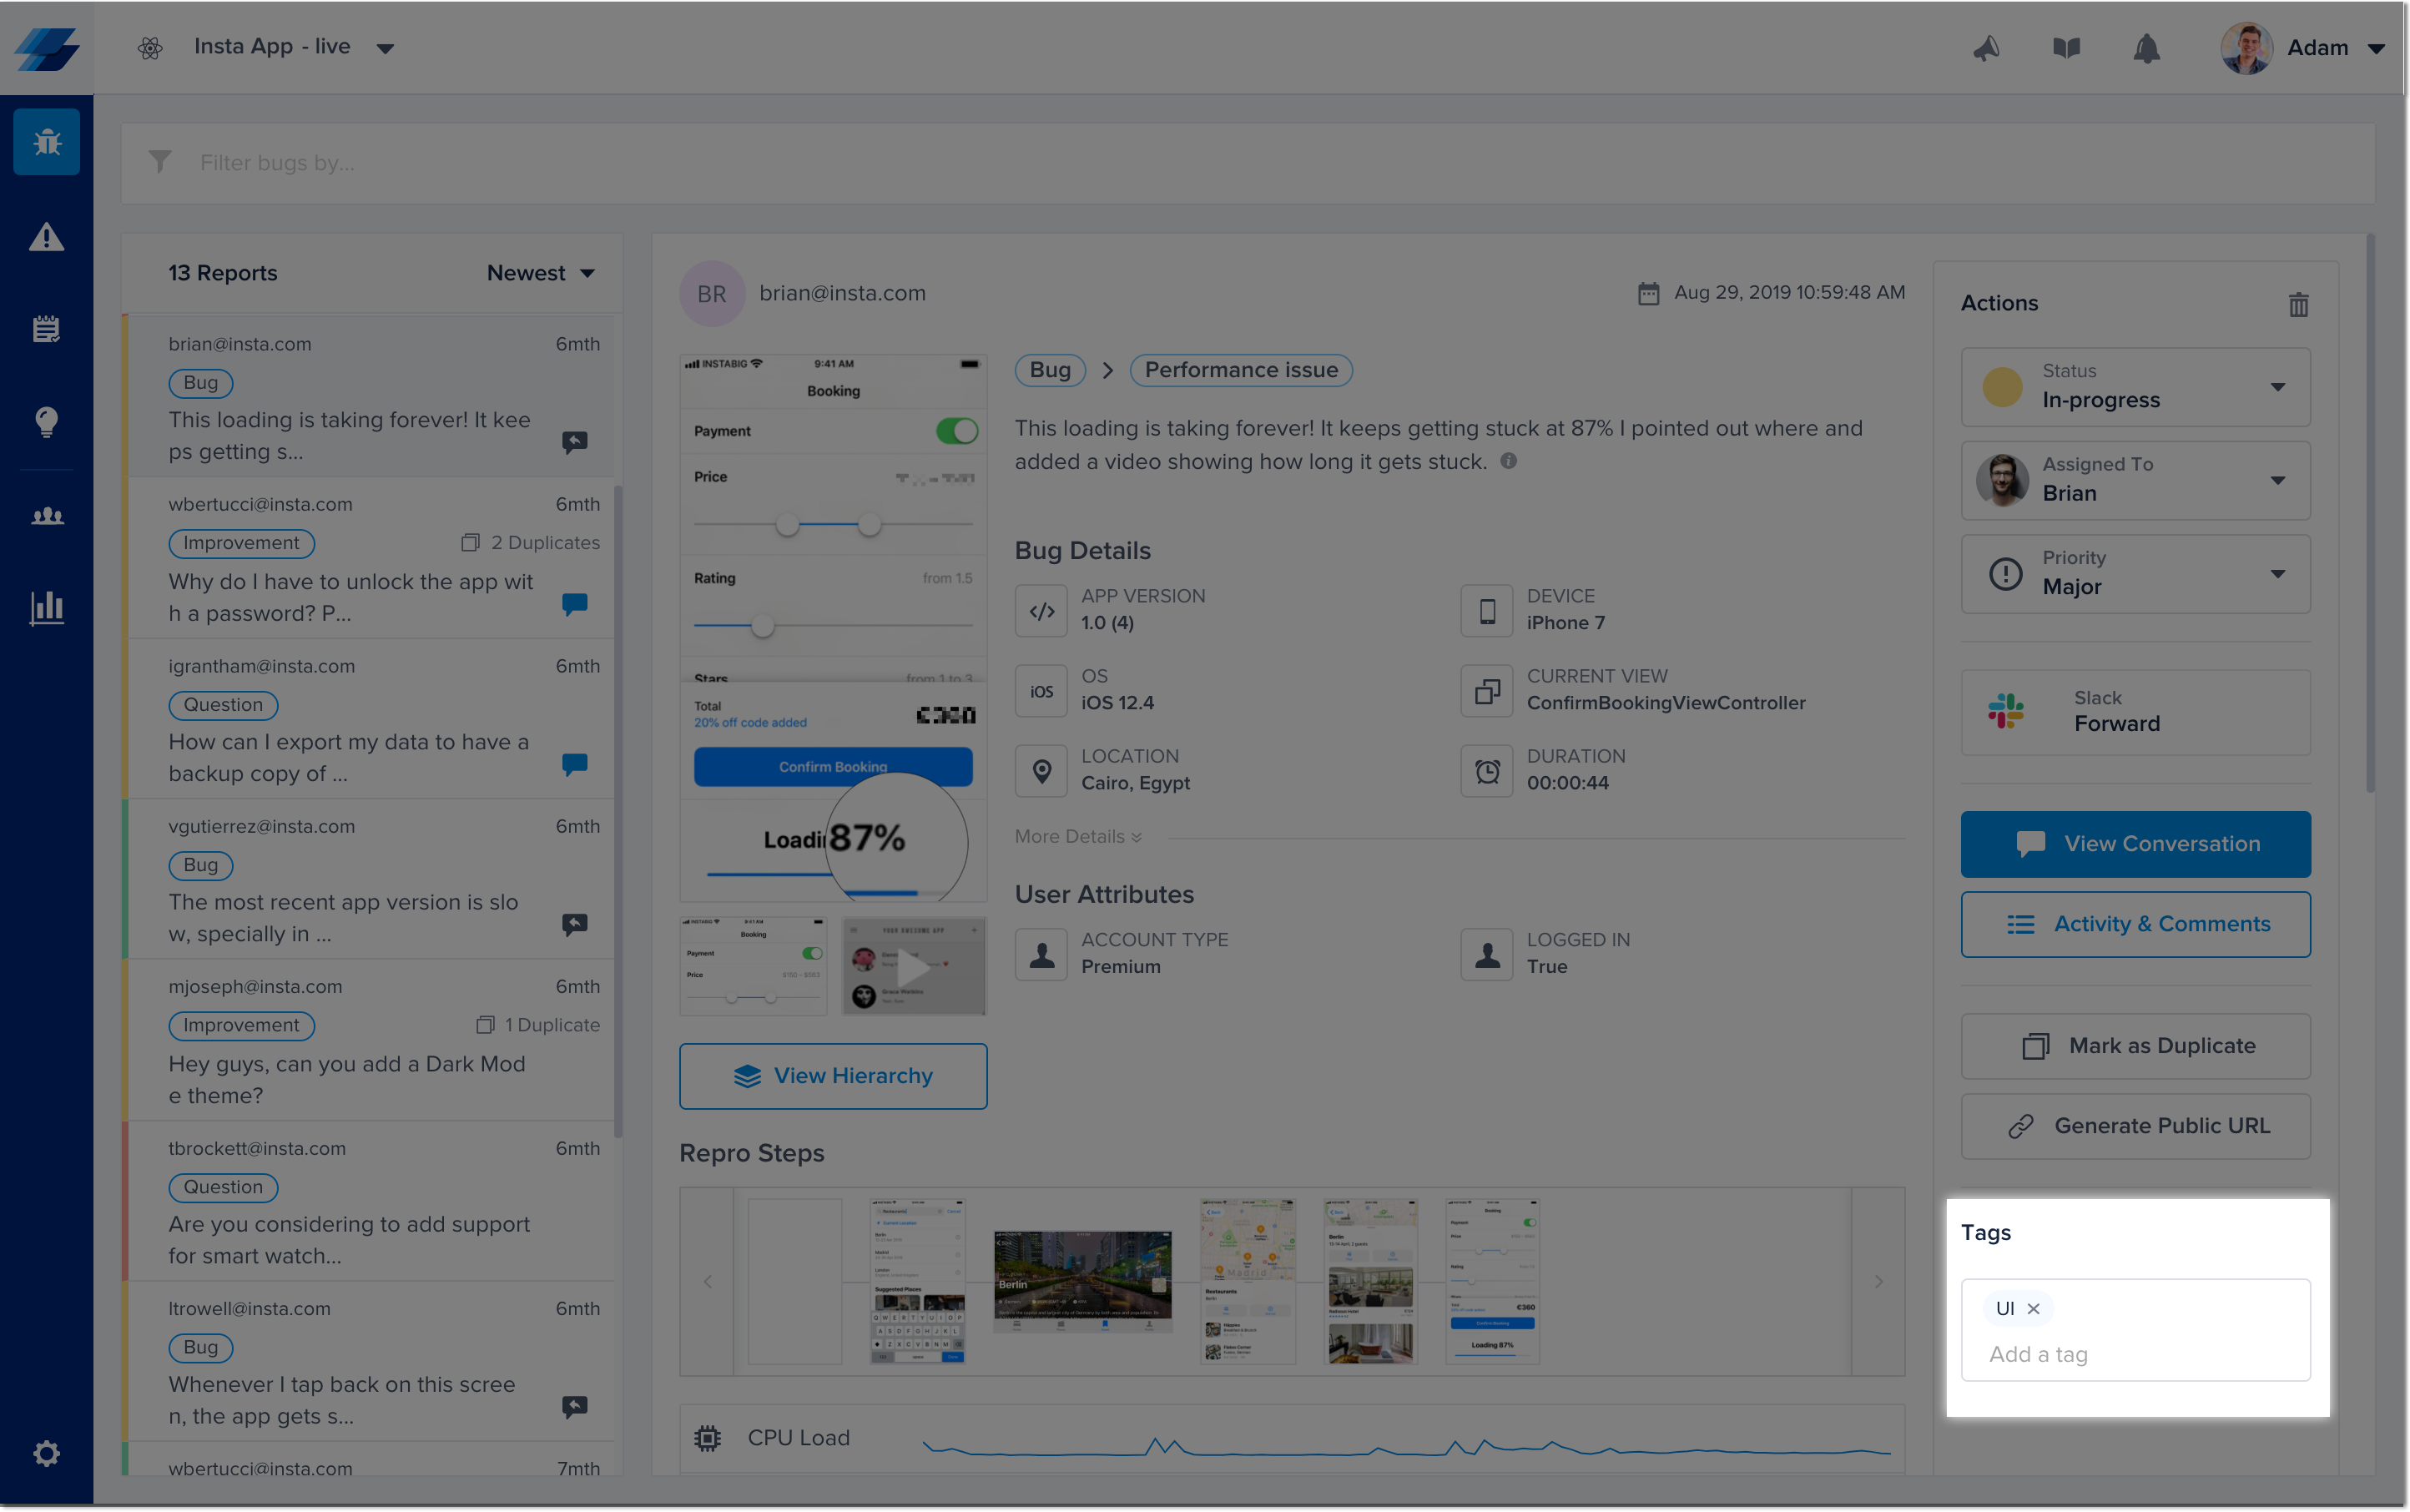
This is where report tags are located in each report from the bugs page of your dashboard.
Updated over 5 years ago
Spot patterns, identify trends, and explore data in your bug reports with our useful analytics. Check it out below!
