Repro Steps
Learn more about the steps your user has taken until the bug or crash was reported.
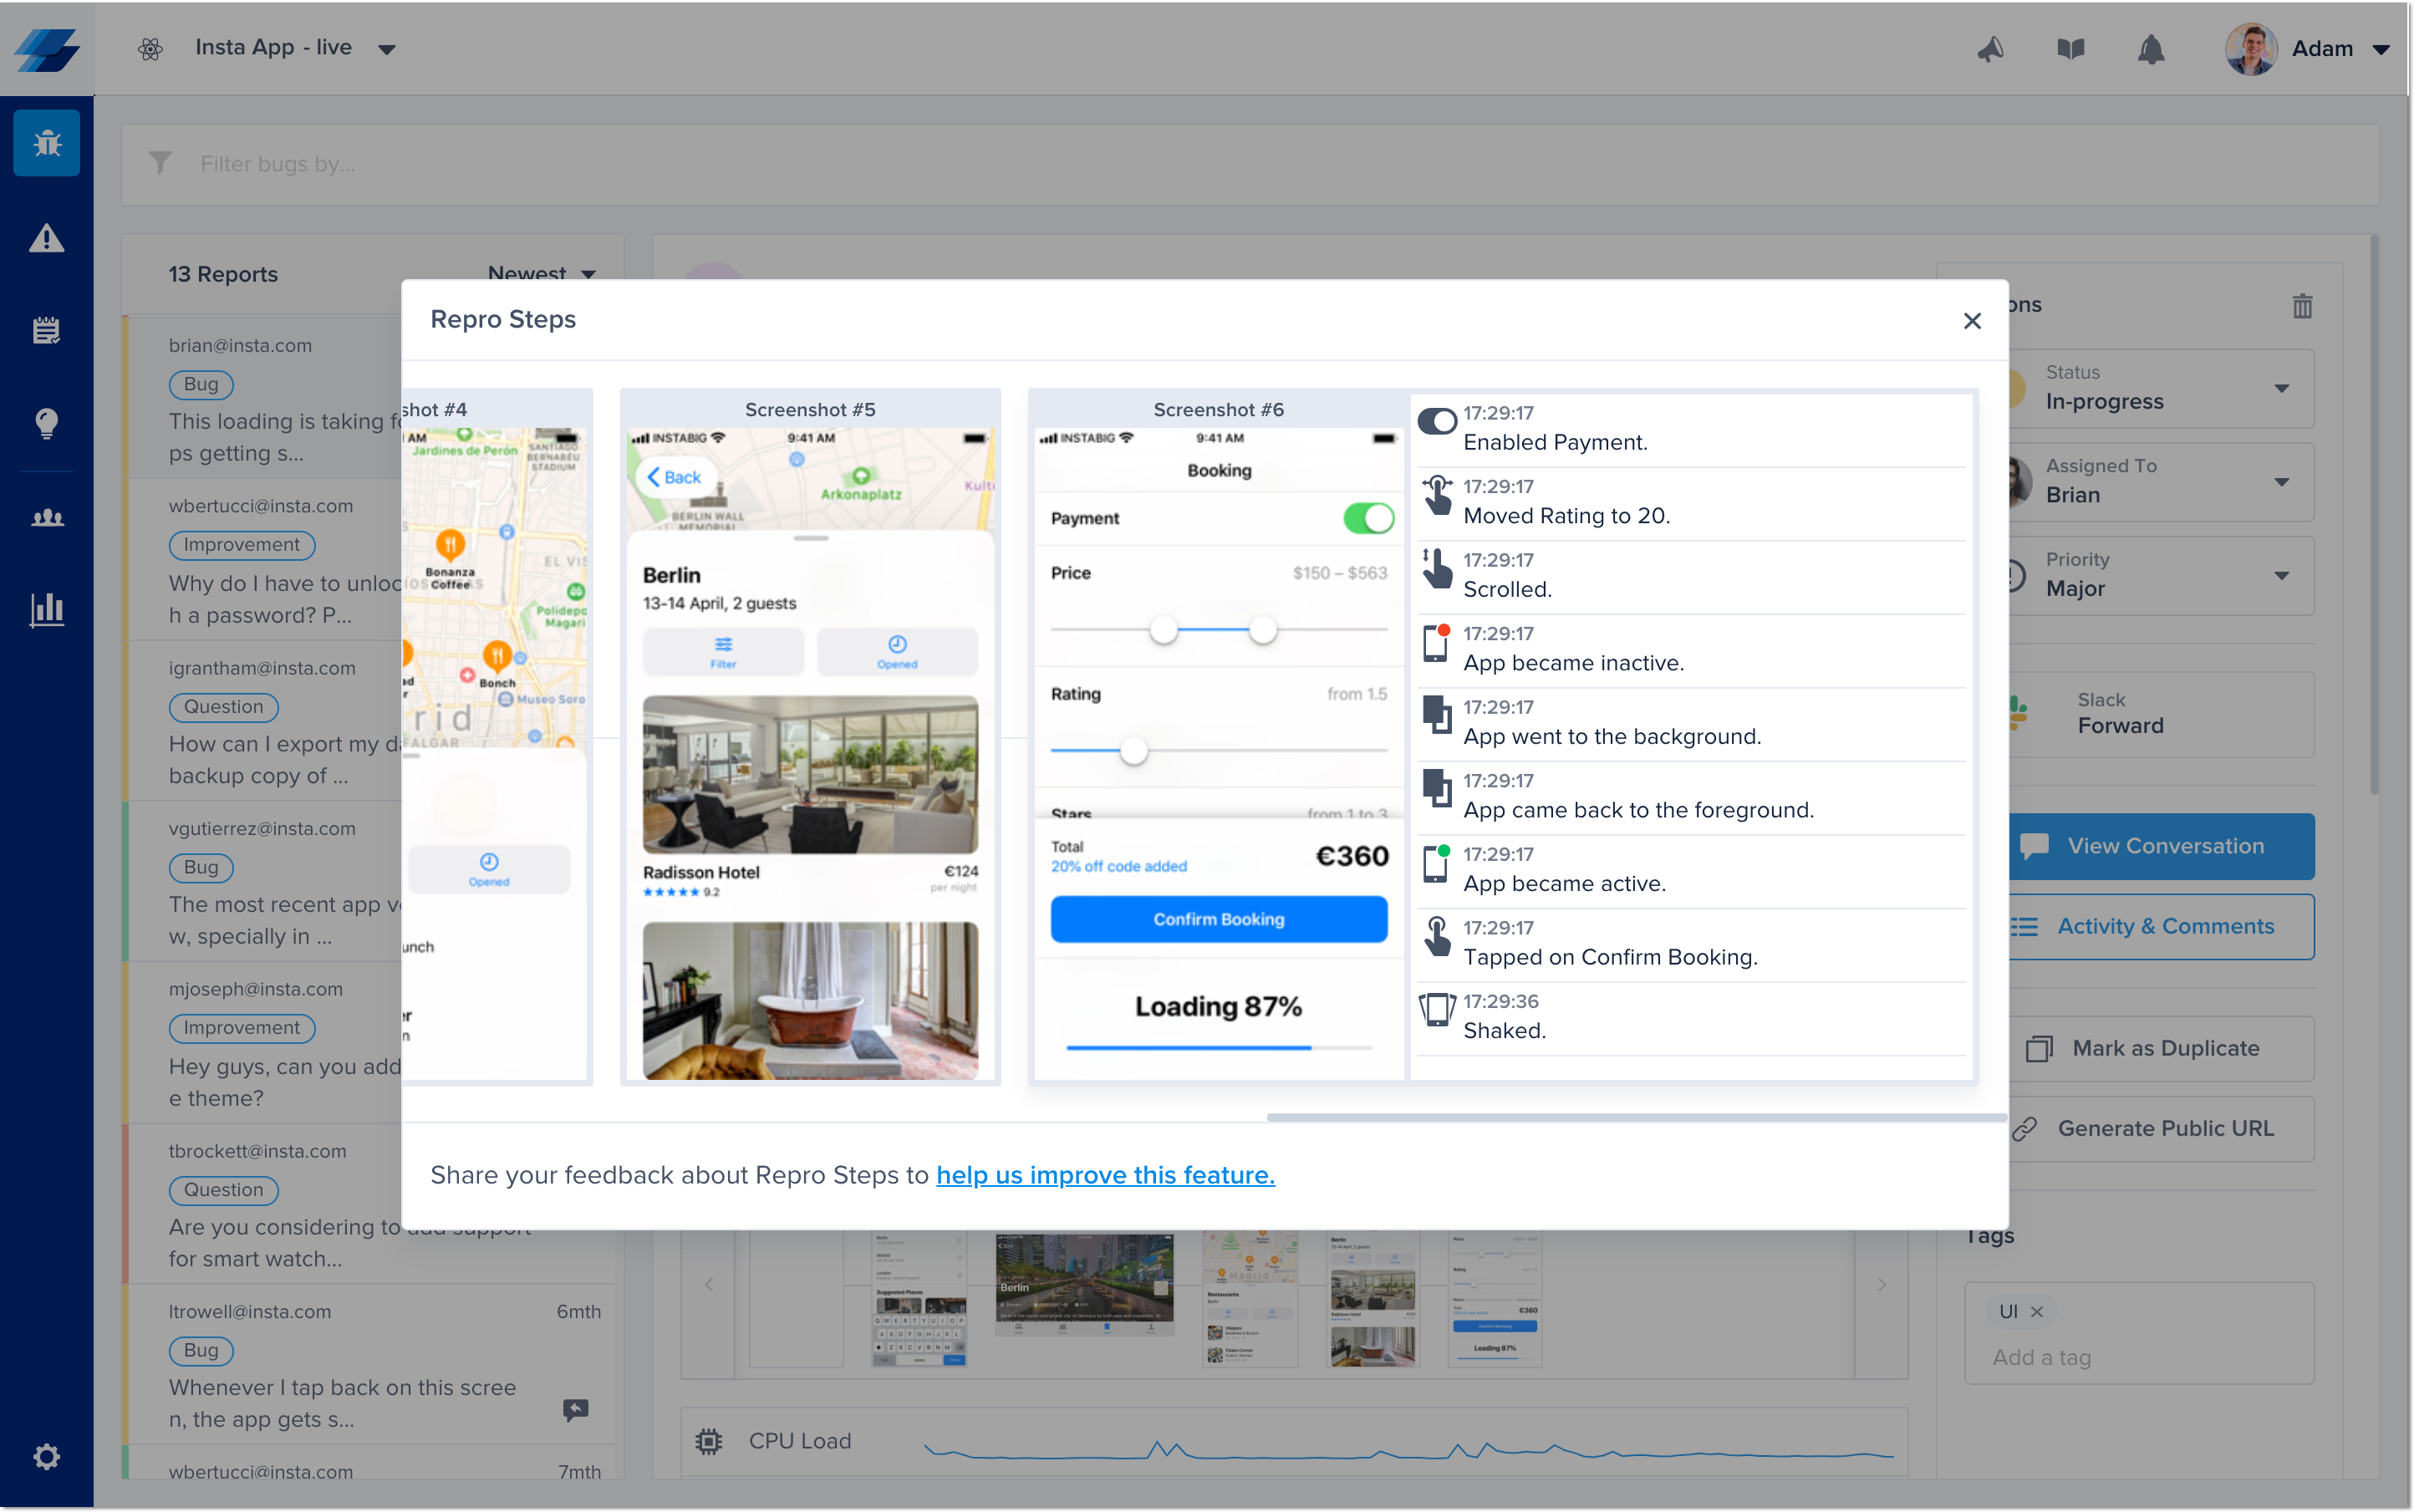
Repro Steps show you all of the interactions a user makes with your app up until a bug or crash is reported, grouped by app view. For each view that a user visits, all of the steps that they commit within those views are captured and displayed as a log, grouped by view.

An example of Repro Steps in the Instabug dashboard.
Setting Up Repro Steps
Repro steps are enabled by default and support the 2 most popular React Native navigation libraries.
React-Navigation
You'll need to set the onNavigationStateChange to Instabug.onNavigationStateChange in your app wrapper as follows:
export default () => (
  <App
    onNavigationStateChange={ Instabug.onNavigationStateChange } />
);
React-Native-Navigation
You'll need to register the Instabug.componentDidAppearListener listener using the following code:
Navigation.events().registerComponentDidAppearListener(Instabug.componentDidAppearListener);
Logged Data
Captured Events
UI Interactions
For the following gestures, only the gesture is logged and displayed:
- Swipe
- Scroll
- Pinch
- Tap
- Force touch
- Double tap
- Enabling/disabling a switch
- Changing the value of a slider
- Editing a text field.
Lifecycle Events
Whenever one of the following lifecycle events occurs, it will be captured and shown on the timeline:
- Application is moved to the background
- Application is moved to the foreground
- Application becomes active
- Application becomes inactive
- Memory warning
Extra Details
Depending on the event, you'll find further details displayed as part of the log statement.
- Tap, double tap, and force touch: the SDK always tries to first capture the text rendered inside the UI that the user is interacting with, then we fall back to capturing the icon only with the buttons and navigation items, then, we fall back to the accessibility labels.
- Switch: both the accessibility label as well as whether the user enabled or disabled the switch are logged.
- Slider: both the accessibility label as well as the value that the user moves the slider to it are captured.
- Text fields: first, the SDK tried to capture the placeholder, then we fall back to the accessibility label.
Examples
Here are some examples of how steps look like:
Tapped on the button "Send"Double tapped on UI that contains "Instructions"Started editing “Password“Enabled the switch “Push Notifications“Moved the slider “Text Size“ to 10%App went to the backgroundApp became activeMemory warning
User Privacy
Disclaimer
A disclaimer will be shown at the bottom of the report. It helps your users view all the screenshots taken for the Repro Steps before sending a report and can delete them as well.
![[iOS] Repro Steps Disclaimer.png 2391](https://files.readme.io/34fad42-iOS_Repro_Steps_Disclaimer.png)
Private Views
On your side, you can easily mark any view that might contain sensitive info like payment details as private. Any private view will automatically appear with a black overlay covering it in any screenshot. To make a view private, you use the following property.
<Text ref={c => this.textView = c} style={styles.welcome}>This is a private view!</Text>
Afterwards, to make the view private, you can use the following API.
Instabug.setPrivateView(this.textView);
Disabling and Enabling
This feature is enabled by default with screenshots starting from the Essential Plan. You can control it through the following API.
Instabug.setReproStepsMode(Instabug.reproStepsMode.enabled);
Here are the possible arguments.
Instabug.reproStepsMode.enabled
Instabug.reproStepsMode.disabled
Instabug.reproStepsMode.enabledWithNoScreenshots
Screenshots are always disabled with Crash Reporting.
For Crash Reporting, the screenshots are always disabled as the data is silently collected without any interaction from the user. This decision is part of our ongoing commitment to end-users' privacy.
Updated about 5 years ago
