Integrating Instabug
This page covers how to install Instabug SDK into your Xamarin application.
Installation
To install and integrate the SDK in your project follow the following steps:
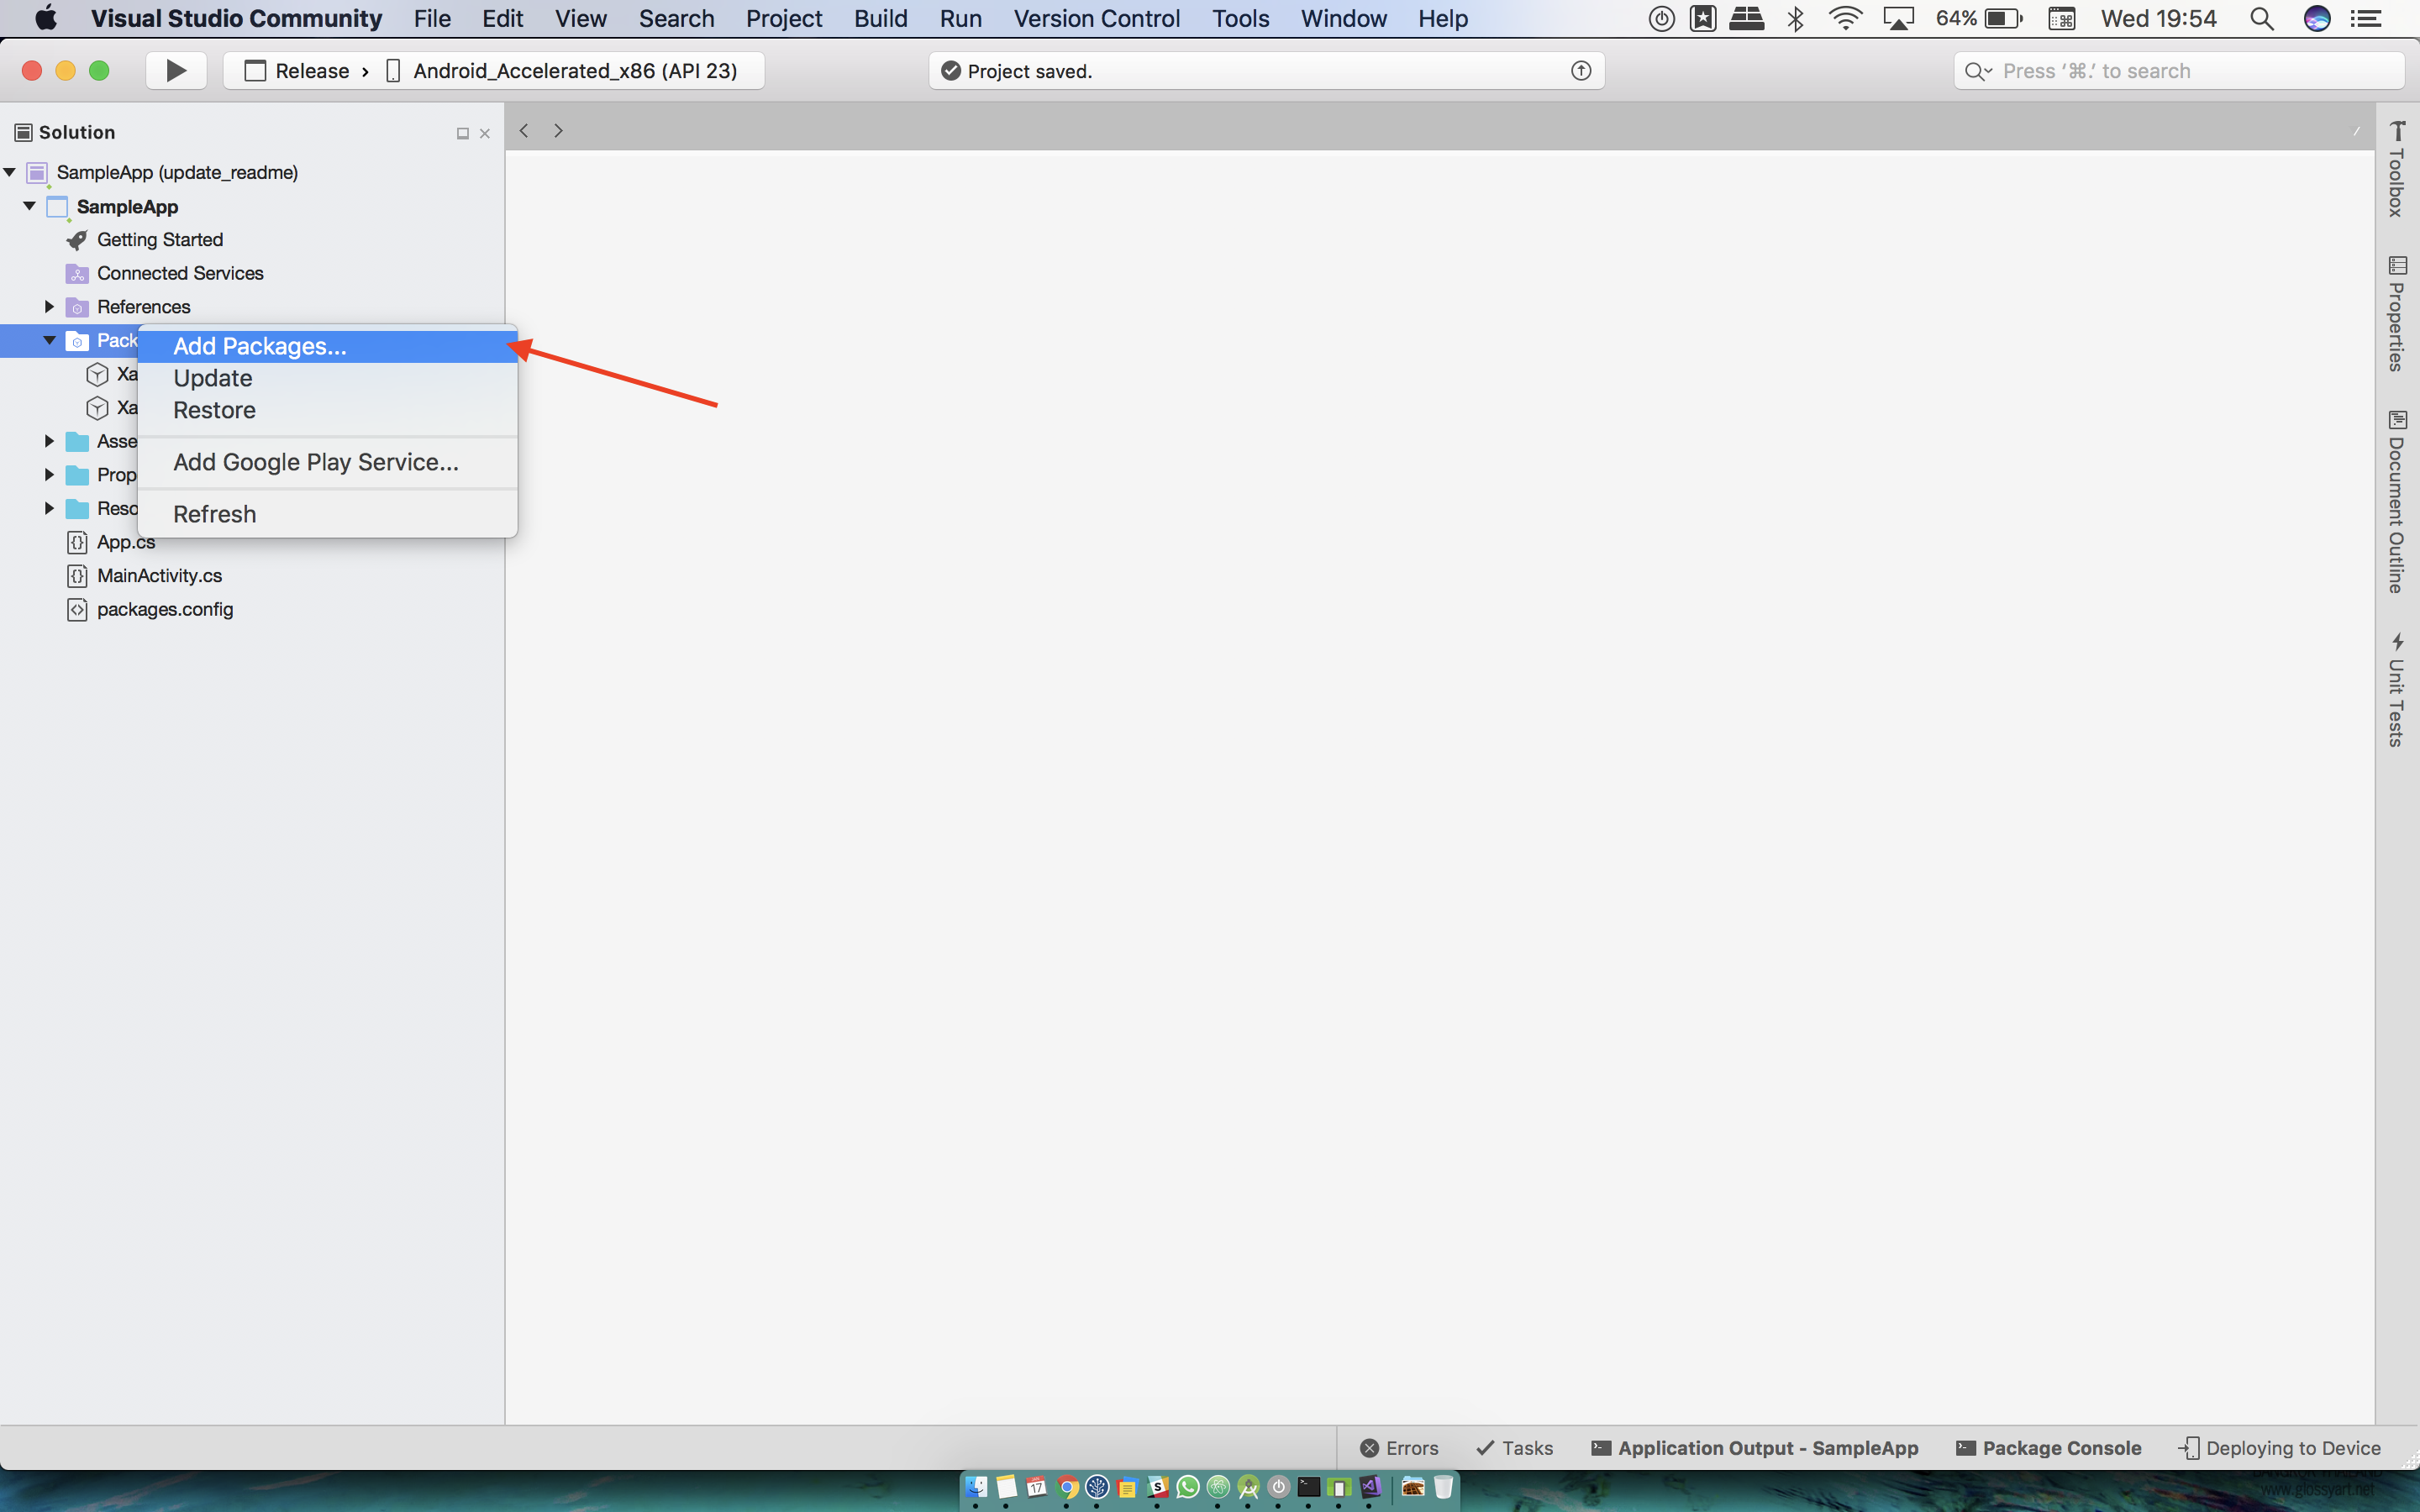
- From Visual Studio project navigator, expand ProjectName.Droid. Right click on the Packages folder. Click on Add Packages.

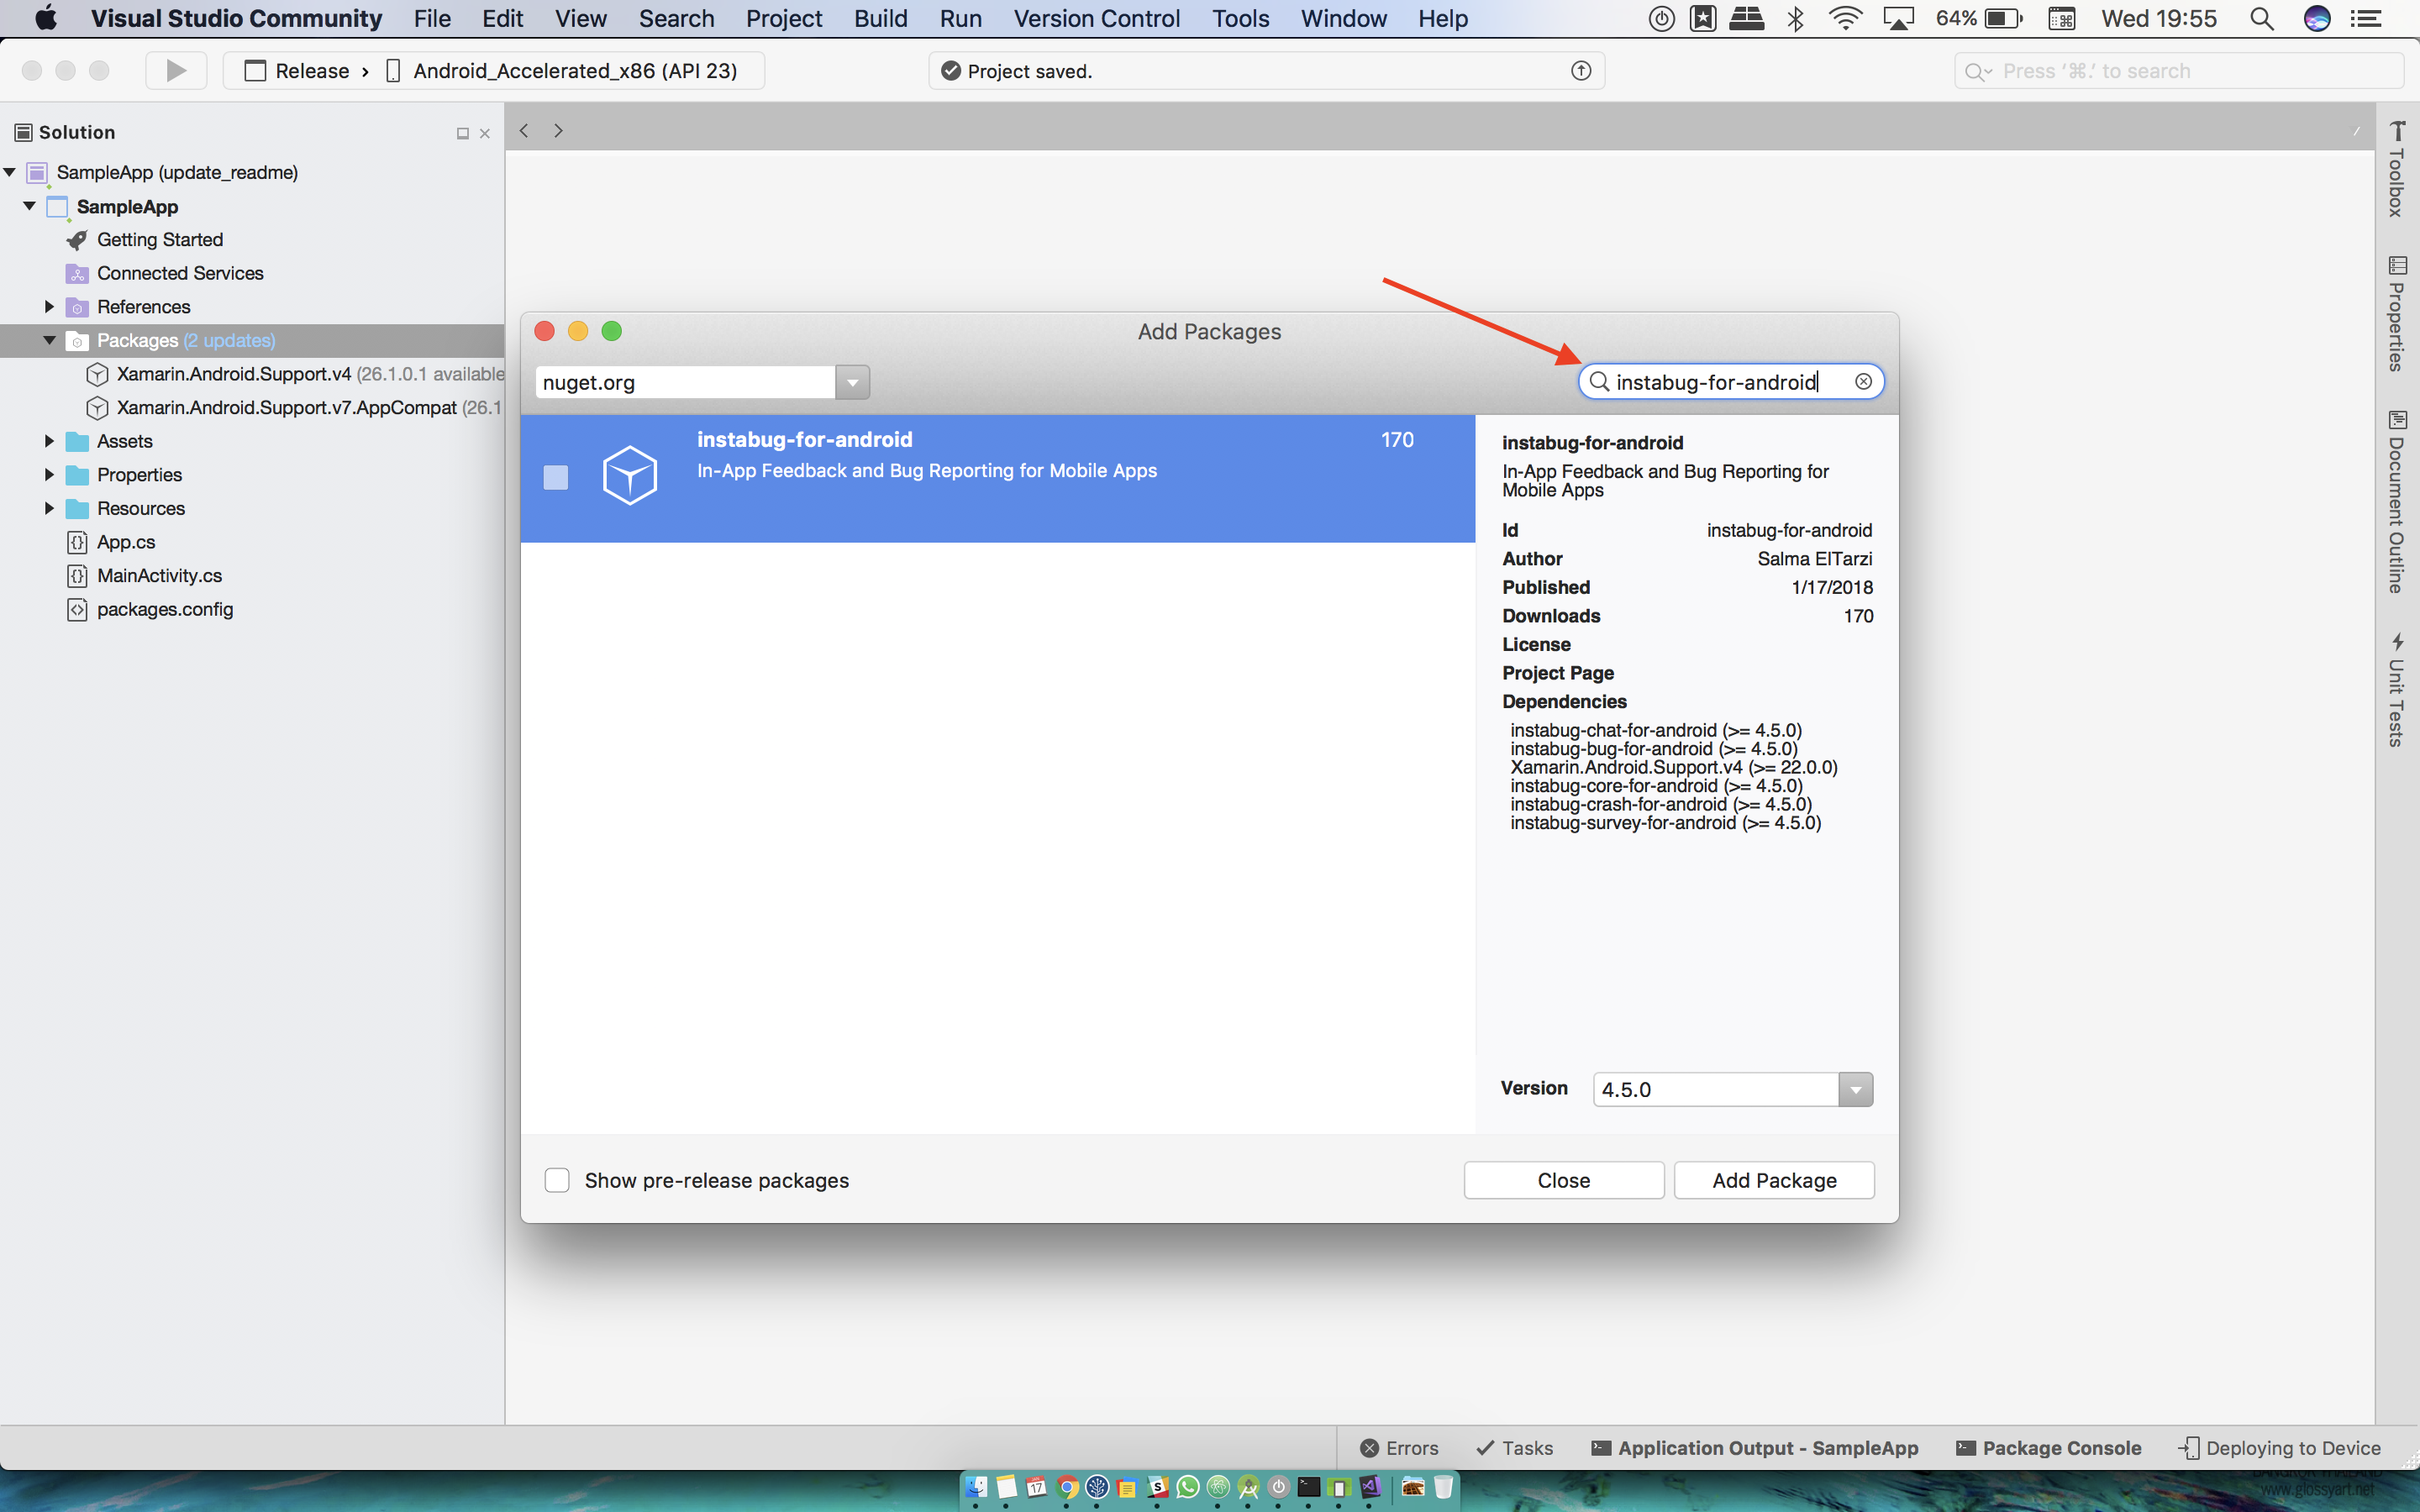
- Search for instabug-for-android. Then, click on Add Package.

- Repeat all the previous steps for ProjectName.iOS.
Using Instabug
iOS
To start using Instabug in your application you will need to initialize it.
First, import Instabug in the AppDelegate class.
using InstabugLib;
Then add the following line in the FinishedLaunching method inside the AppDelegate class.
Instabug.StartWithToken("YOUR_APP_TOKEN", IBGInvocationEvent.Shake | IBGInvocationEvent.Screenshot);
Android
To start using Instabug in your application, you will need to initialize it. Create a custom application class, it should look like the following.
using System;
using Android.App;
using Android.Runtime;
using Com.Instabug.Library;
using Com.Instabug.Library.Invocation;
namespace Xamarinsampleandroidapp

{
    [Application]
    public class MainApp : Application
    {
        protected MainApp(IntPtr javaReference, JniHandleOwnership transfer)
        : base(javaReference, transfer)
        {
        }
        public override void OnCreate()
        {
            base.OnCreate();
            new Instabug.Builder(this, "TOKEN").SetInvocationEvents(InstabugInvocationEvent.FloatingButton, InstabugInvocationEvent.Shake).Build();
        }
    }
}
You can find your app token by selecting SDK Integration in the settings popup from your Instabug dashboard.
Updated about 5 years ago
Now that you've successfully integrated Instabug, check out how to show Instabug using different methods, how to identify your users, or how to customize your SDK.
