Deobfuscation for Android
Explained here is how to deobfuscate your crashes to get more details from stack traces for your Android apps.
Deobfuscating Java/Kotlin Crashes
The below sections detail different methods of uploading and automating your mapping file uploads to deobfuscate your crashes.
Uploading Manually via the Dashboard
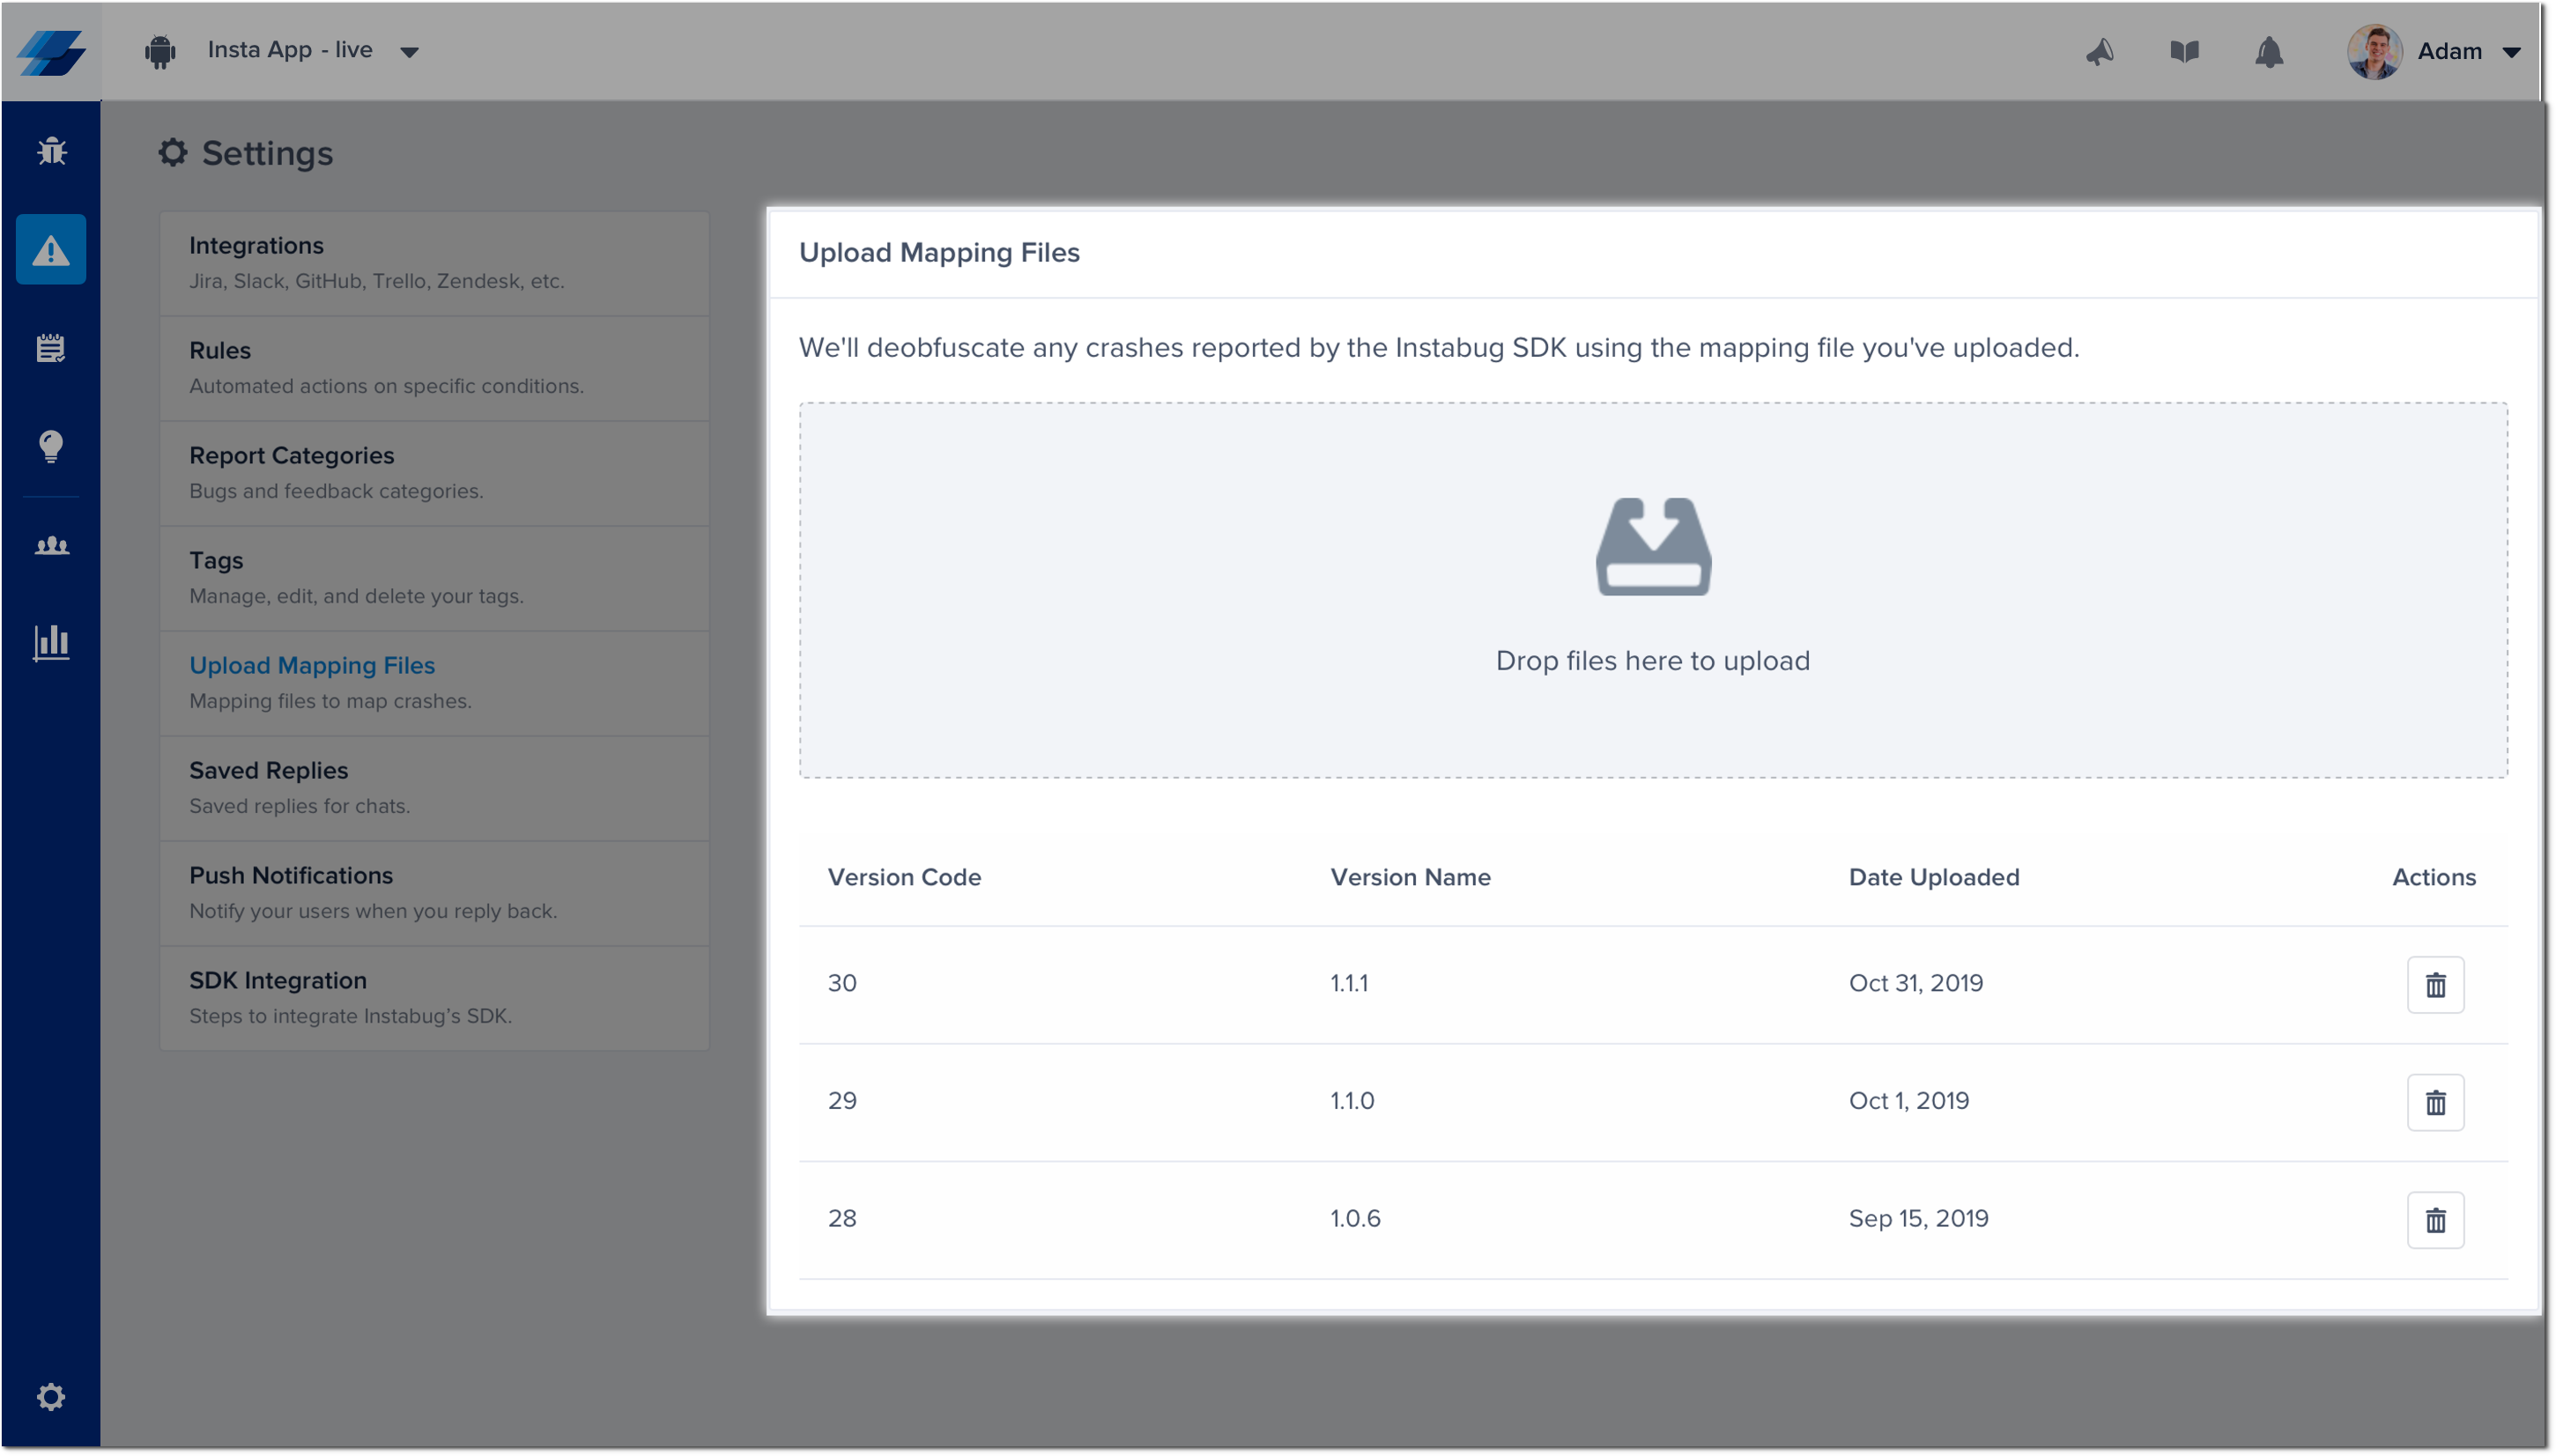
Go to Upload Mapping Files in the Settings menu of your Instabug dashboard and upload your Mapping.txt file. Multiple mapping files can be uploaded to correspond with each version of your application.

Uploading via Script
Through automation, you can make it so that mapping files are generated and uploaded from environment with ease. First, you'll need the below script, which can be used to upload your mapping files directly without needing to visit the dashboard. You only need to add the location of your mapping file, as well as your application token.
#!/bin/bash
echo "Instabug mapping files uploader"

# Constants for app token and mapping files
APP_TOKEN="APPTOKEN"
PATH_TO_MAPPING_FILE="PATH/TO/FILE.txt"
VERSION_CODE="1"
VERSION_NAME="1.1"
VERSION='{"code":"'"$VERSION_CODE"'","name":"'"$VERSION_NAME"'"}'

if [ ! -f $PATH_TO_MAPPING_FILE ]; then
    echo "File not found!"
    exit 0
fi

echo "Mapping file found! Uploading..."

ENDPOINT="https://api.instabug.com/api/sdk/v3/symbols_files"
STATUS=$(curl "${ENDPOINT}" --write-out %{http_code} --silent --output /dev/null -F os=android -F app_version="${VERSION}" -F symbols_file=@"${PATH_TO_MAPPING_FILE}" -F application_token="${APP_TOKEN}")
if [ $STATUS -ne 200 ]; then
  echo "Error while uploading mapping files"
  exit 0
fi


echo "Success! Your mapping files got uploaded successfully"
Afterwards, add the following gradle task to your app's build.gradle while replacing "TOKEN" with your own token.
task uploadMappingFiles(type: Exec) {
    android.applicationVariants.all {
        if (it.variantData.variantConfiguration.buildType.name == "release" && it.mappingFile != null && it.mappingFile.exists()) {
            commandLine 'sh', '../upload_mapping.sh', "TOKEN", it.versionCode, it.versionName, it.mappingFile
        }
    }
}
Lastly, once you're done with the release task, simply run the following command:
./gradlew :app:uploadMappingFiles
Uploading via API
We have an API endpoint that you can use to upload your mapping files directly from the console. Mapping files must be uploaded as a .txt file.
curl --location --request POST 'https://api.instabug.com/api/sdk/v3/symbols_files' \
--form 'os="android"' \
--form 'application_token="TOKEN"' \
--form 'app_version="{\"code\":\"7\",\"name\":\"7.7\"}"' \
--form 'symbols_file=@"./file.txt"'
Uploading via Gradle Plugin
Using the Instabug plugin, you can make sure the mapping files are always uploaded in a prompt manner.
1- First, you'll need to add the below class plugin to your projects Gradle file:
buildScript{
  dependencies{
    classpath "com.instabug.library:instabug-plugin:x.y.z"
  }
}
2- Then add apply plugin: 'instabug-crash' to your app's Gradle file
3- Finally, you'll need to set the configurations of the plugin:
instabug {
    crashReporting {
        autoUploadEnabled = {true/false} //Enables/disables uploading for whitelisted variants
        appToken = "APPLICATION_TOKEN" //Provides user's application token
        experimentalGuardSquareSupportEnabled = {true/false} //Enables/disables GuardSquare's product checking and processing.
        uploadUrl = "{url value}" //a url to be used to upload the mapping files to (defaults to release-configured Instabug domain)
        variantConfigurations{ configurations->
            def variantName = configurations.name //Provides the name of the variant to configure
            configurations.setWhitelisted({true/false}) //Whitelists a variant for the plugin to create and attach upload task to its build flow.
            configurations.setCustomMappingFilePath("FILE_PATH") //Sets a custom mapping file path for the variant to be uploaded instead of the default generated one.
        }
    }
}
Deobfuscating NDK/C++ Crashes
By default, native crashes are obfuscated. In order to deobfuscate them, you'll need to upload the relevant .so files and we'll take care of the rest.
Locating .so Files
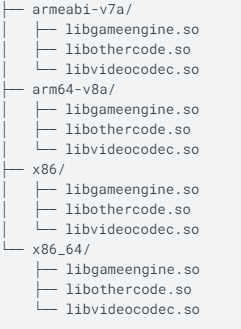
The .so files are usually found in specific directories related to the different app architectures. You can find below the different files, as well as their related architecture.

Uploading Manually via the Dashboard
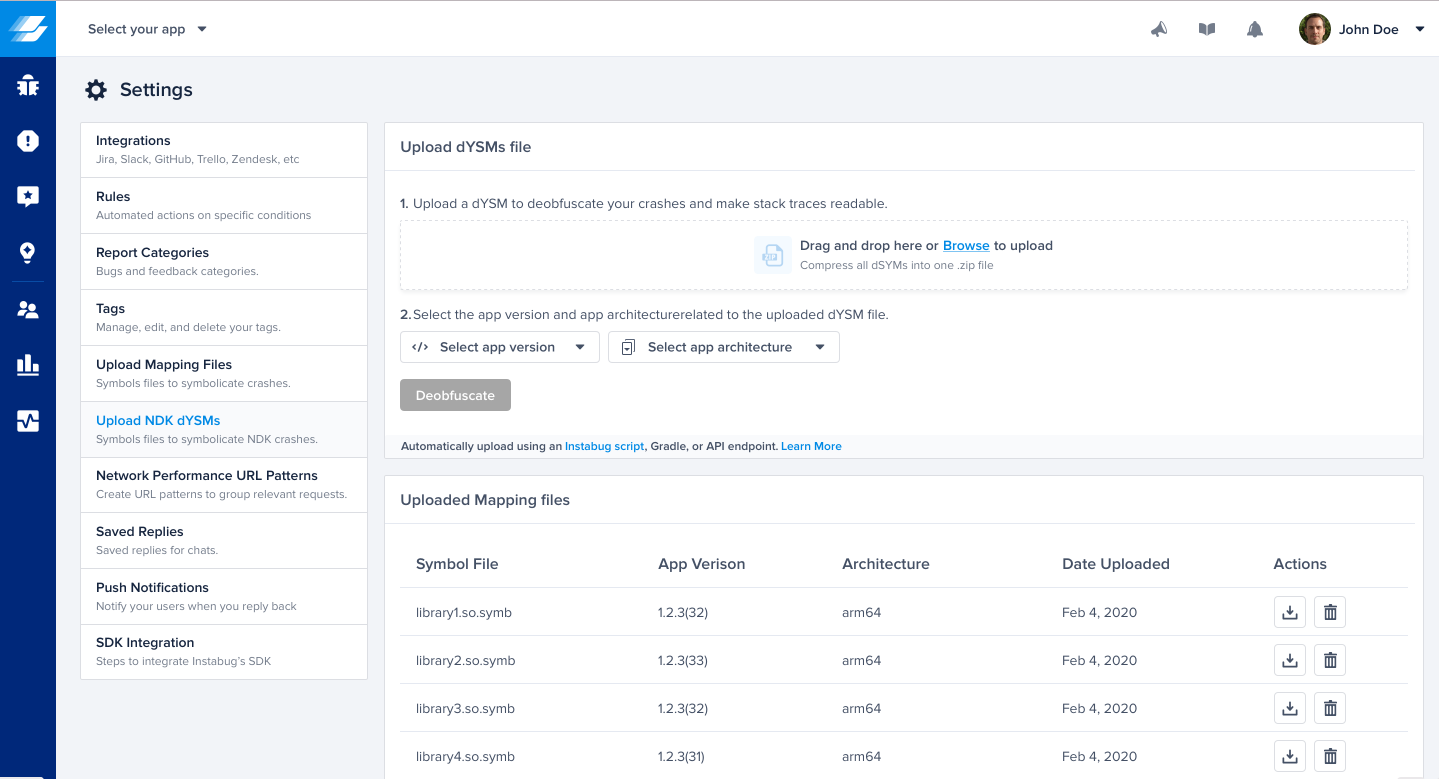
Once you have the .so files, you can upload them directly to the dashboard through Upload NDK DSYMs page found in the Settings menu of your Instabug dashboard. You'll only need to upload the file, while selecting the correct app version and app architecture.

Uploading via API
We have an API endpoint that you can use to upload your symbol files directly from the console or from the CI
curl --location --request POST 'https://api.instabug.com/api/web/public/so_files' \
--form 'application_token="TOKEN"' \
--form 'api_key="API_KEY"' \
--form 'app_version="1.1"' \
--form 'arch="x86"' \
--form 'so_file=@"so-files.zip"'
Please contact support to obtain your API Key
Updated over 1 year ago
After a crash has been deobfuscated and the fix is done, reach out to your affected users and let them know to update.
