Report Categories for iOS
This page covers how you can set custom categories so that when a user tries to report a bug or suggest an improvement, they can select the category for the report.
The Report Categories are built specifically to optimize triaging your bug reports on Instabug, help you take faster actions and make faster decisions. It's very easy to set them up, tweak them and change them. Everything can be controlled from your Instabug dashboard without any code changes in your application.
You give your users a list of categories to pick from before they send you a bug report. Then, based on the category each report belongs to, the magic will start to happen.
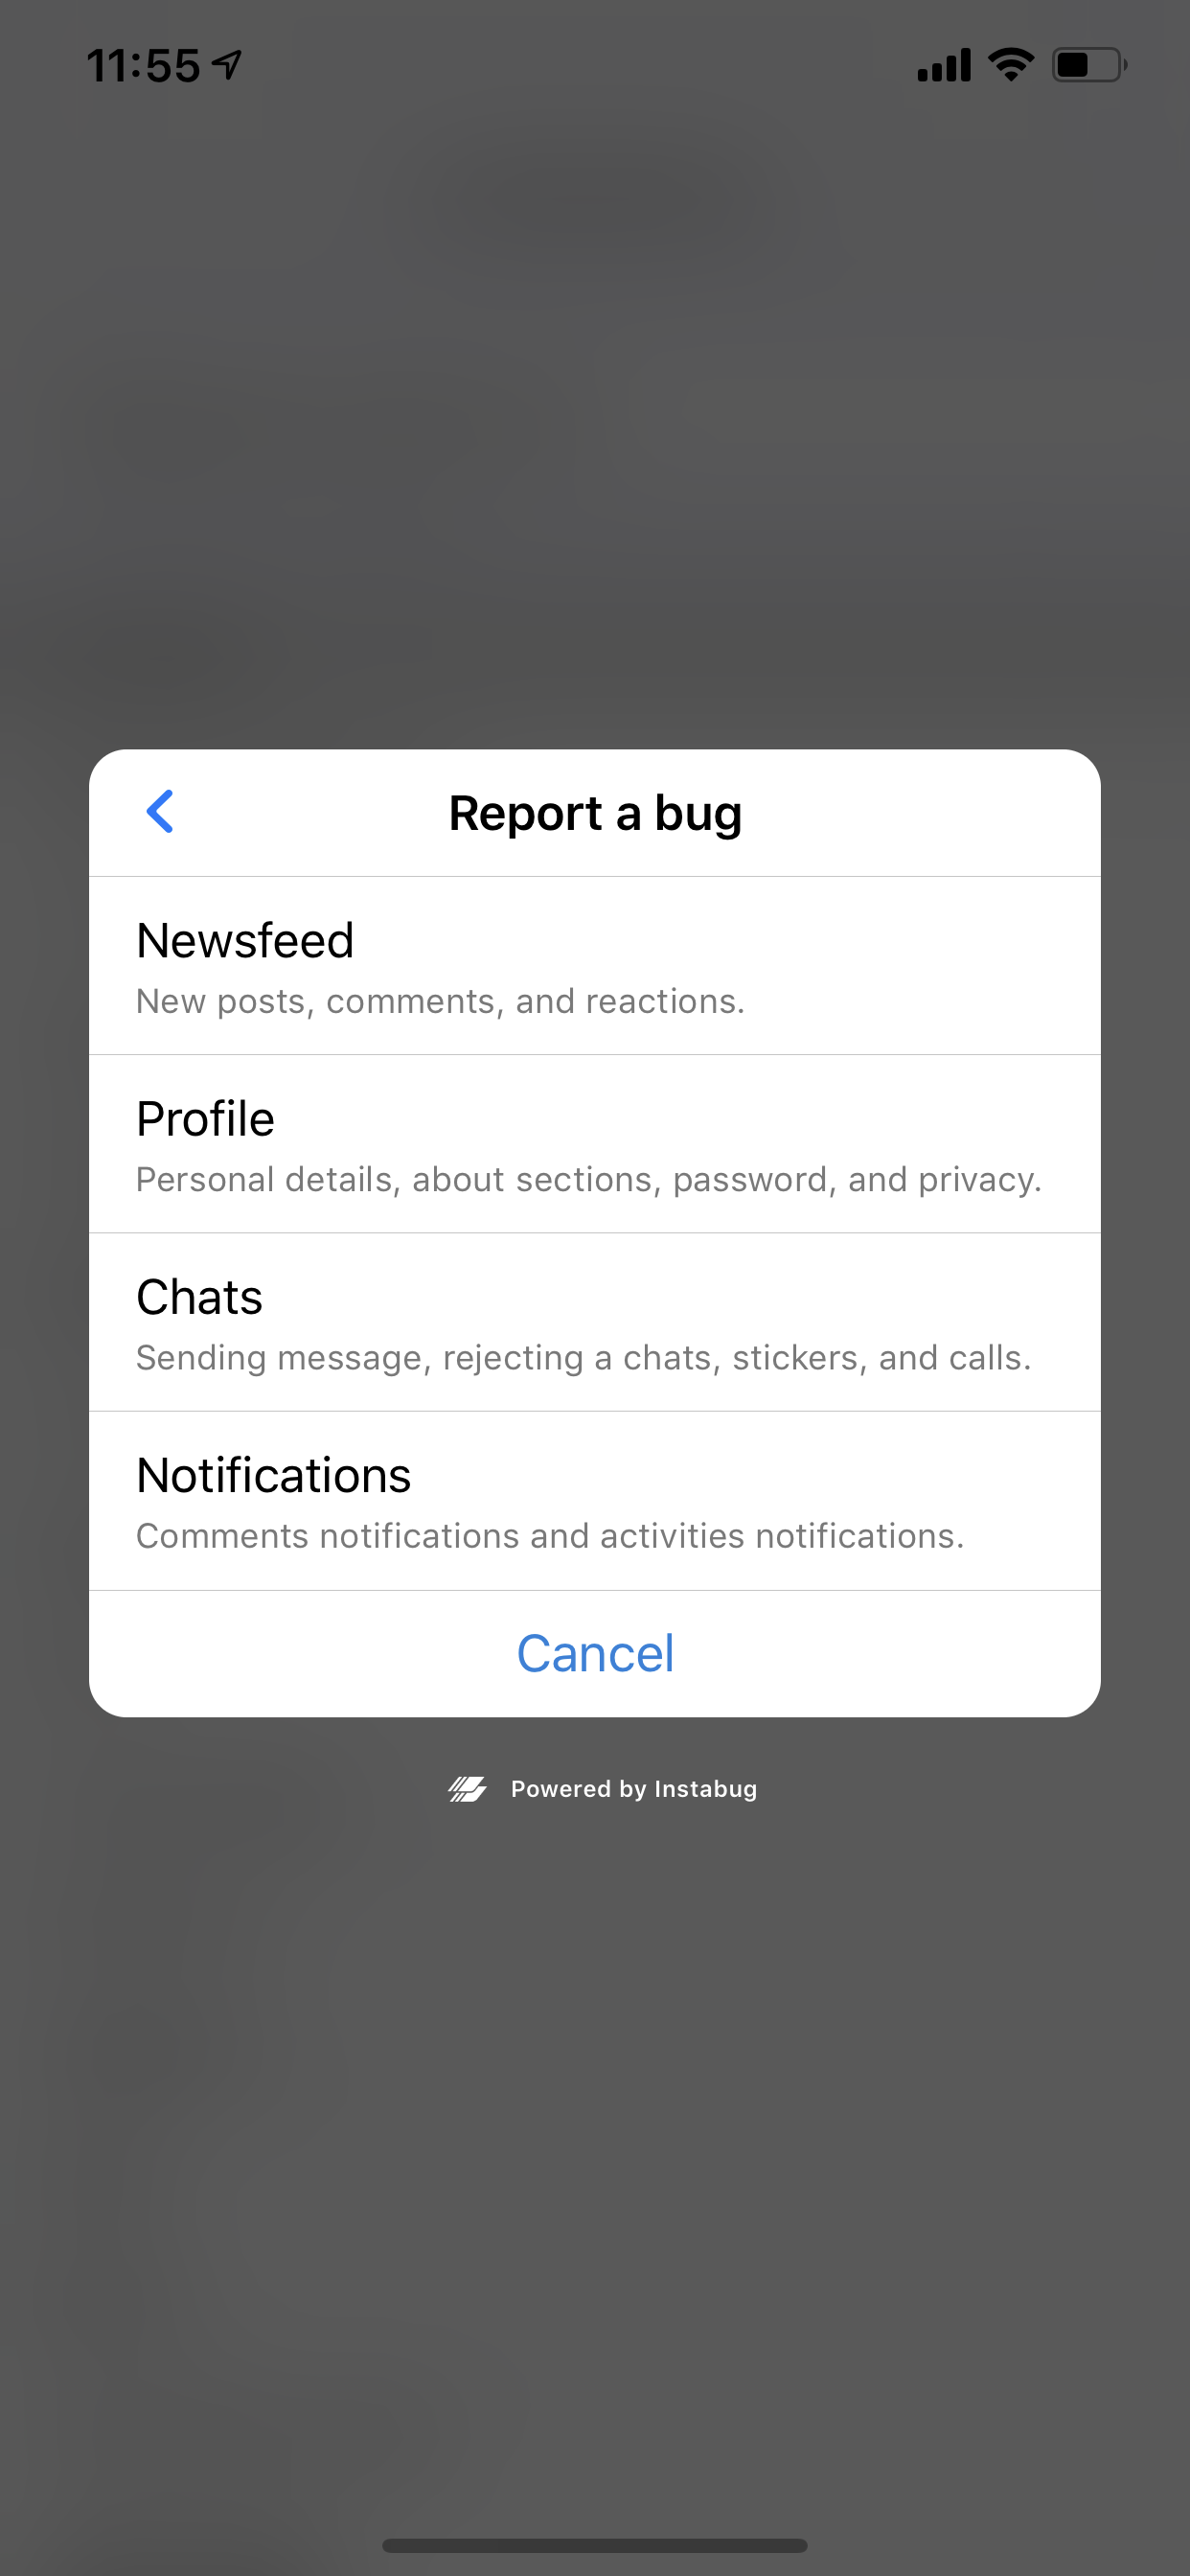
Tip: Avoid naming categories with the same name as the main report types (Bug, Improvement, or Question) to avoid confusion.
How Can I Benefit from the Report Categories?
Make Fast Decisions
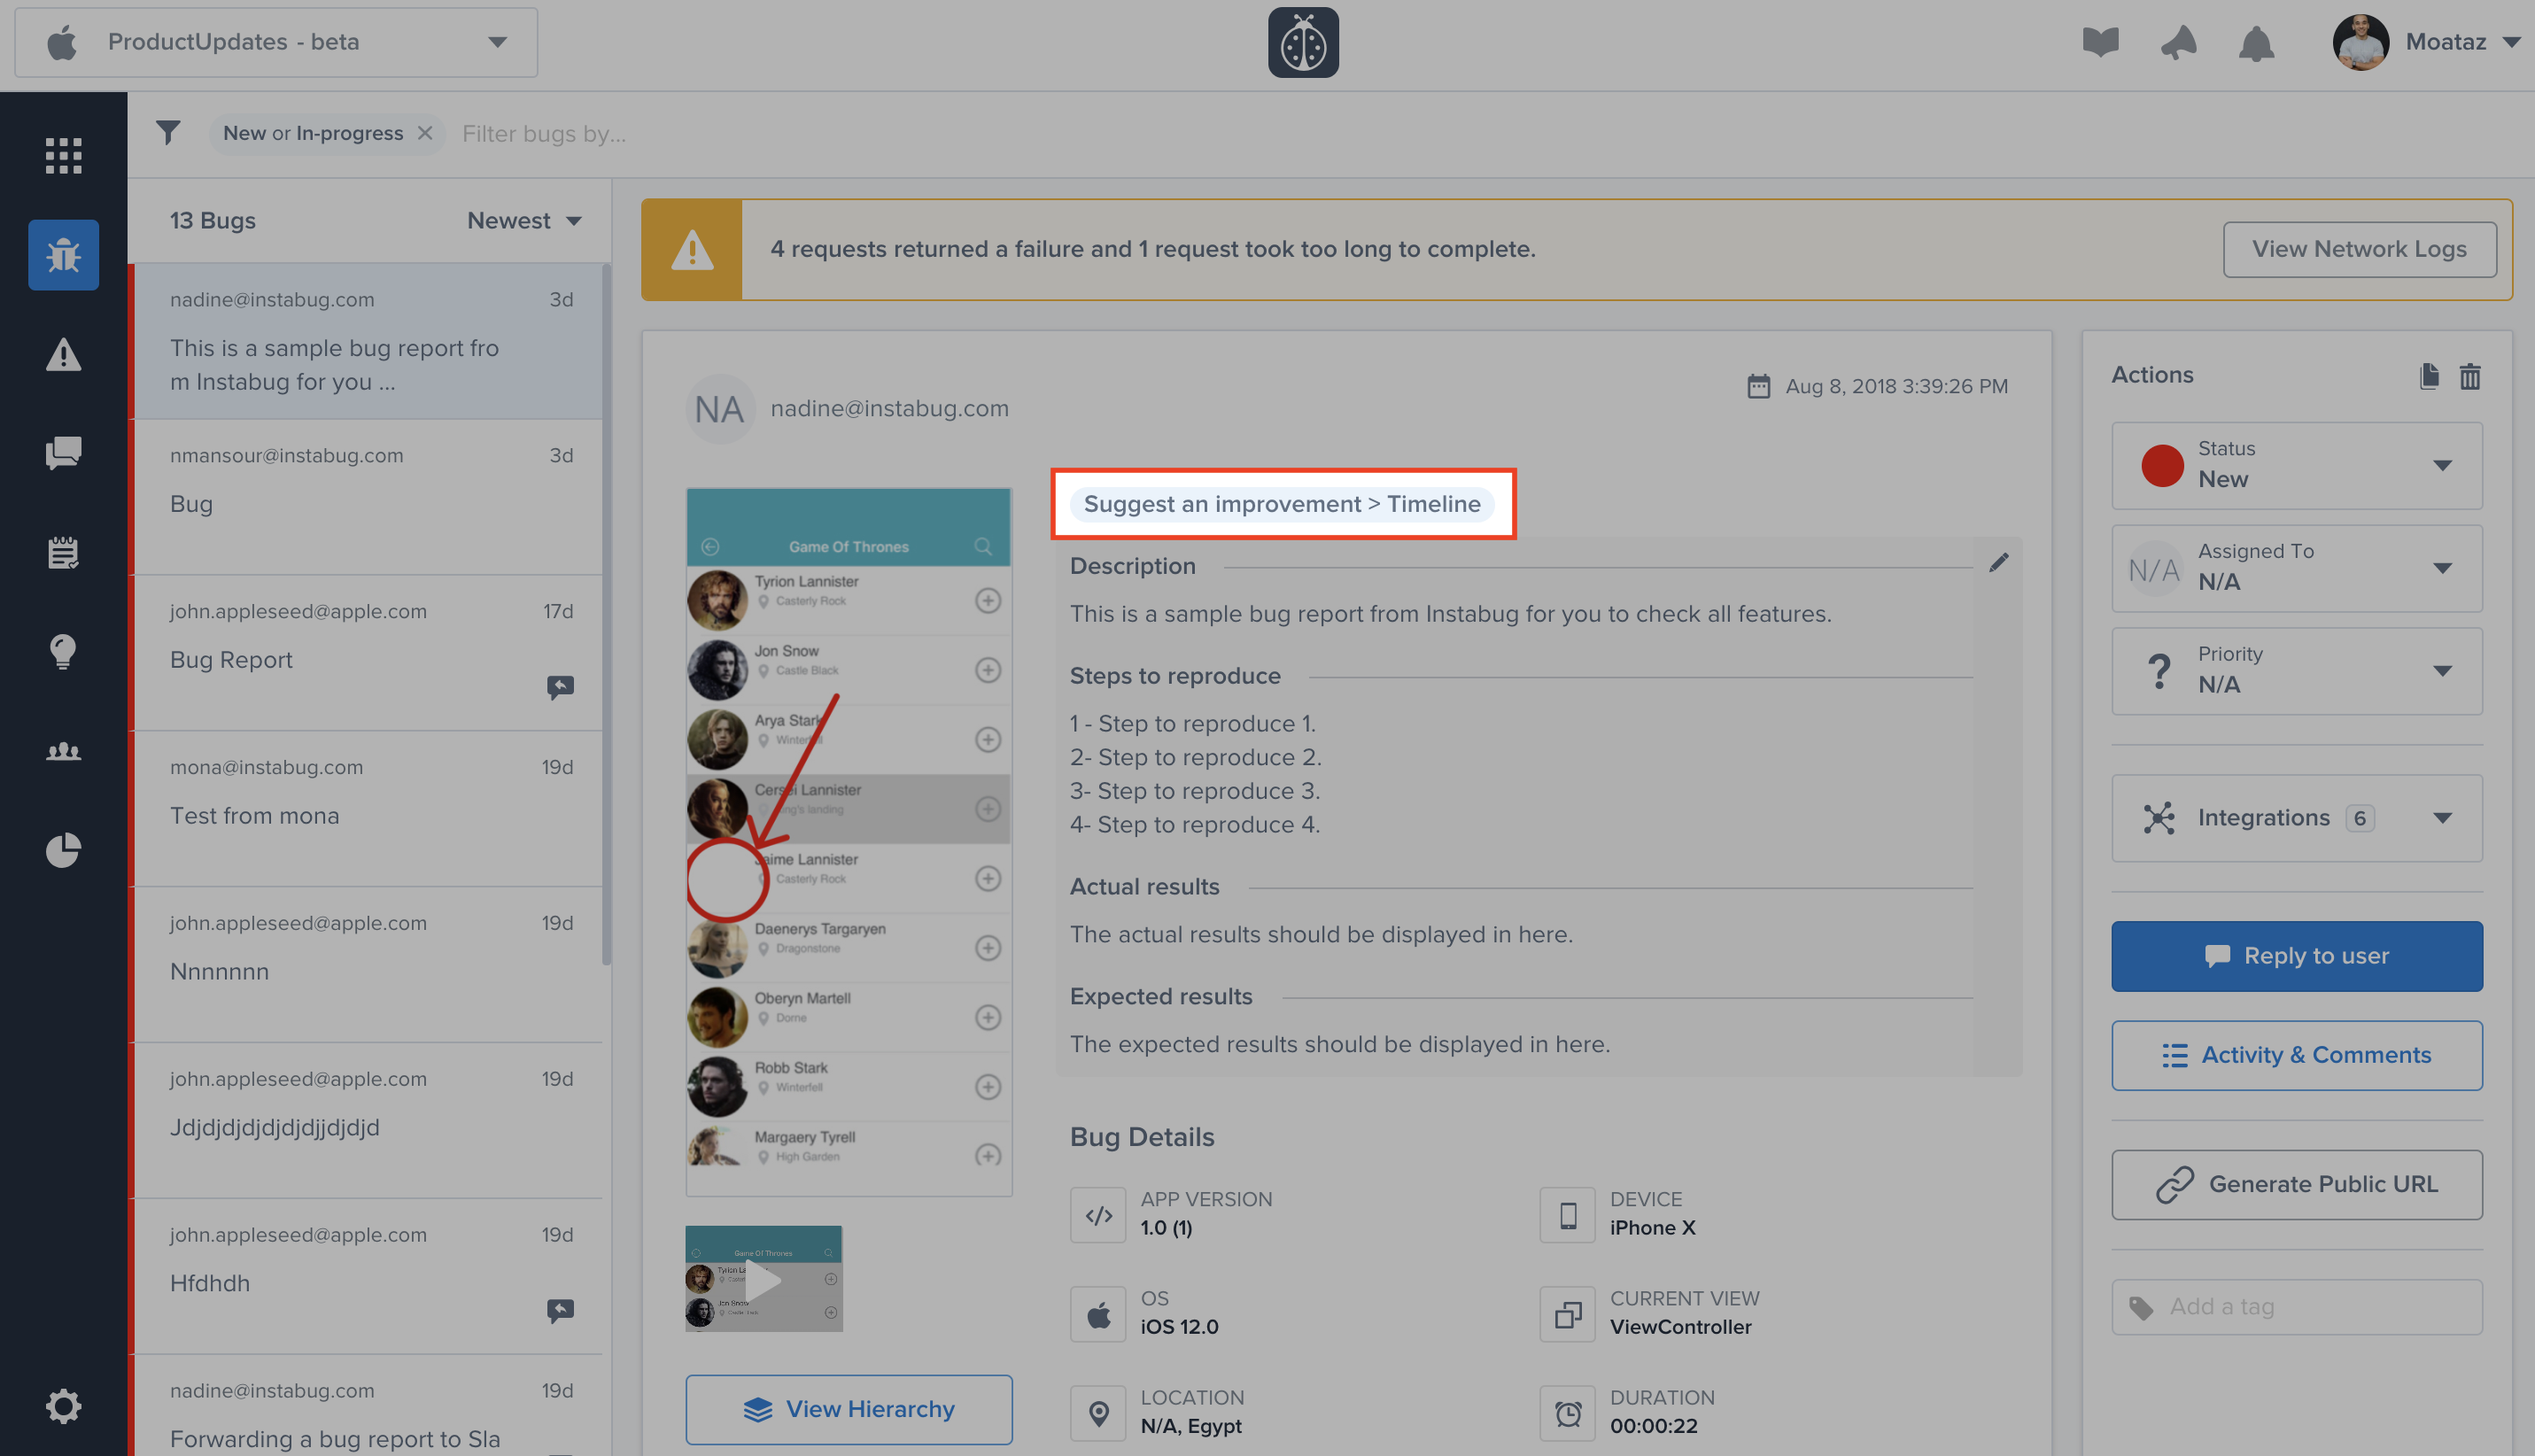
With a glimpse of an eye, you can spot the categories each report belongs to. You can then start following the course of actions that you and your team agreed on following for each category.
Don't Let Your Users Wait
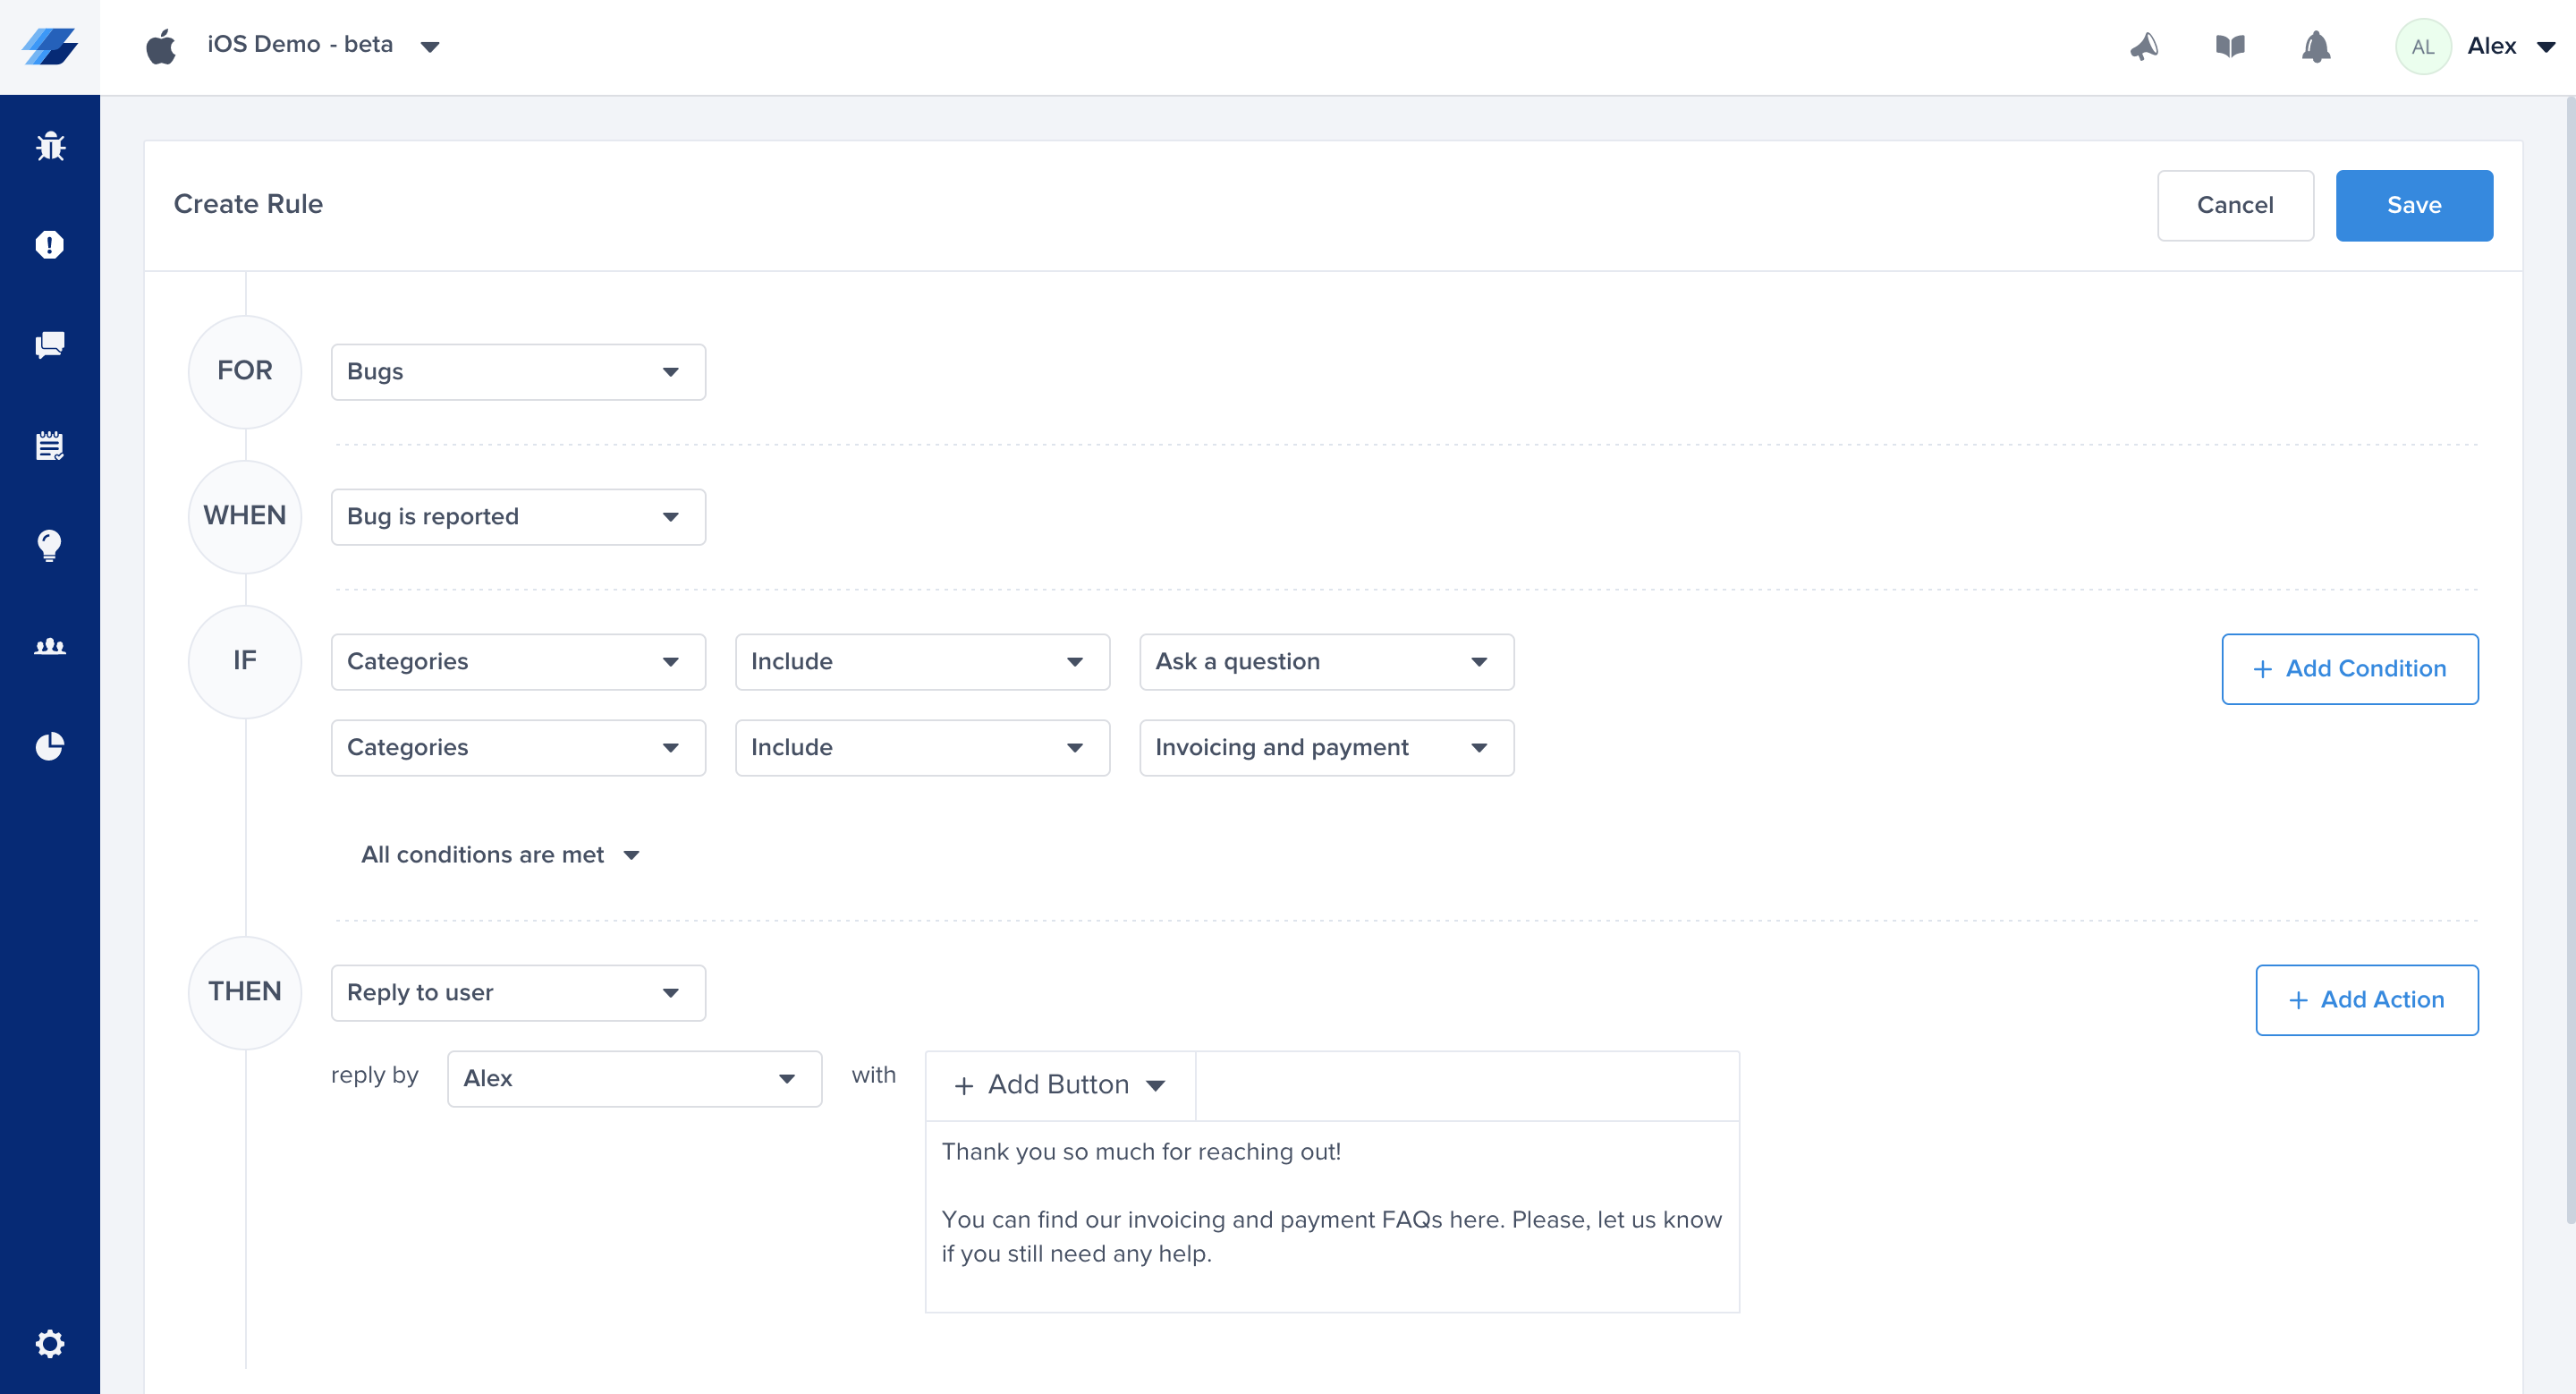
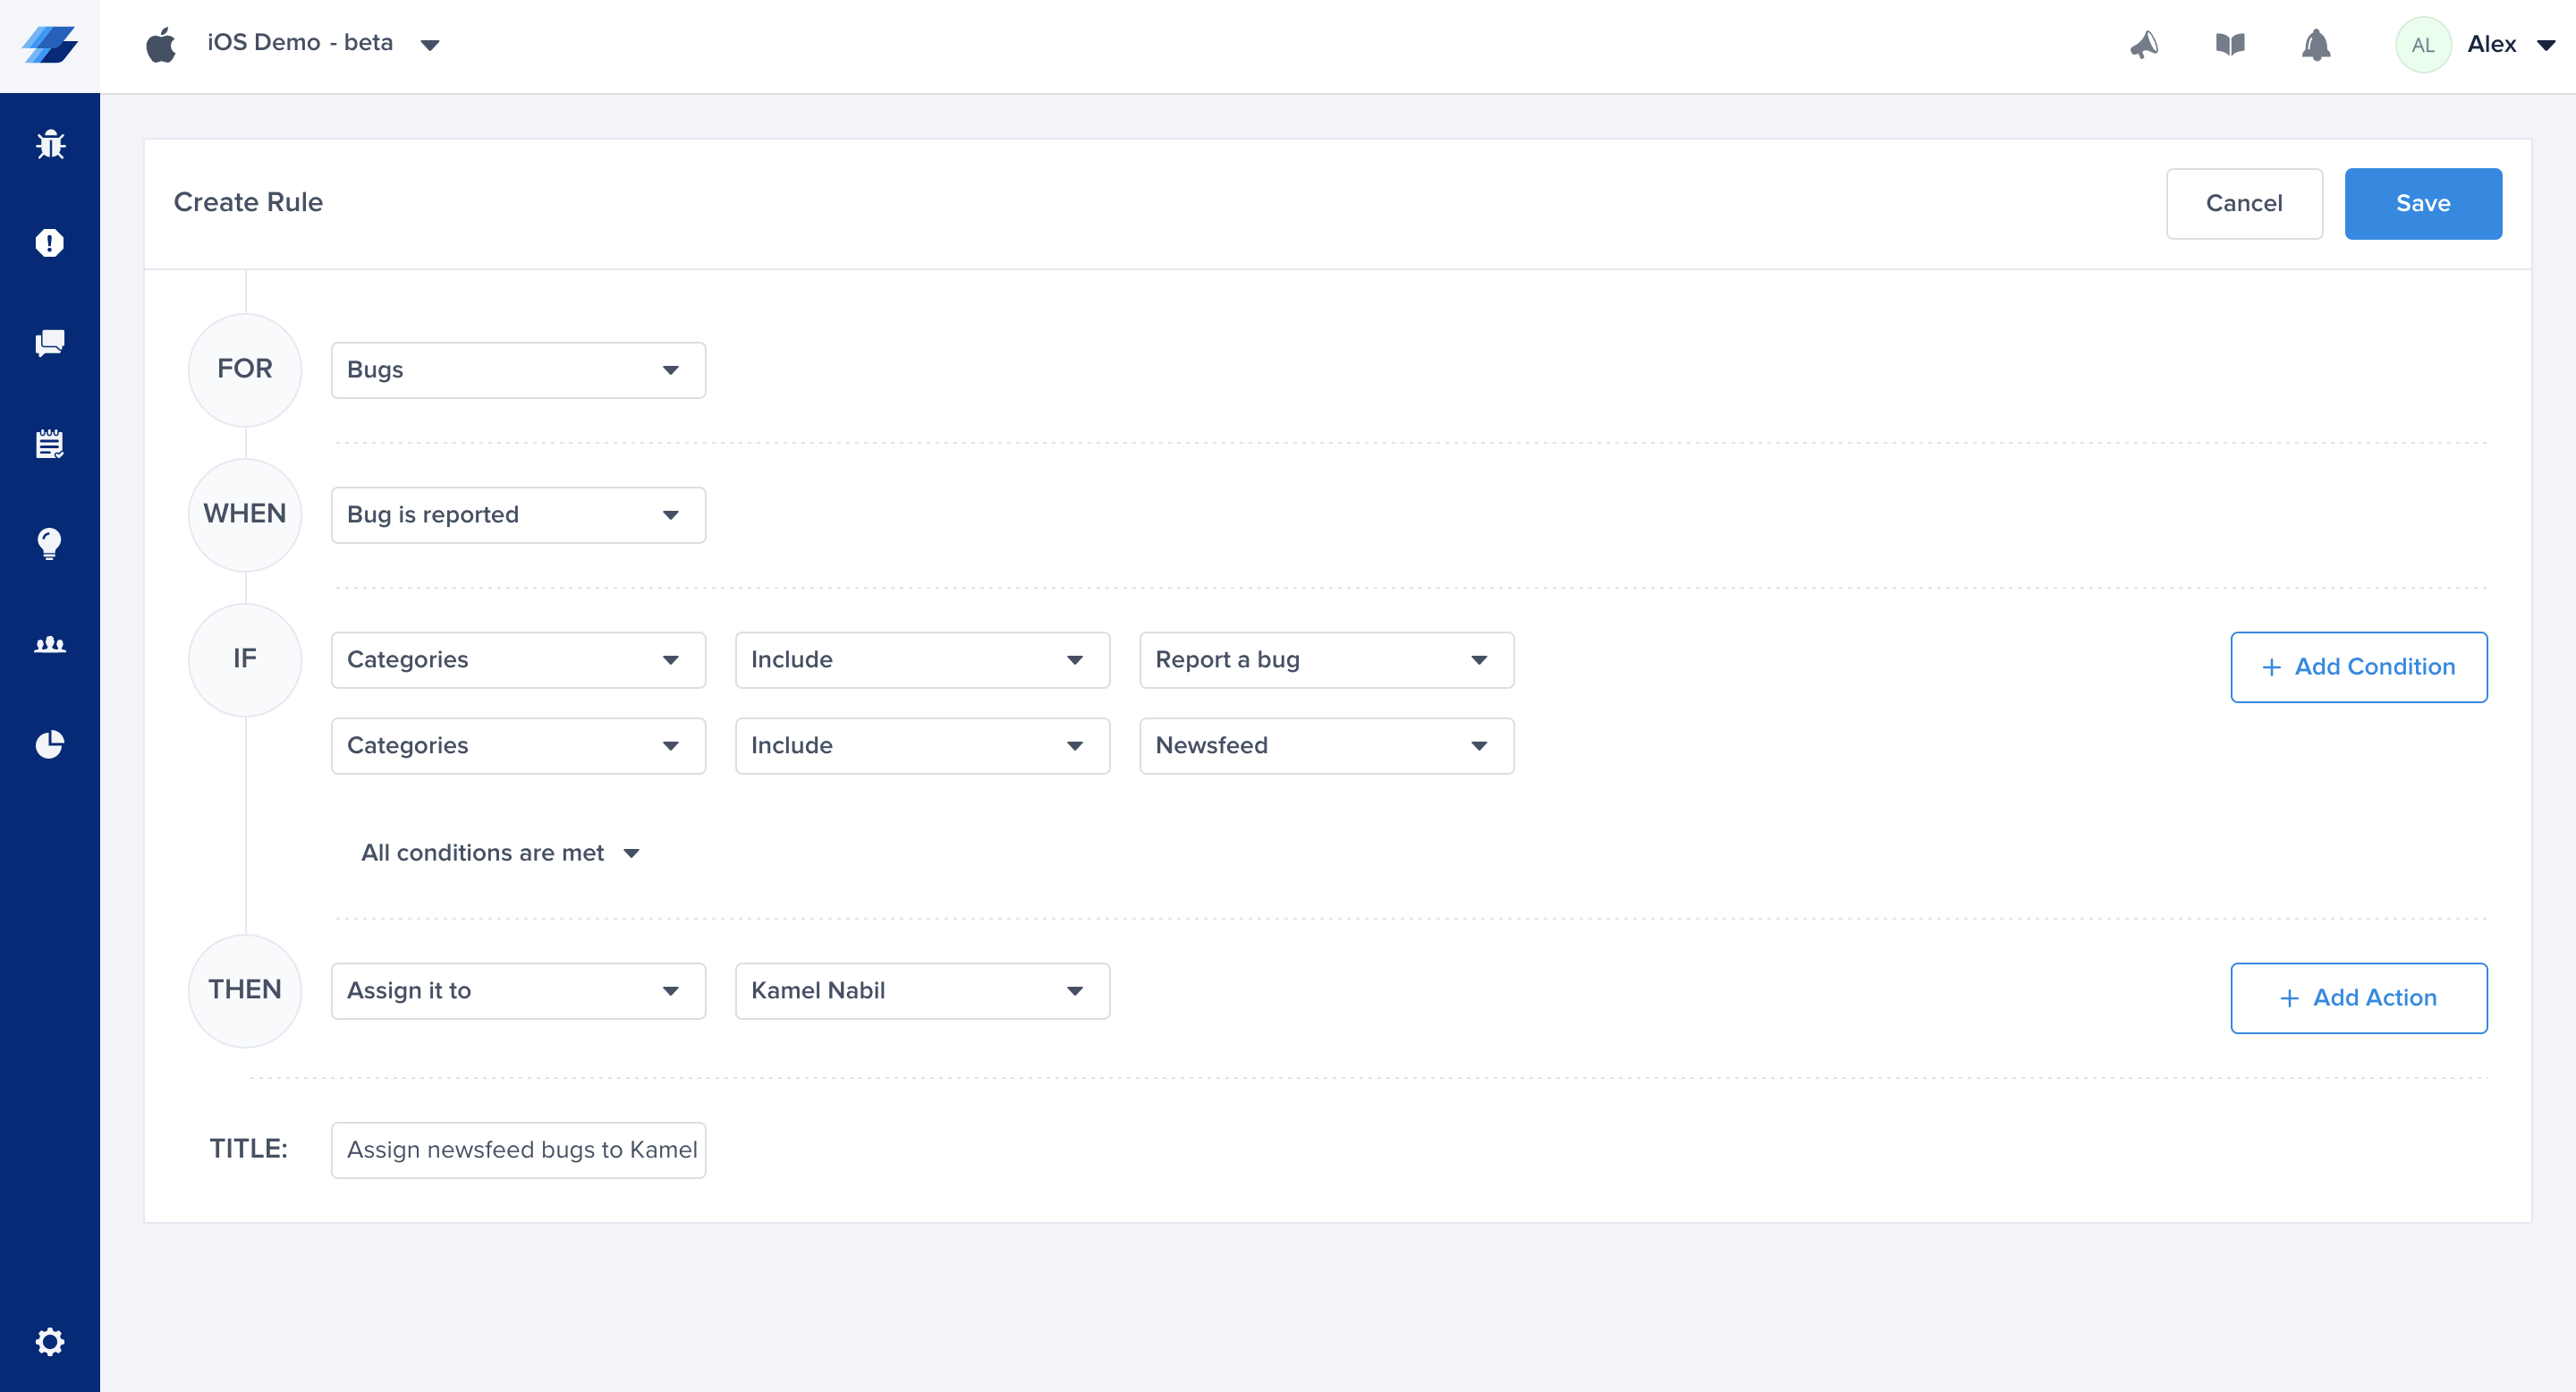
It's never guaranteed that your team will be able to reply back to all the users and their reports on the spot. Instead of making them wait, reply back to them with a content relevant to the problem or issue they reported. You can set an automatic reply and customize the content based on the category they picked before sending the report. This is easily done through the Rules.
Auto-Forward to the Relevant Project
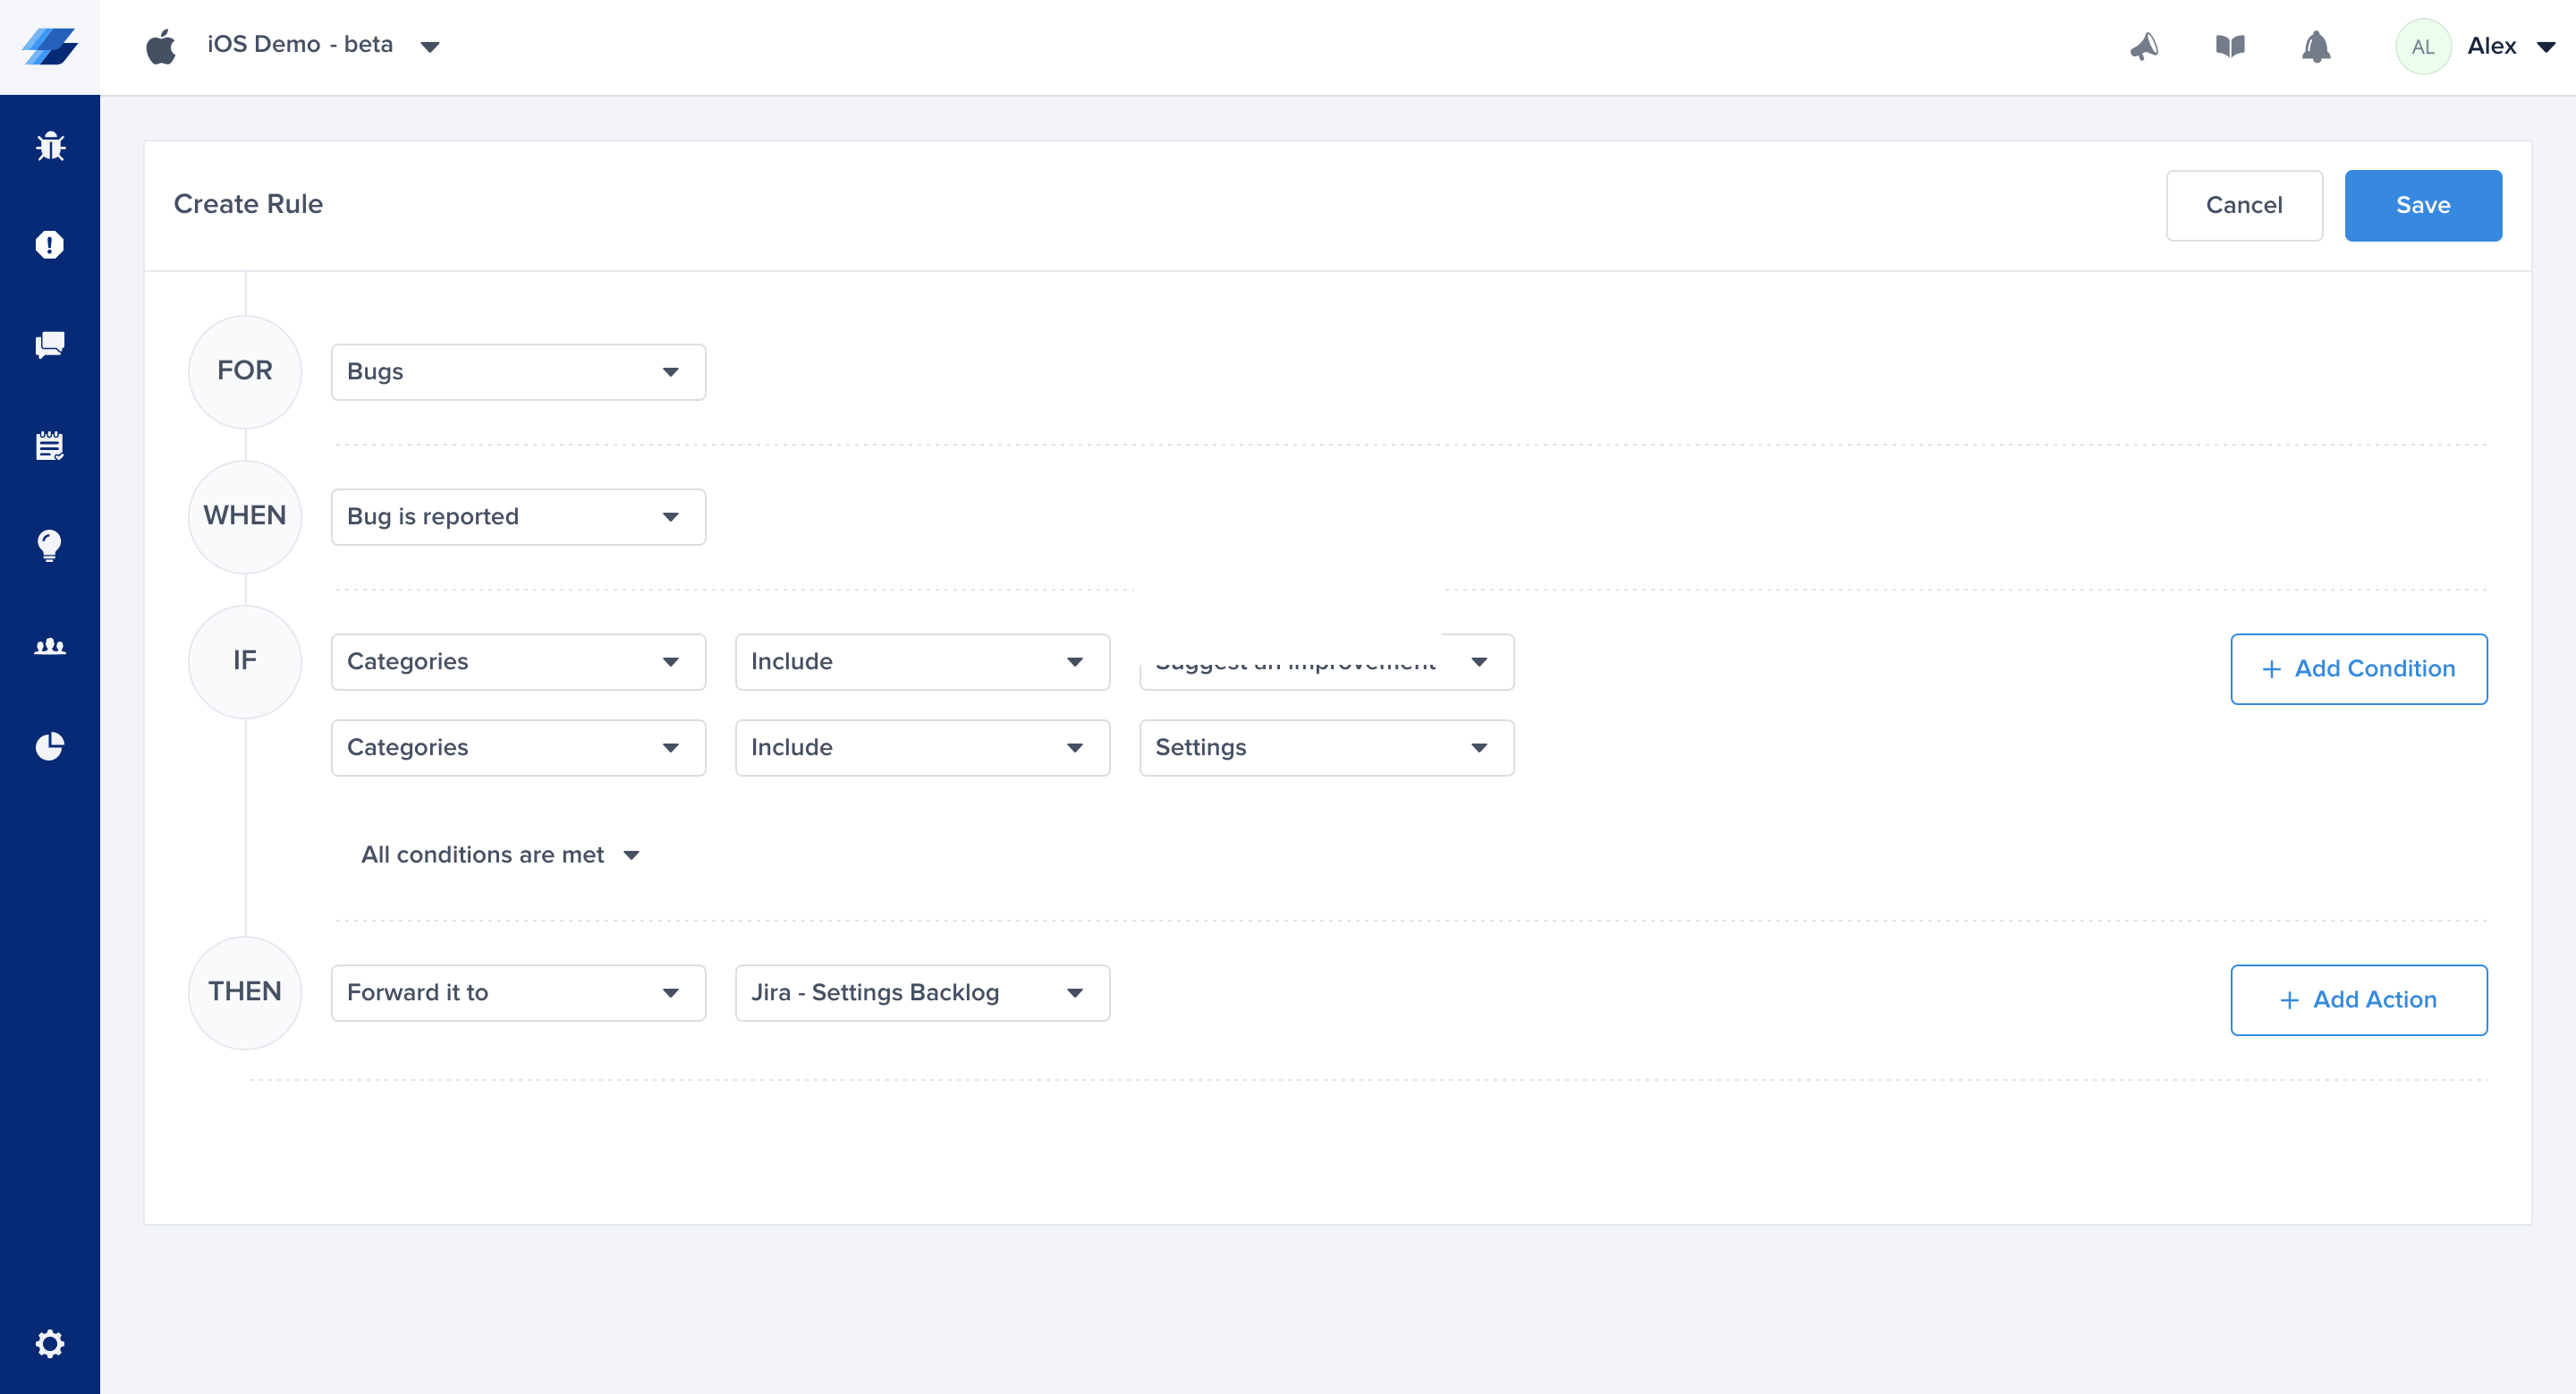
Is your team already used to a specific tracking tool (Jira, Trello, etc..)? You can auto-forward your bug reports to the relevant project depending on the selected category by the user. For example, if you're several teams and each team has an independent Jira project where they track their issues and cards, create a Rule that will auto-forward all the reports relevant to each team to their Jira project.
Auto-Assign the Reports to the Relevant Team Member
If each member of your team is responsible of handling specific types and categories of reports, auto-assign the report to them based on the selected category by the user.
How Can I Create Categories?
It's really simple. Click on the Settings button, Select Report Categories, then, start adding the categories you have in mind.
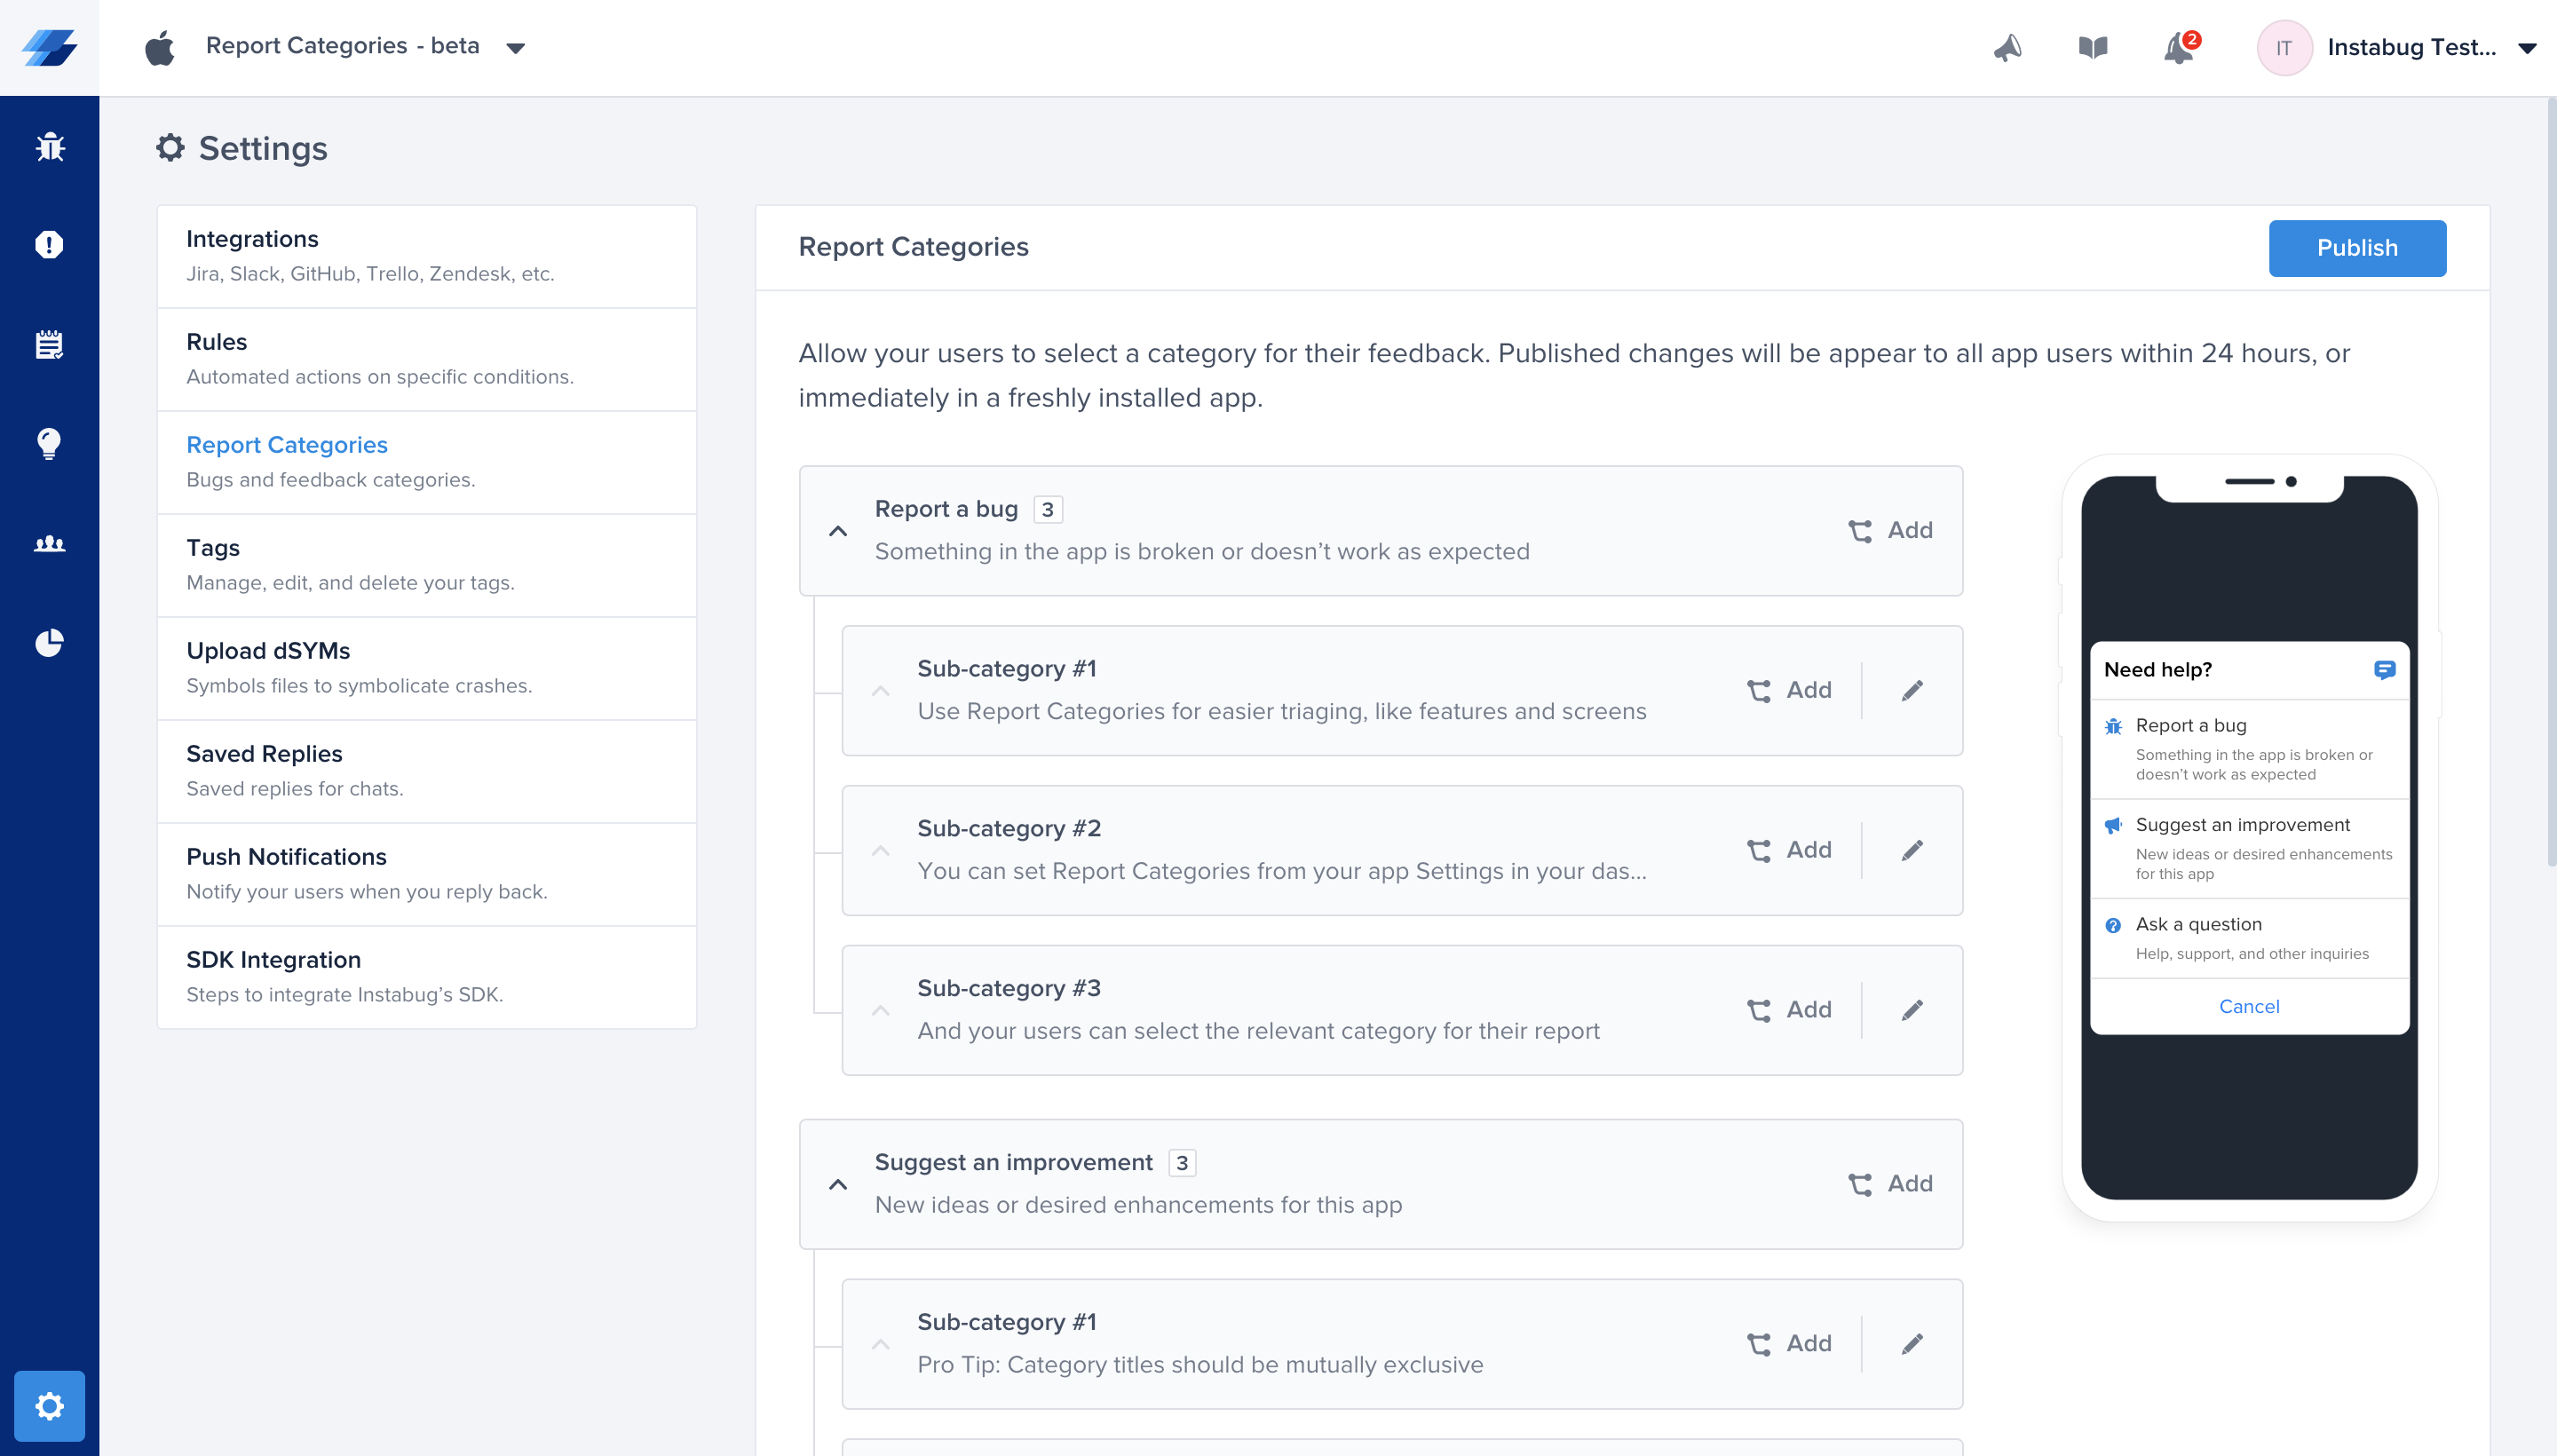
Avoid using commas to separate words within the same category, as our system will treat them as different categories when you filter by them on the Bug Reporting page.
Create Nested Categories
For more accurate and granular setup, you can add nested categories and build more detailed hierarchies. For example, the first level of categories can represent the main areas, features, products, or screens, in your app. Then, you may need to another level, to describe more details functionality within each one. Let's look at the following example:
- Report a bug
- Newsfeed
- Writing a new post
- Adding comments
- Reactions
- Unfollow a person or a page
- Friends requests
- Approving a request
- Rejecting a request
- Sending a request
- Messages
- Privacy
- Suggest an improvement
- Supporting more languages
- Content improvements
- Feature suggestion
- Newsfeed
- Friends requests
- Messages
- Ask a question
- How can I join a group?
- How can I leave a group?
- How can I unfollow a person or a page?
- How can I delete my account?
- If your app for free?
In your rules and filters, you can combine more than one condition together to make sure your logic applies to the reports coming from a specific path of selection. For example, you may want to forward the "Newsfeed bugs" to a different Jira project than the "Newsfeed improvements".
Whatever changes or additions you're making in your Report Categories setup might take up to 24 hours to be reflected in the already installed applications and will appear immediately in freshly installed applications. If you want to test how the categories look like in your application on the spot, make sure you uninstall the application from the device you're testing with and install it again.
Do you have any questions? Let us know, we would love to help!
Updated about 2 months ago
