Open Source Web SDK 1.0
Instabug web SDK is an open-source javascript library that provides an easy way to report bugs from your website with all the details to help you reproduce and fix the bugs faster.
This library is built with love by Instabug's team as a free tool to help developers build better websites and is not part of any of Instabug's current subscription plans.
The SDK is available publicly on GitHub here.
Overview
Instabug web SDK is an open-source javascript library that provides an easy way to report bugs from your website with all the details to help you reproduce and fix the bugs faster.
Your users and testers can attach a screenshot with annotations to highlight the issue, a description of the bug they spotted and their email. In addition, more details are automatically captured:
- Device
- OS
- Current view
- Session duration
- Locale
- Screen size
- Density
- Locale storage
- Console logs
Requirements
To start using Instabug, you need to have an account on the following tools:
- Zapier: to receive your bug reports on a variety of tools: email, Jira, Trello, Slack, etc.
- Cloudinary: to host the screenshots included in the bug reports online.
Node engine compatibility:
- we're using [email protected] module which requires node engine versions 6.14.0 or 8.10.0 or >= 9.10.0.
Installation Steps
To include Instabug Web SDK in your web app, follow the steps below:
- Clone the SDK repository.
git clone https://github.com/Instabug/instabug-websdk.git
- Navigate to the cloned folder.
cd instabug-websdk
- Install the SDK.
yarn install
- Build the SDK.
yarn build
- Last, include the SDK file located in
build/instabug-sdk.min.jsinto your index page body.
<script src="/PATH/TO/instabug-sdk.min.js"></script>
Initialization Steps
Now that you included the JS file, you can start using the SDK. Below is the initialization method and its parameters:
<script>
  ibgSdk.init({
    zapierWebhookUrl: 'ZAPIER_WEBHOOK_URL',
    cloudinaryCloudName: 'CLOUDINARY_CLOUND_NAME',
    cloudinaryUploadPreset: 'CLOUDINARY_UPLOAD_PRESET',
  });
</script>
API Reference
.init(options)
This function initializes the SDK. When called, the Instabug button should become visible in your UI.
Parameters
options: Object required .
zapierWebhookUrl: webhook url you get from Zapier while creating a Zap. More details are mentioned here.cloudinaryCloudName: cloudinary cloud name, you can find it on your Cloudinary dashboard. More details are mentioned here.cloudinaryUploadPreset: cloudinary upload preset, you can find it on your Cloudinary dashboard. More details are mentioned here.
.disable()
Call this function to hide the Instabug button that invokes the bug reporting UI.
.enable()
Call this function to show the Instabug button that invokes the bug reporting UI.
.invoke()
Call this function to invoke the bug reporting UI manually from your code independently from the default Instabug button.
.dismiss()
Call this function to dismiss and close all the SDK windows.
Cloudinary Guide
Start by creating an account on Cloudinary. Then, you will need to fetch your cloud name and upload preset name as explained below.
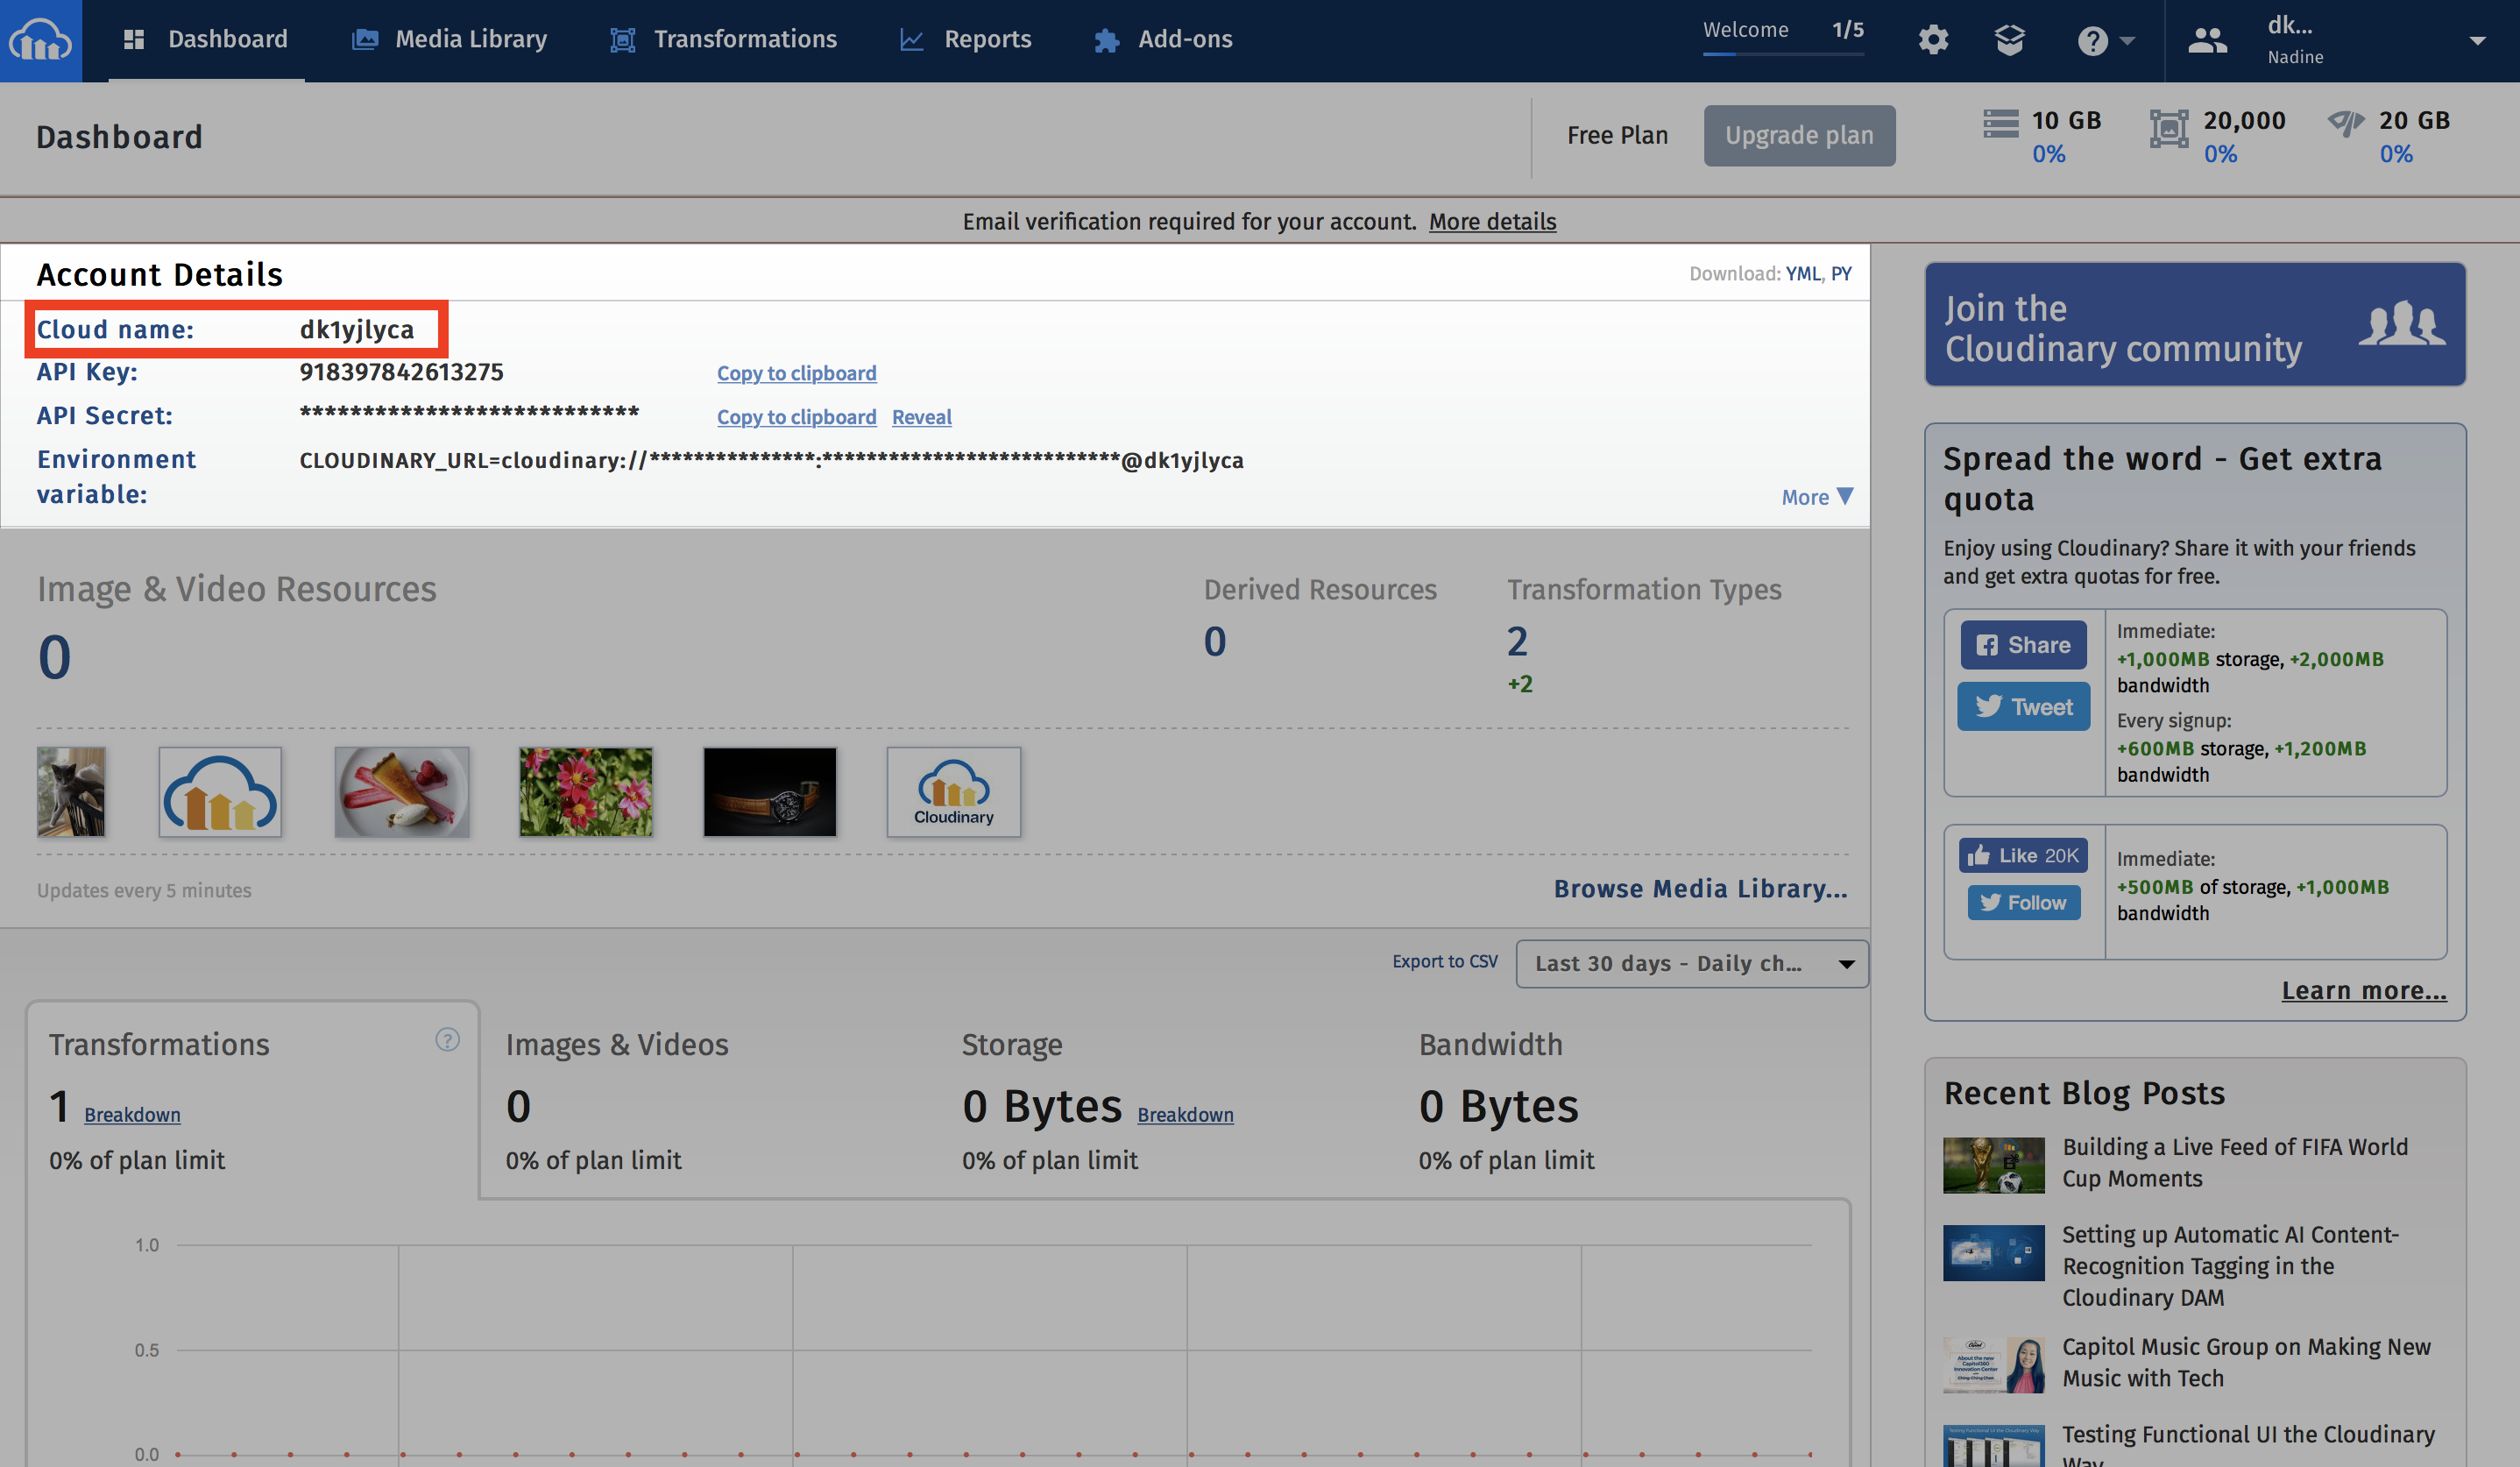
- Find your cloud name on your dashboard to use it in te init function.
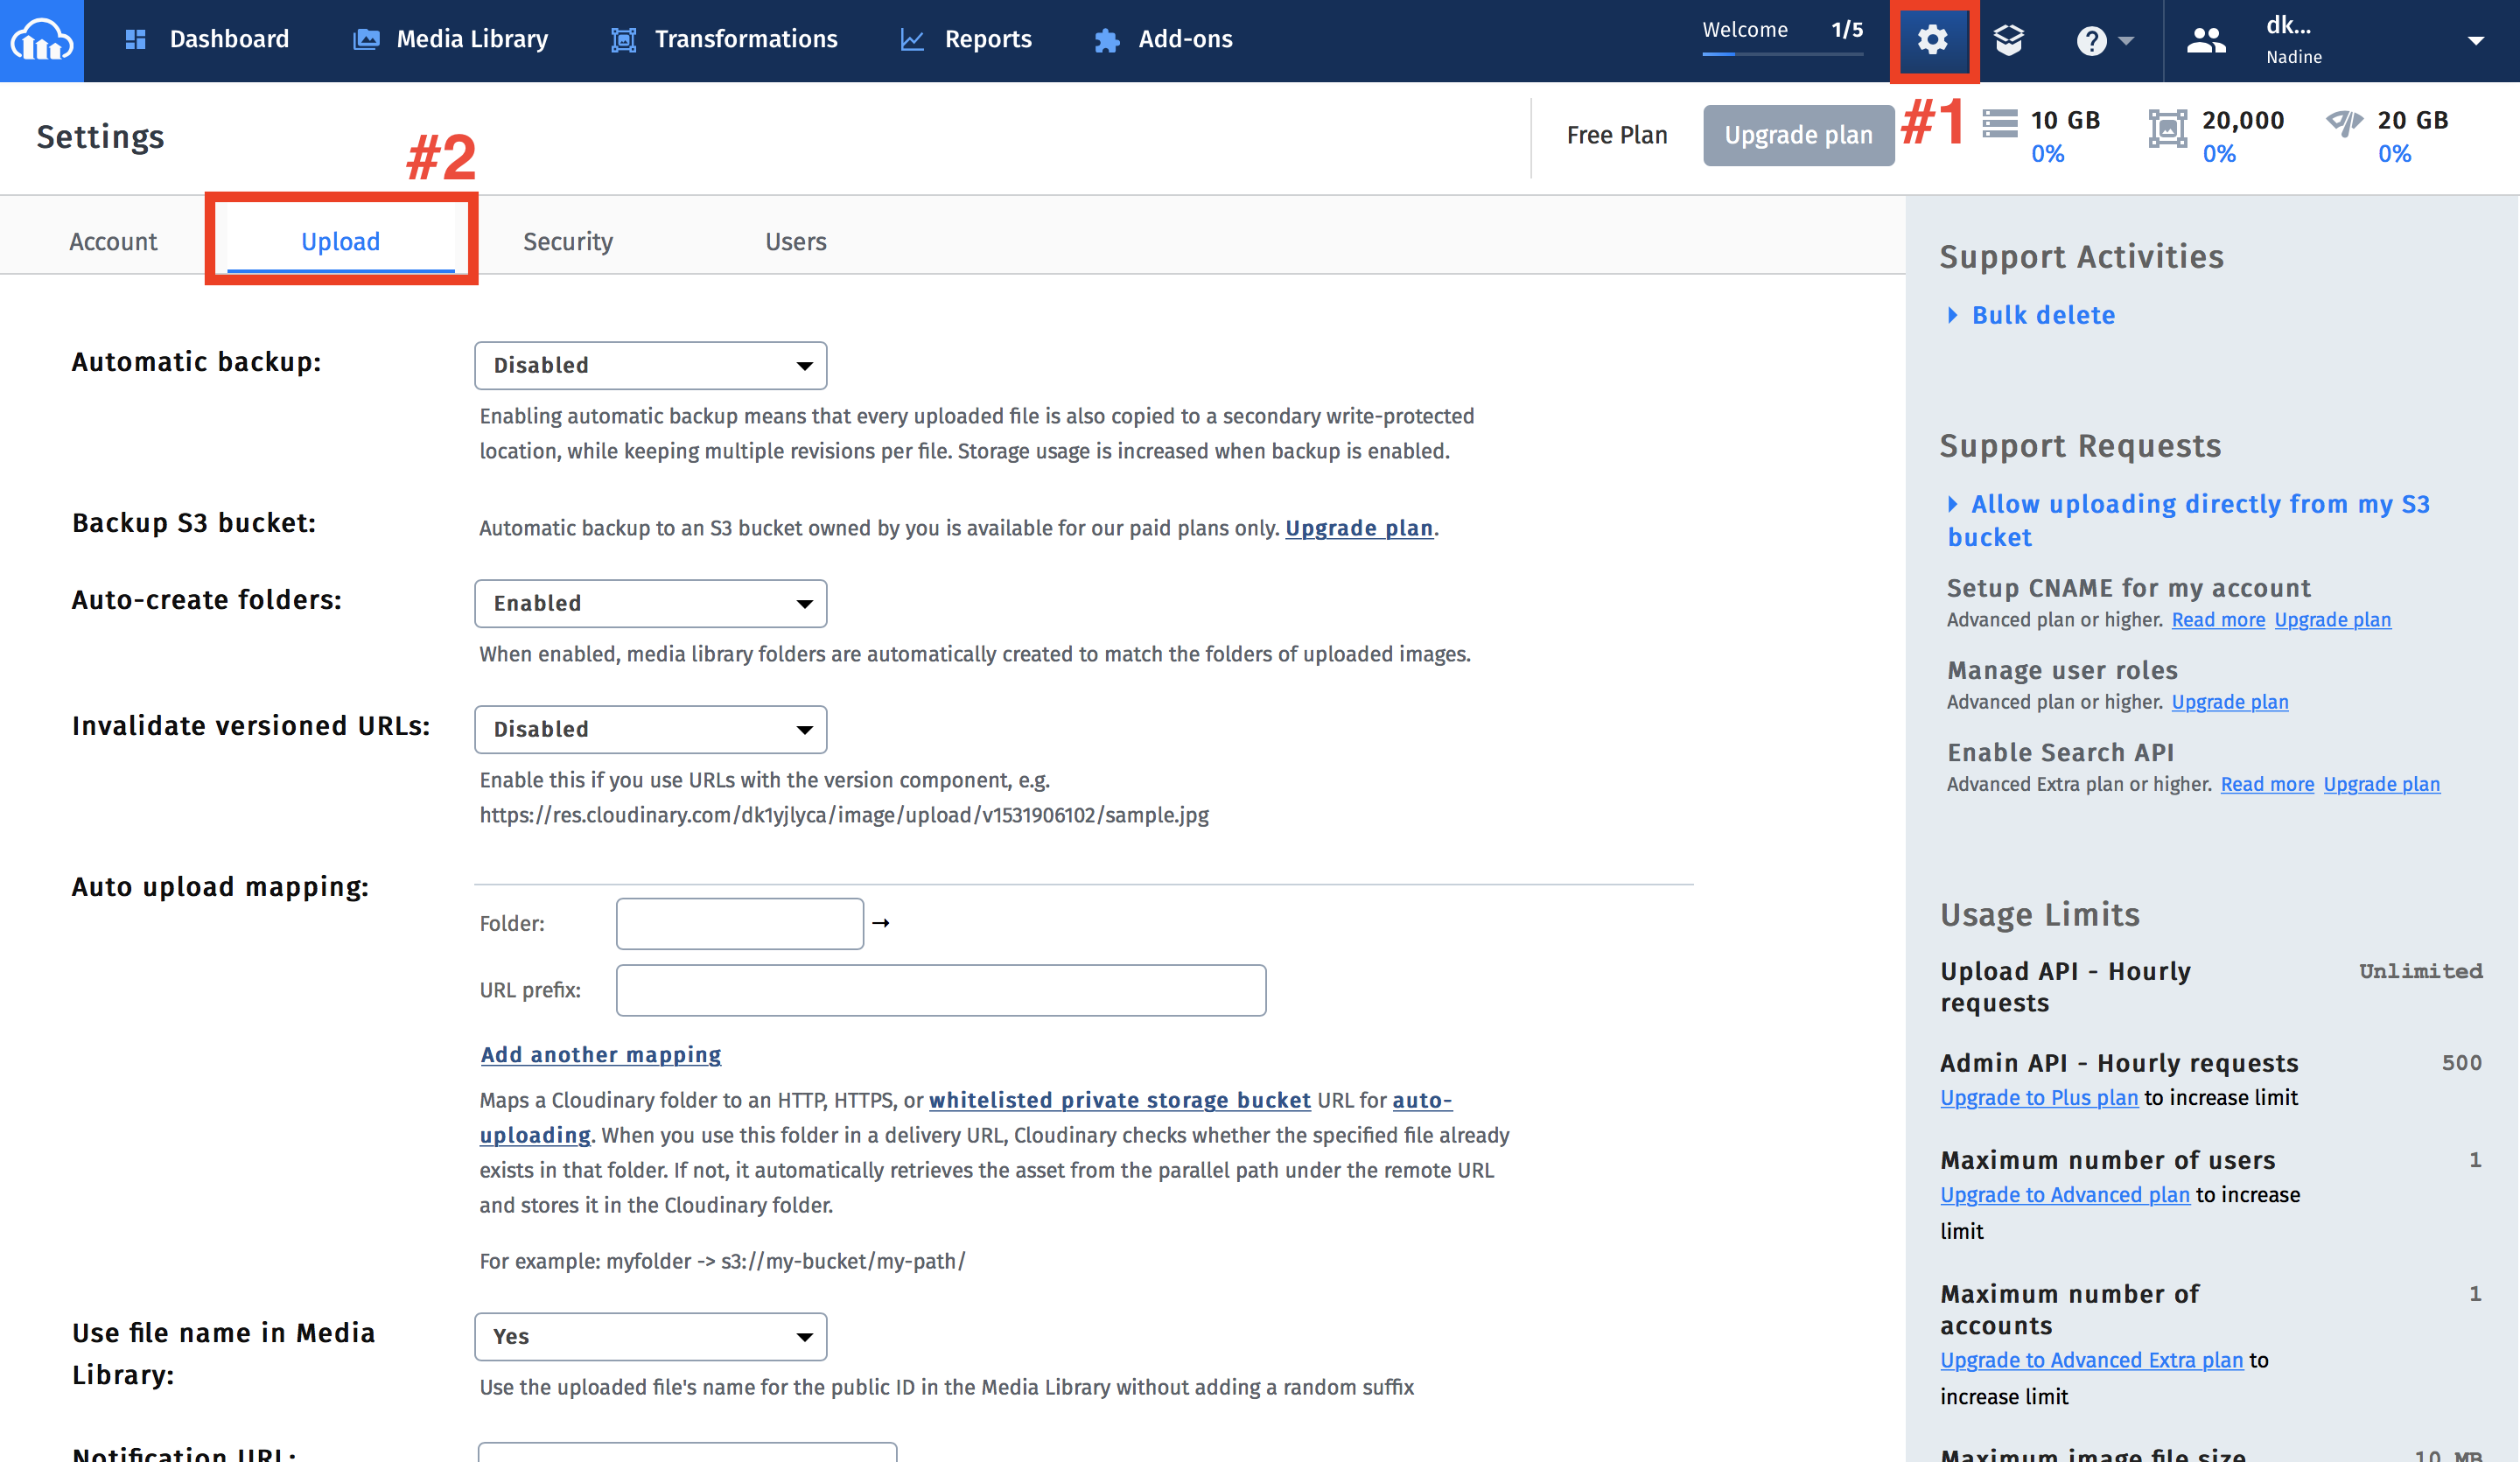
- Navigate to the Settings page, and open the Upload tab.
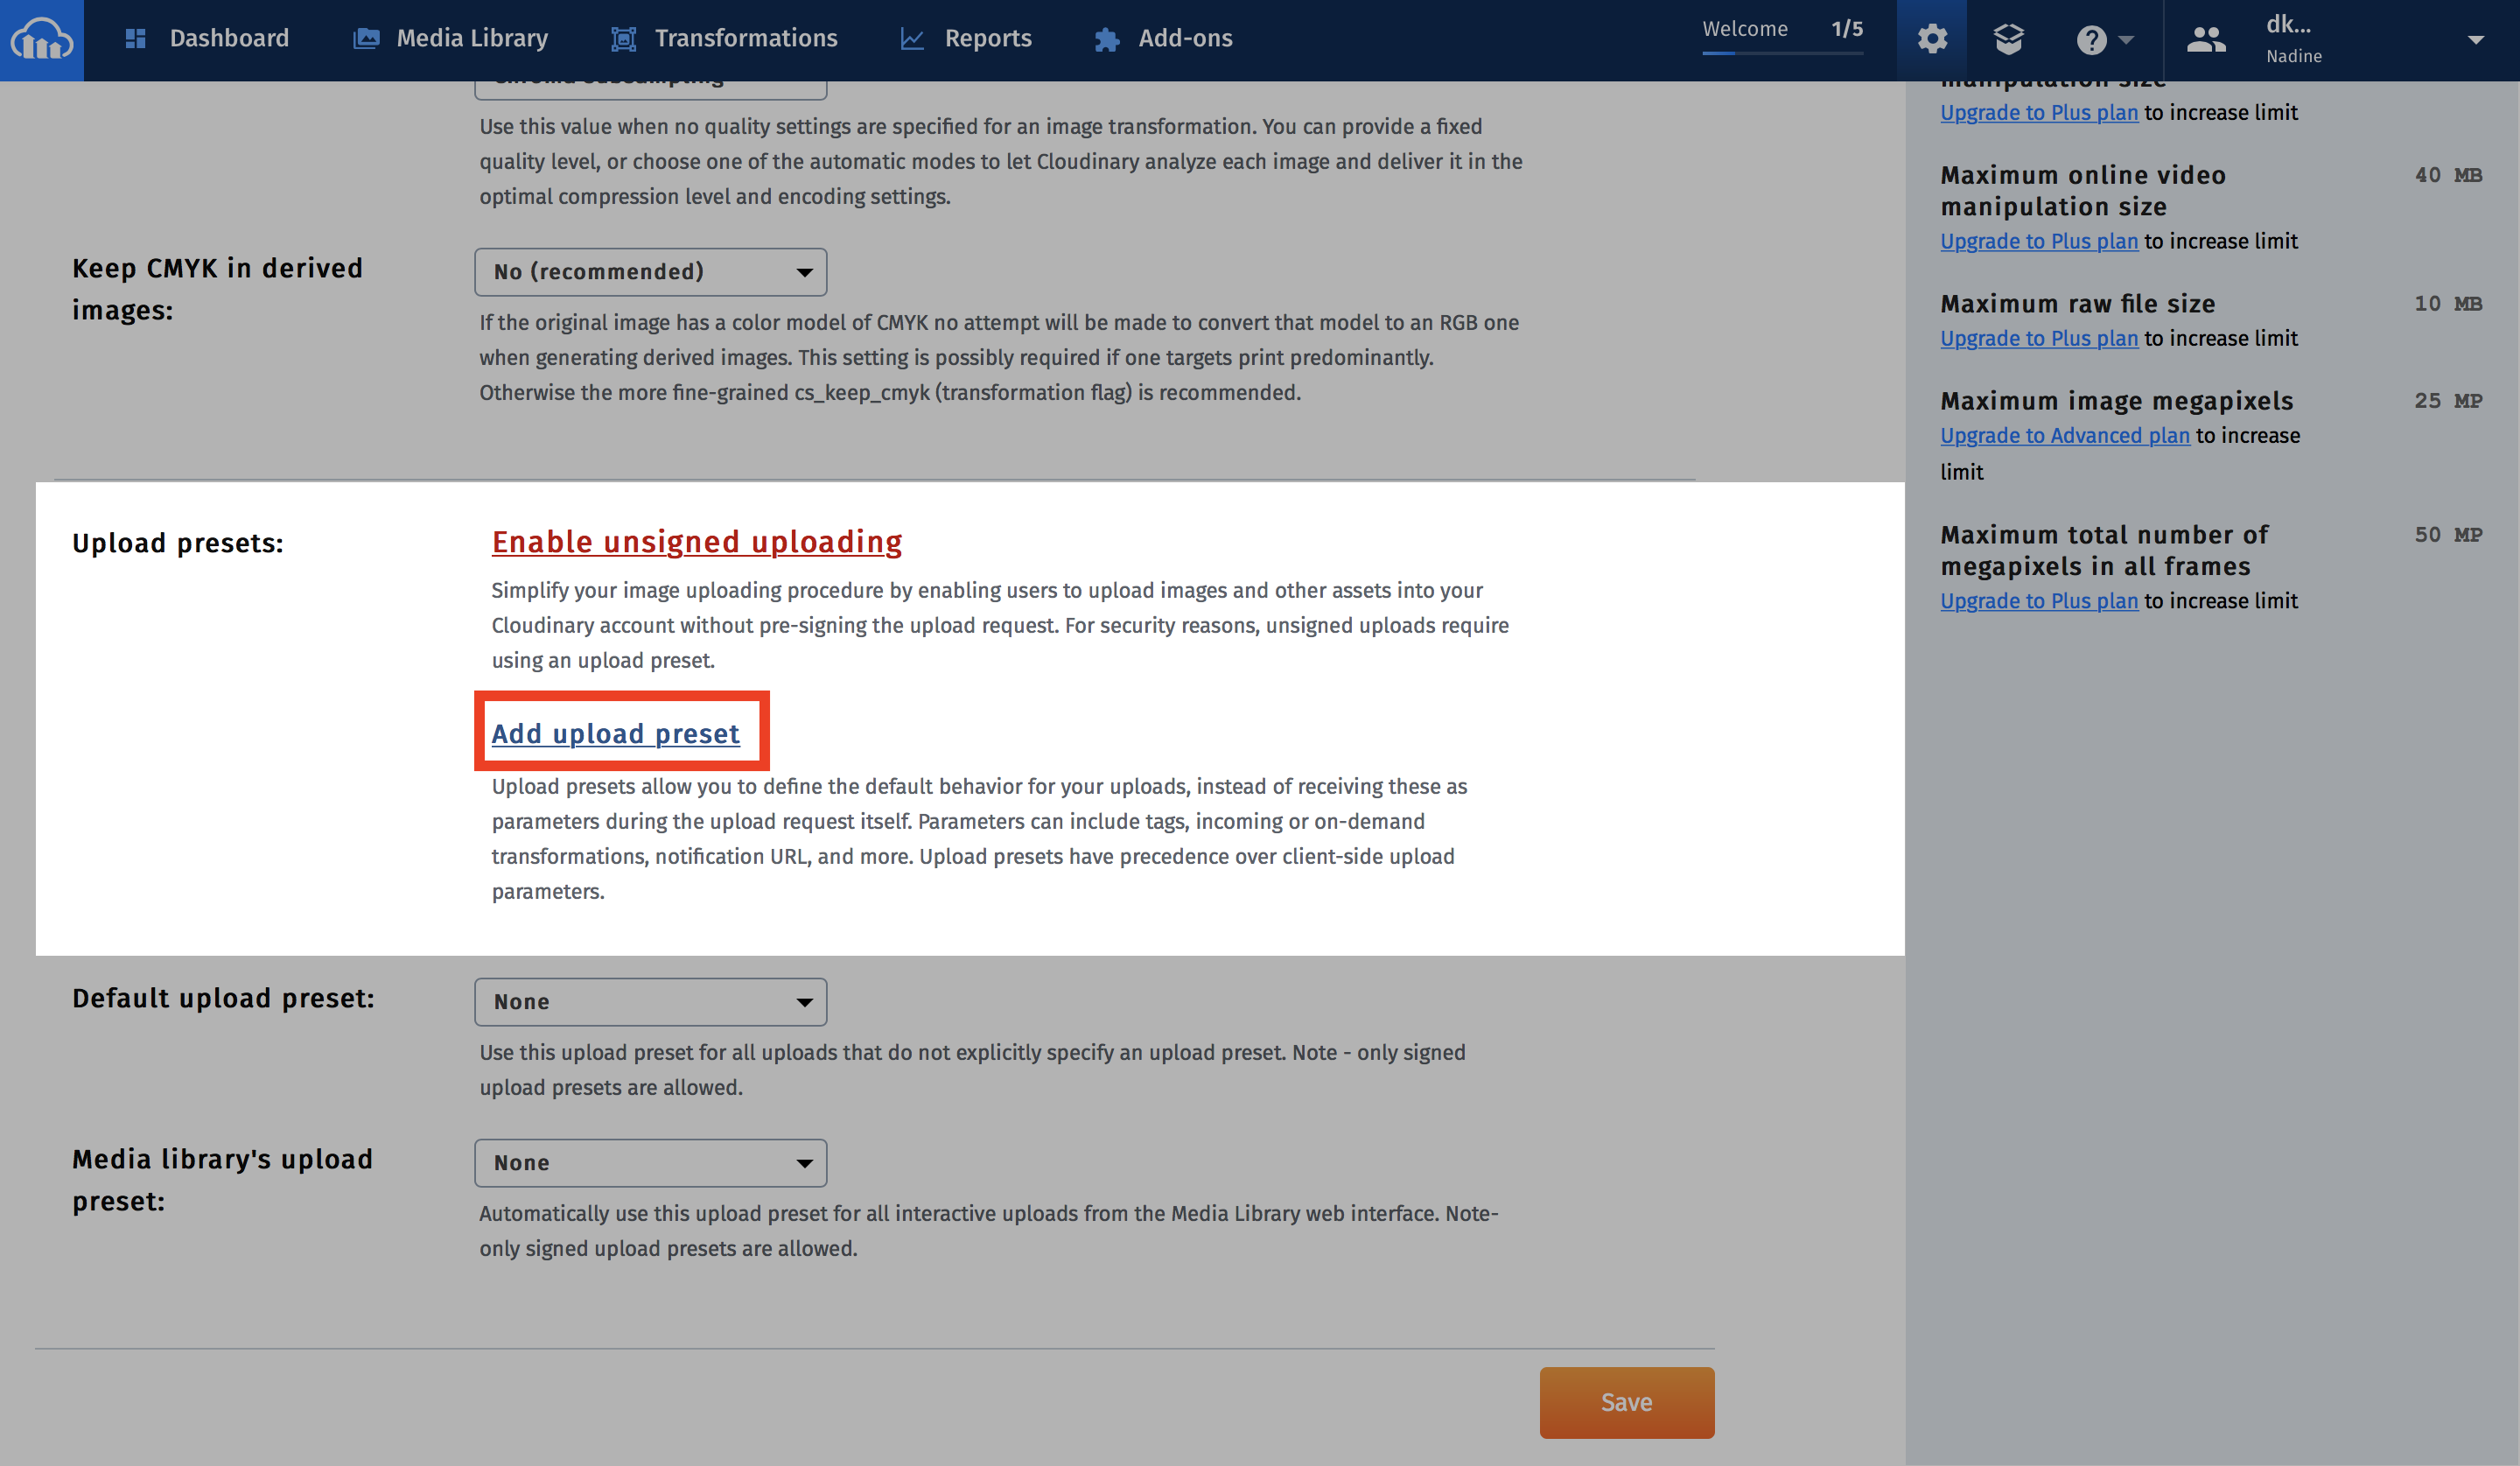
- Scroll down to the Upload Presets section, click on Enable Unsigned Uploading, then, click on Add upload preset.
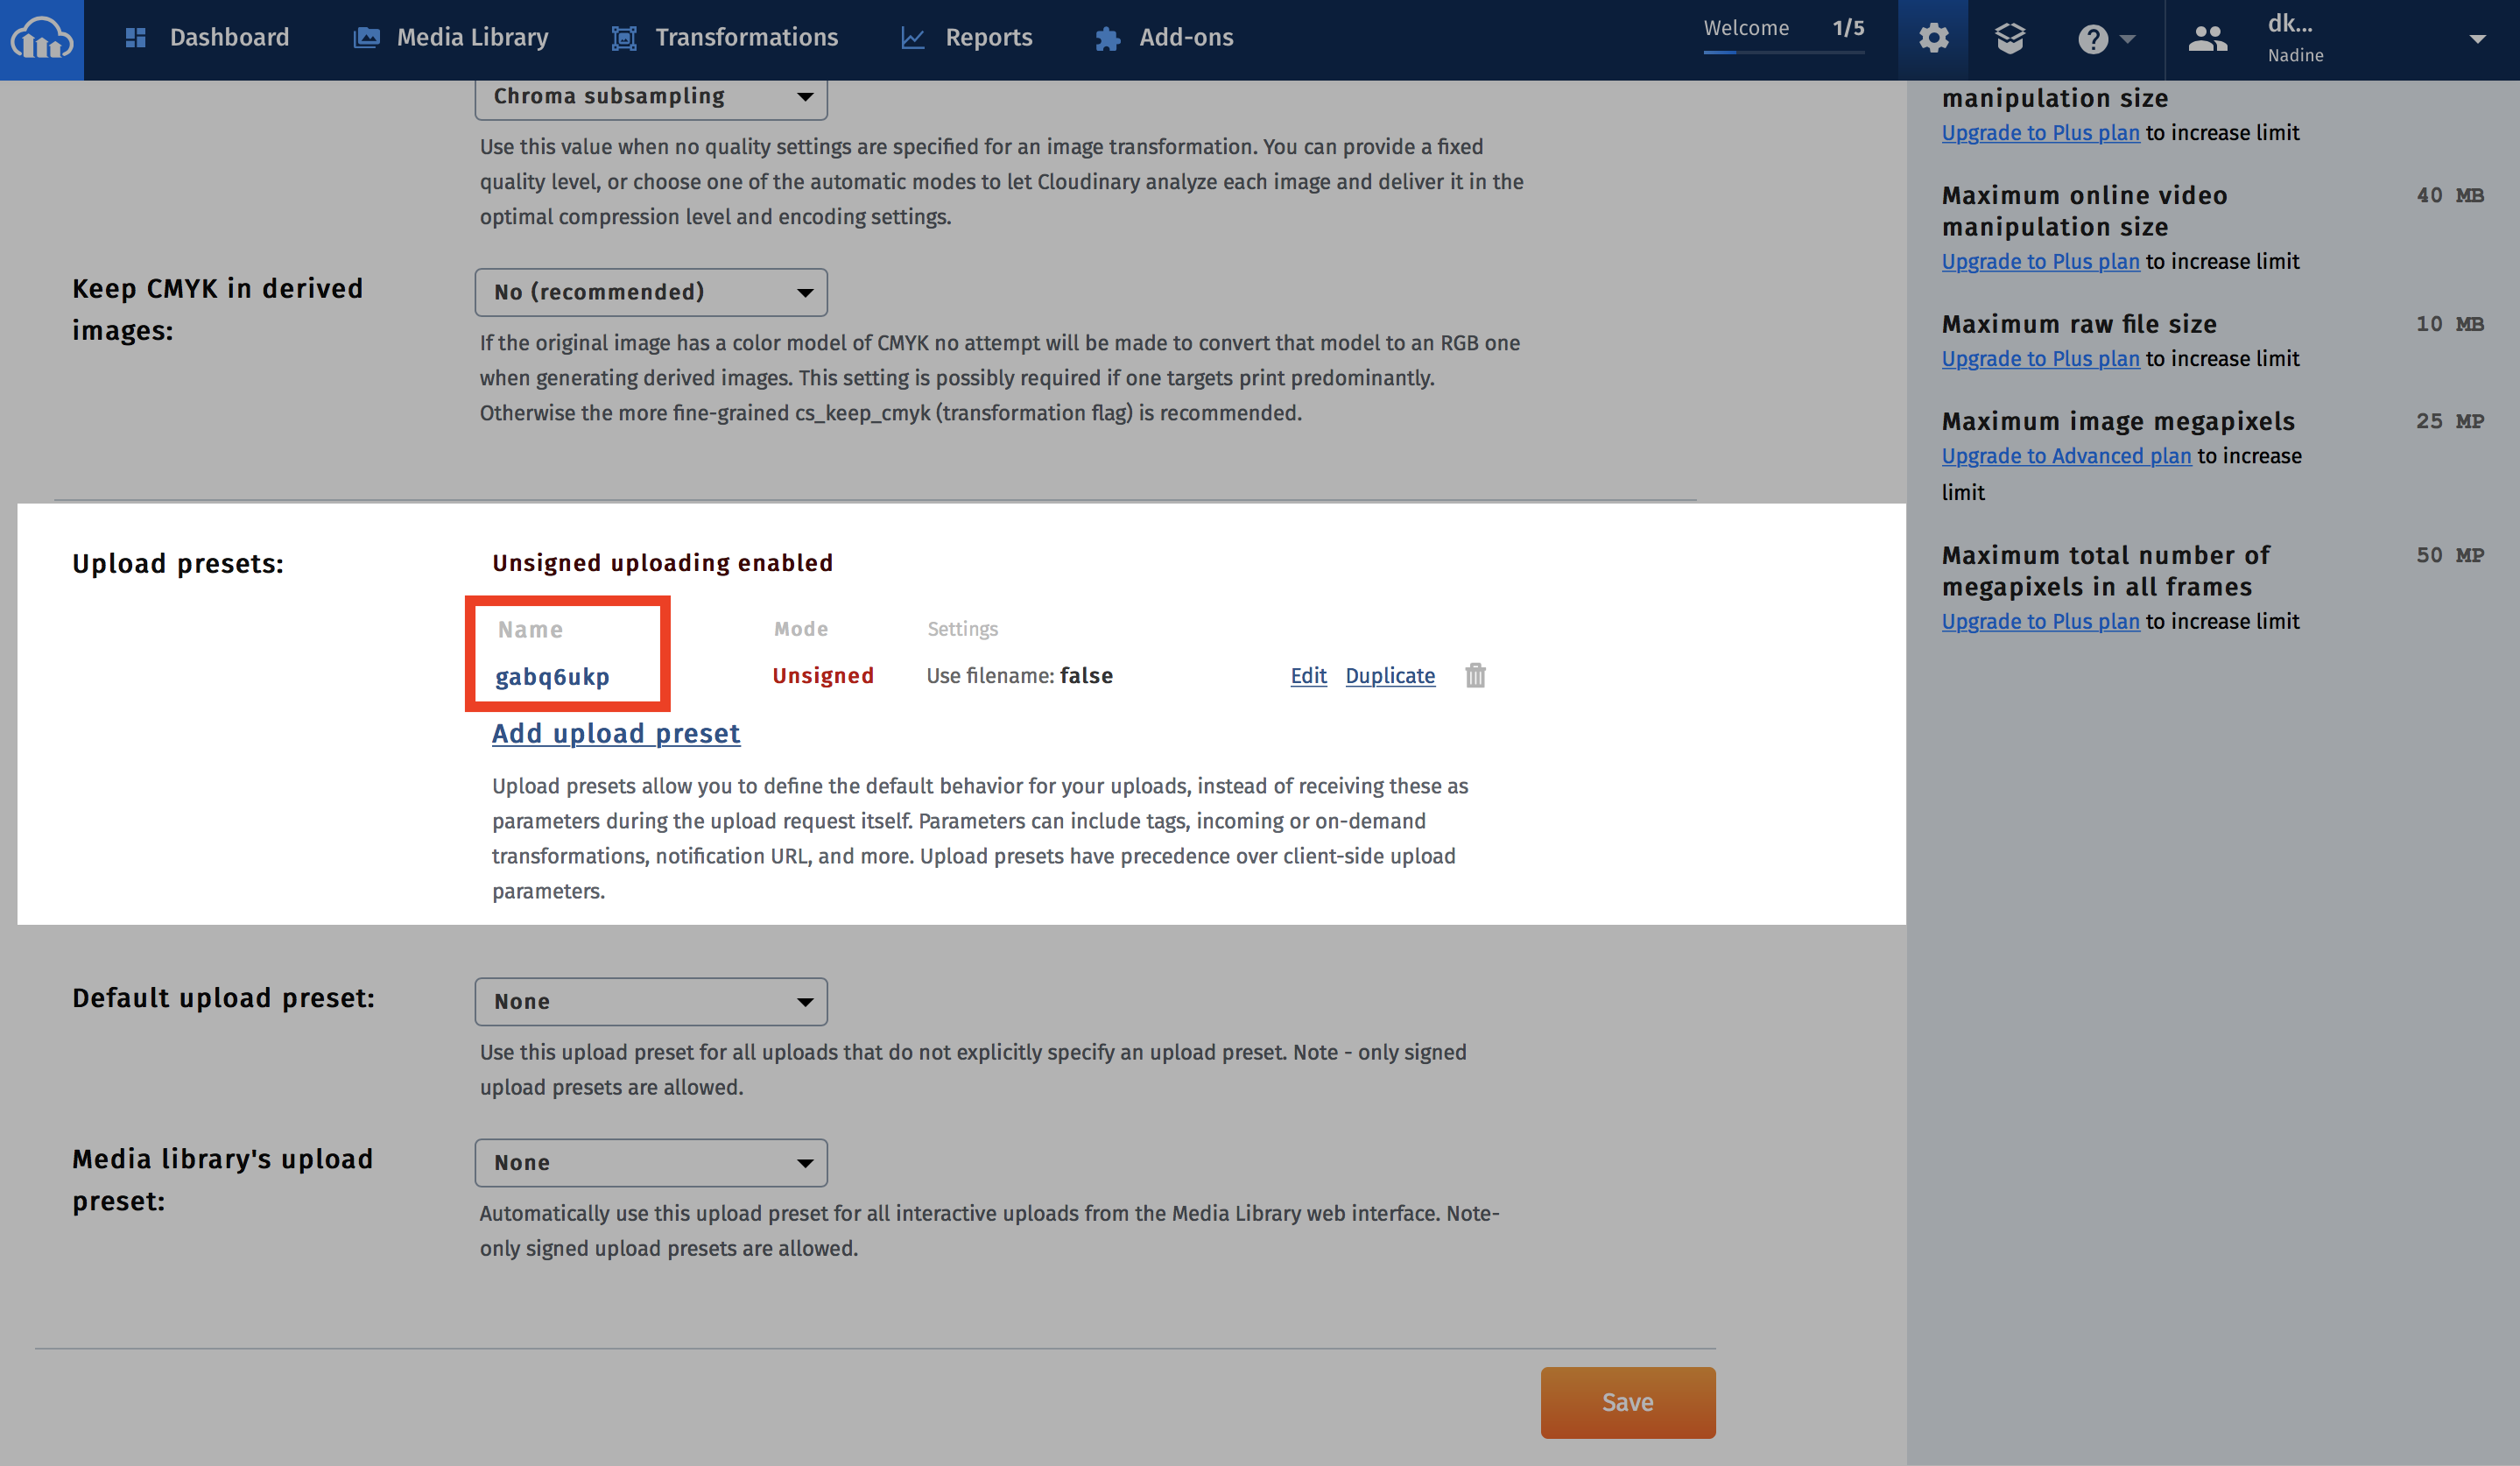
- The upload preset name will be generated to use in the init function.
Zapier Guide
Create an account on Zapier to automatically forward your bug reports to the tool you prefer. You can find below the steps to create a new Zap.
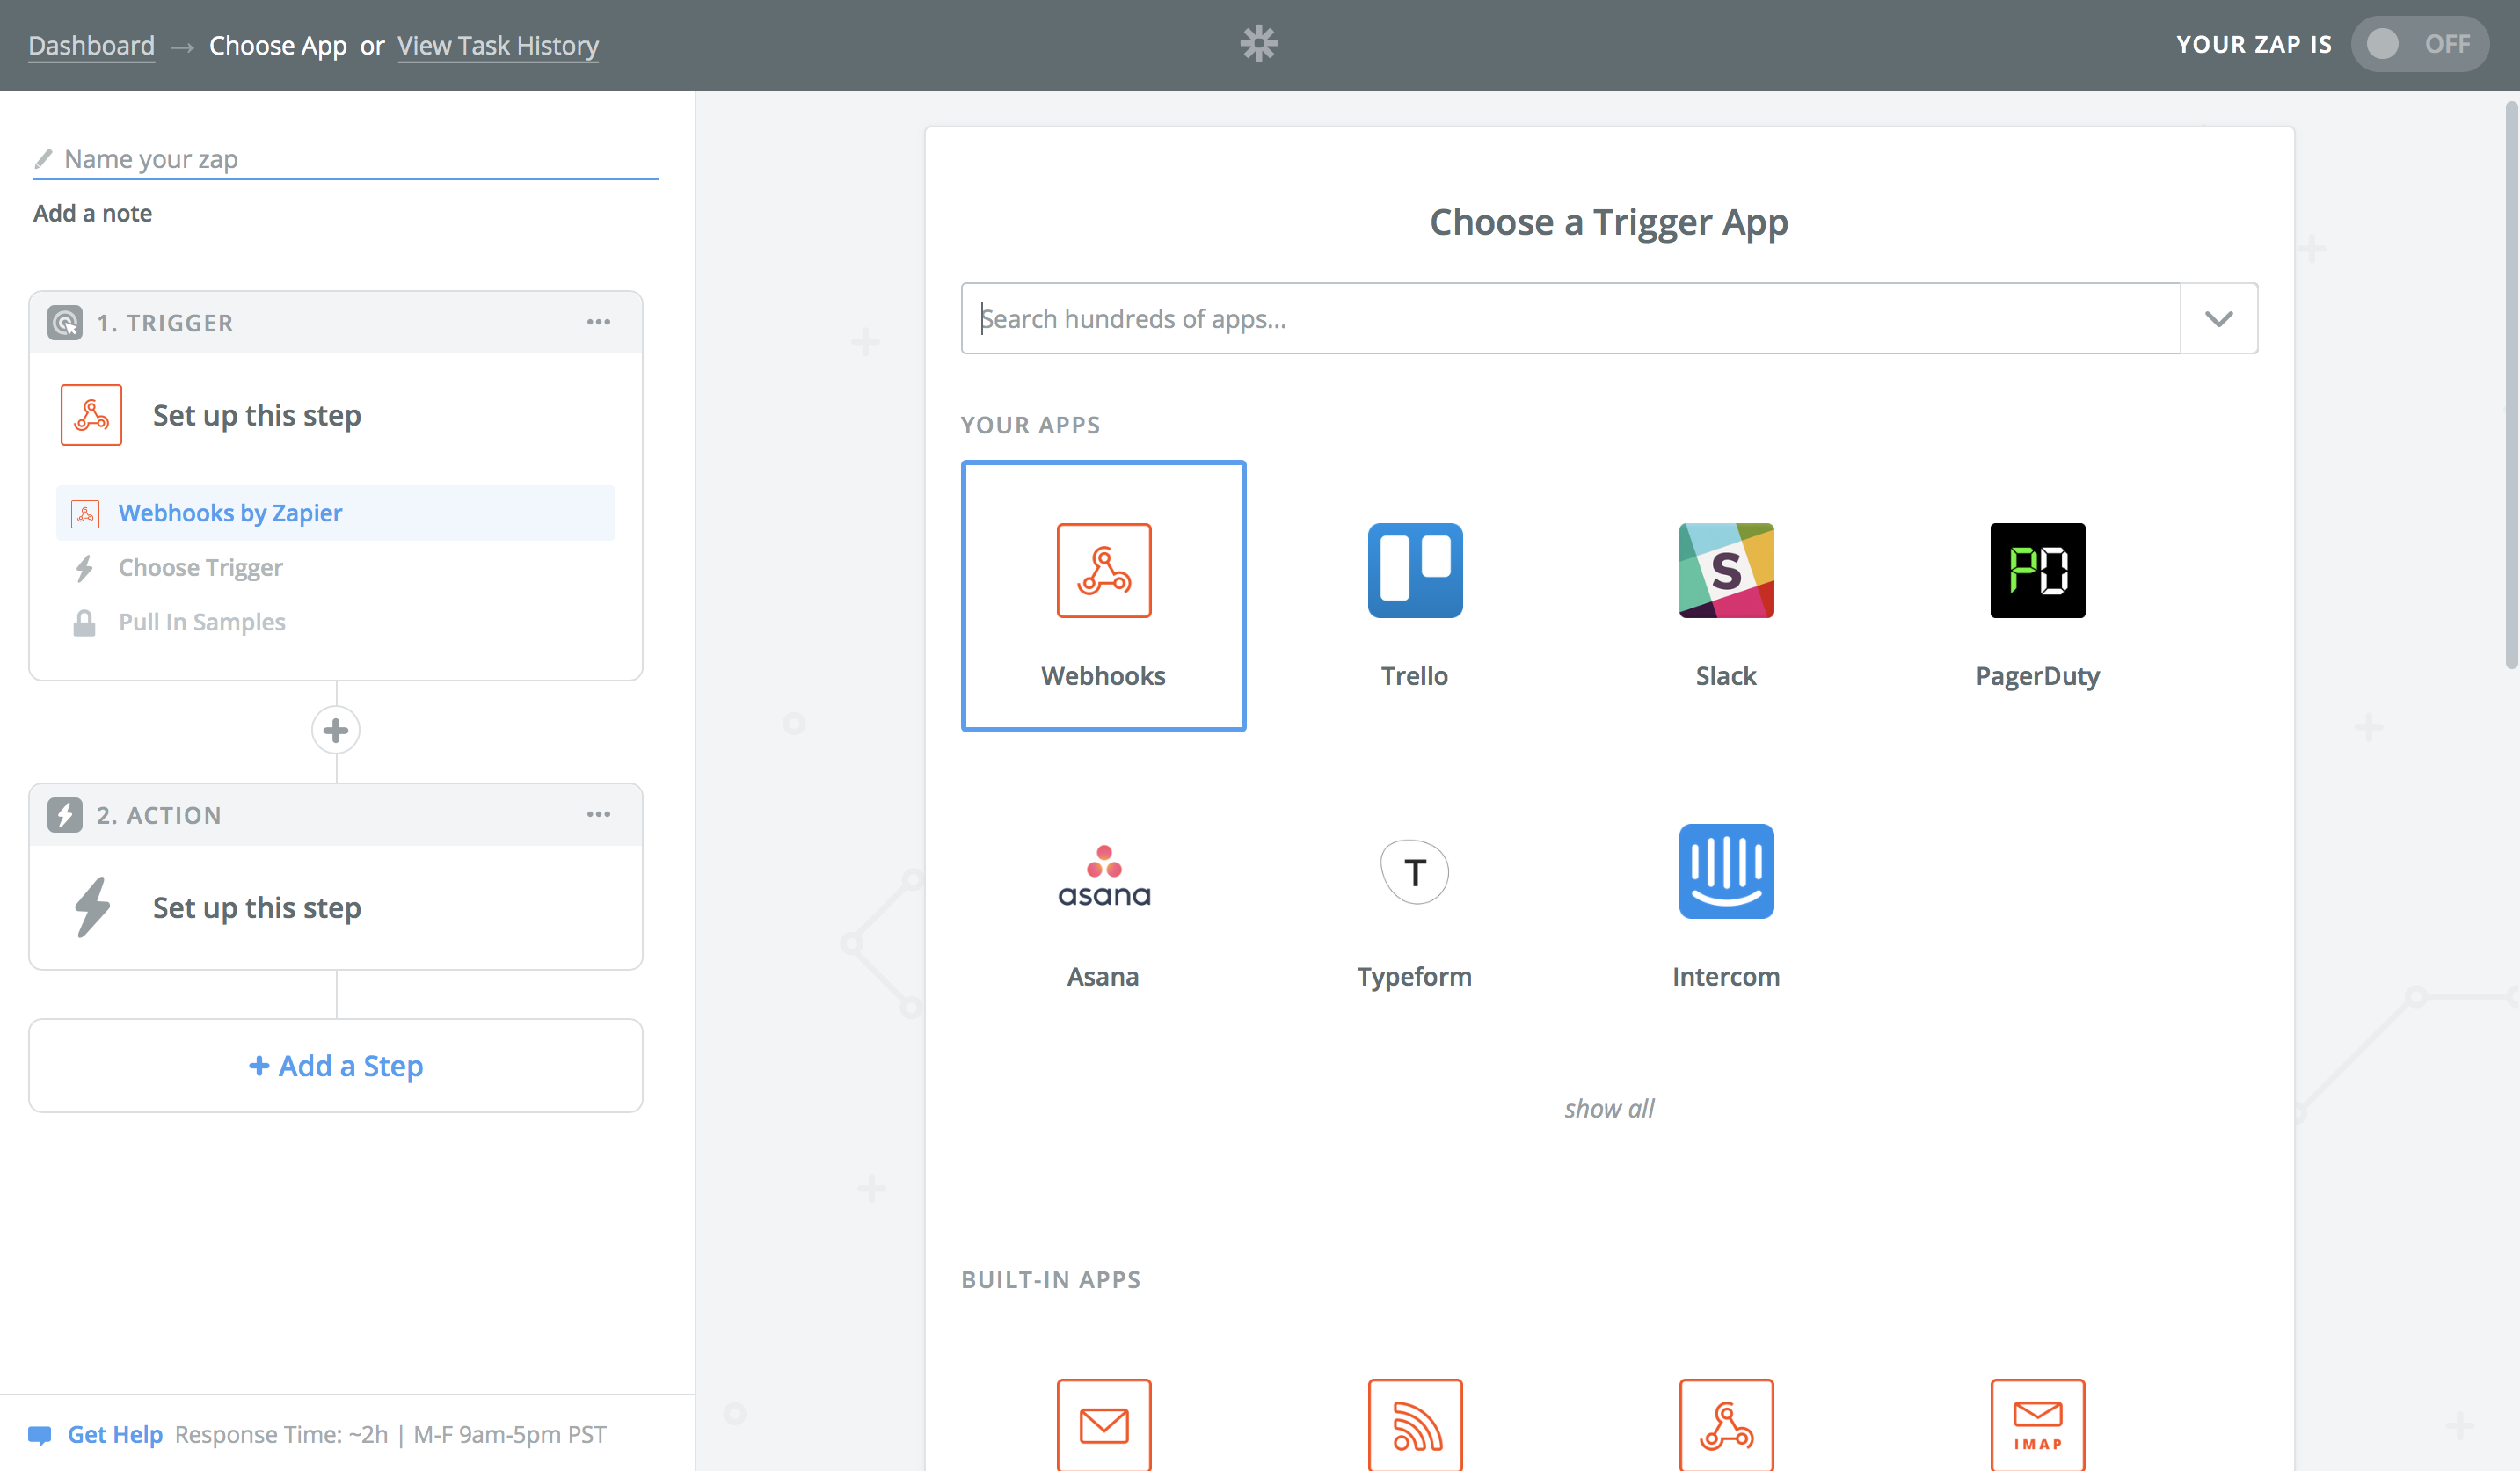
- Select Webhooks to be your trigger app.
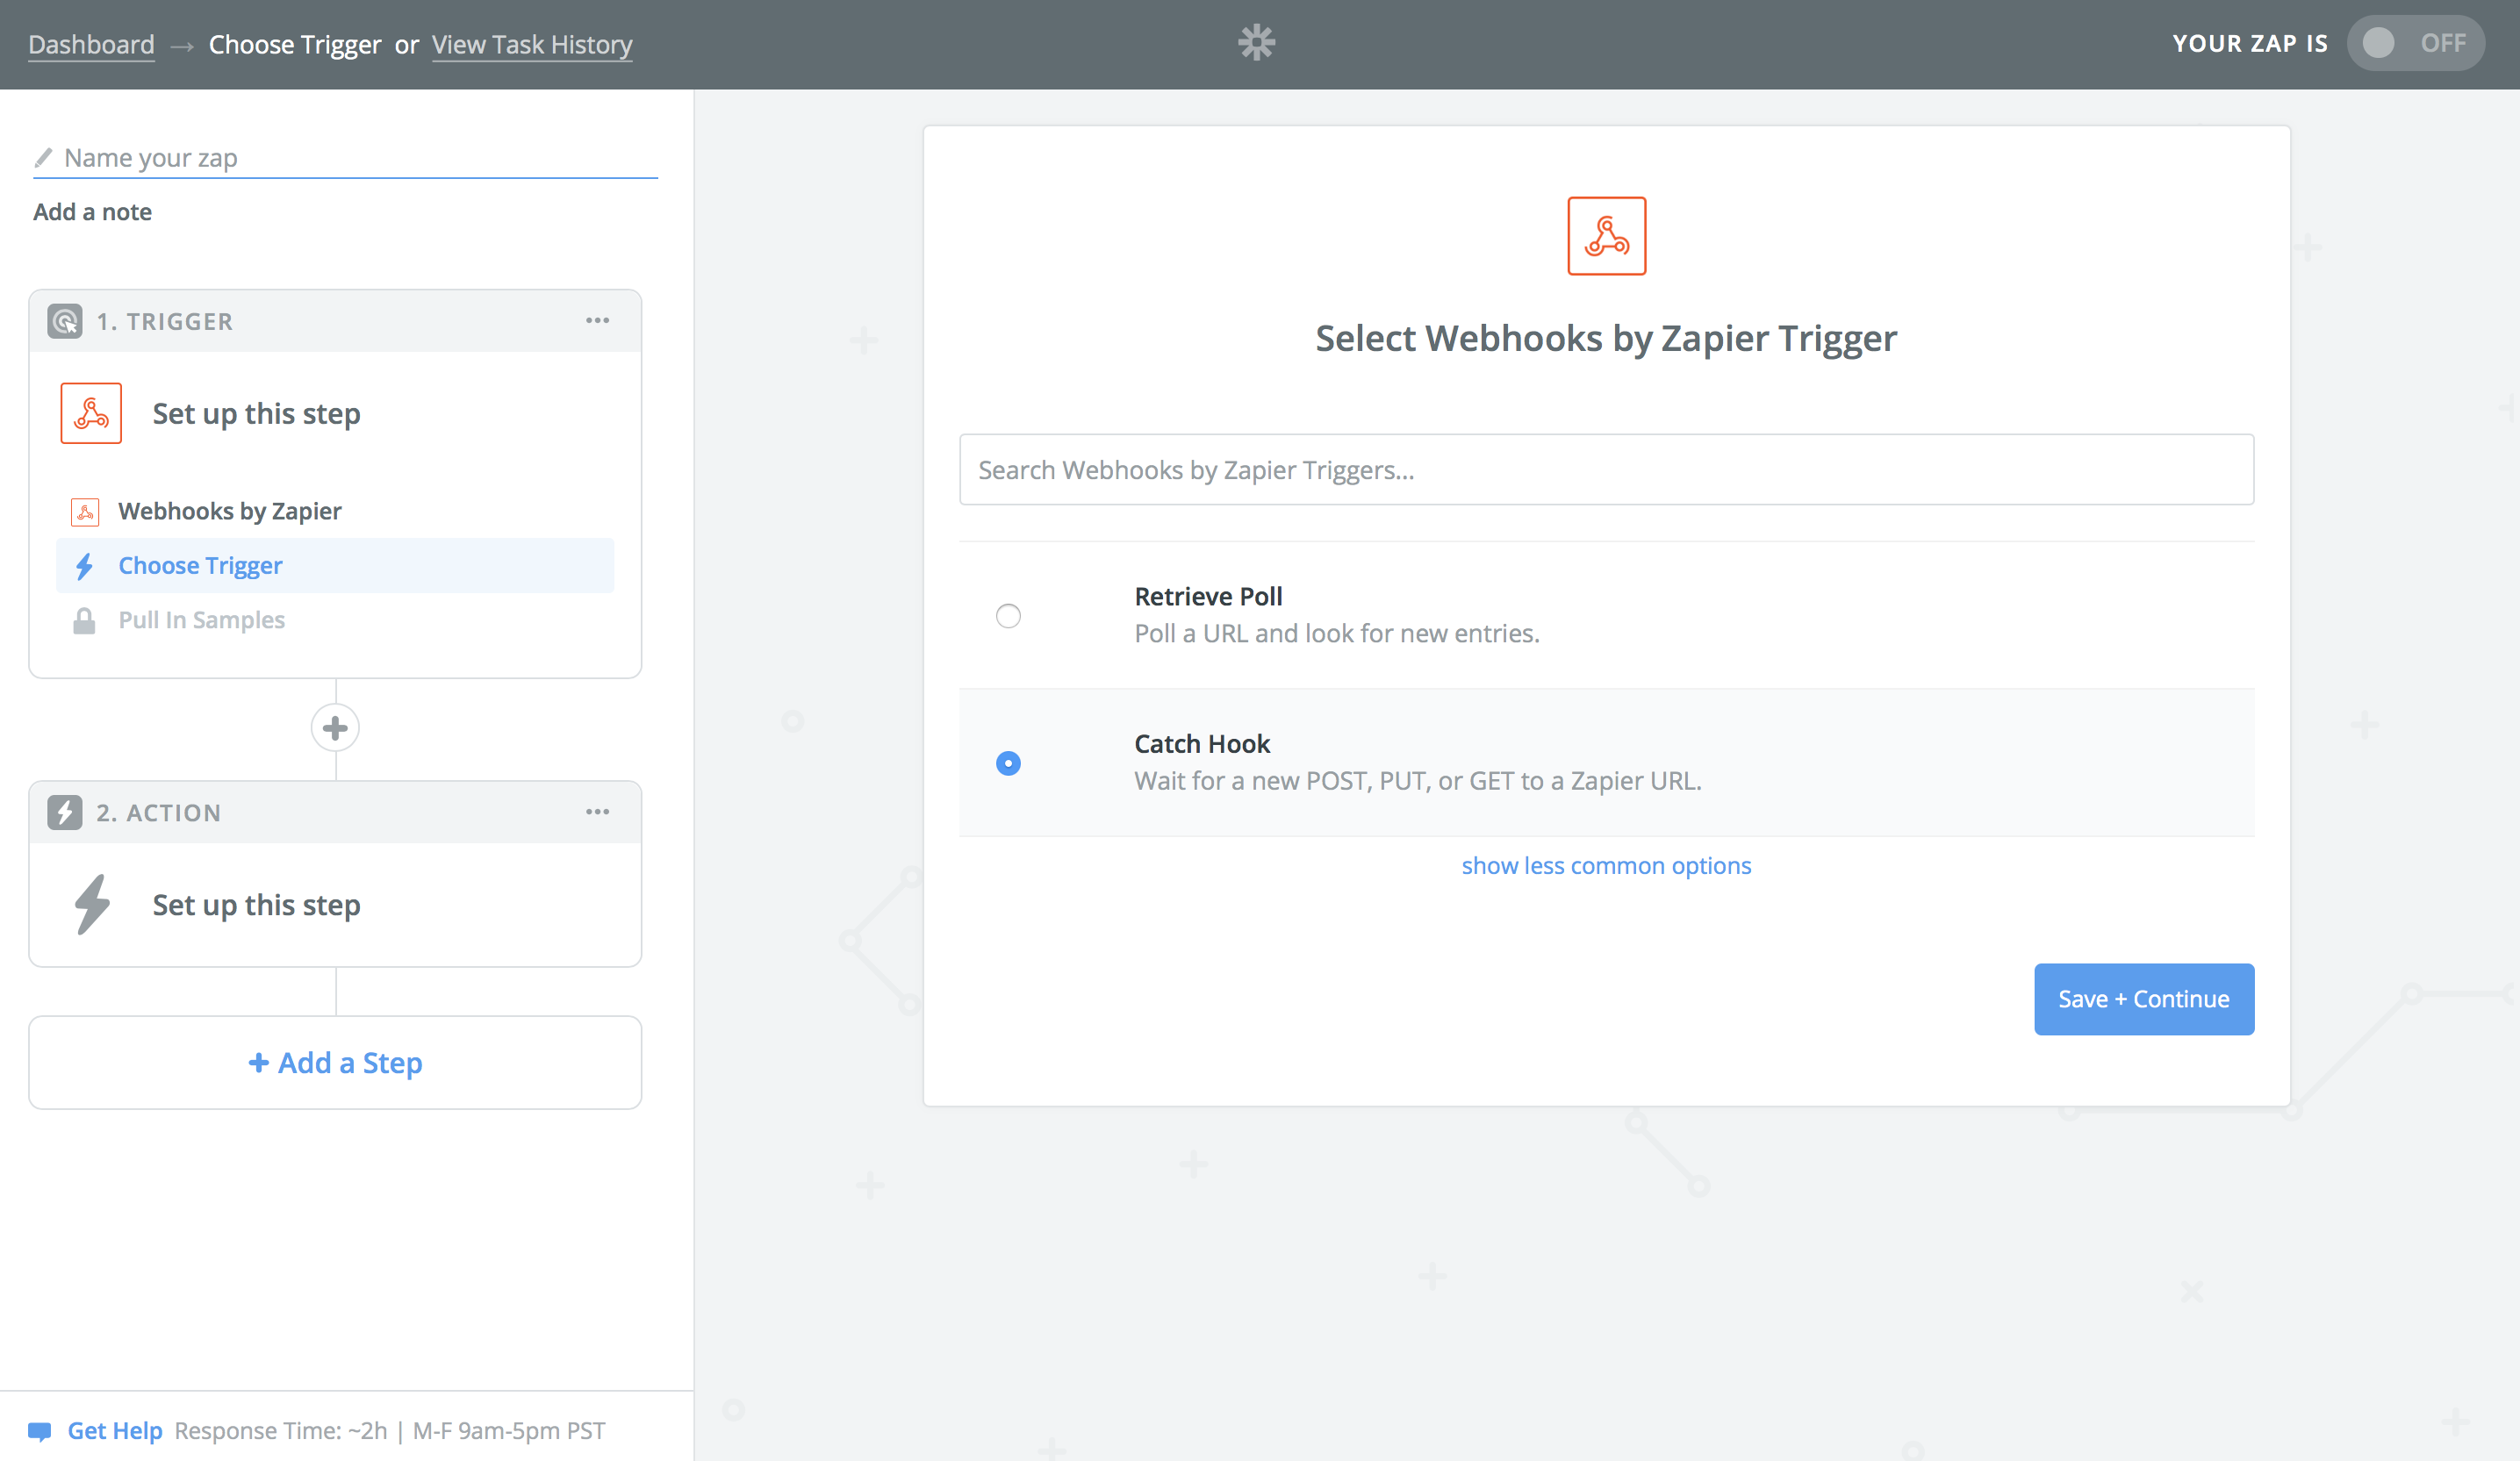
- Choose Catch Hook as your trigger.
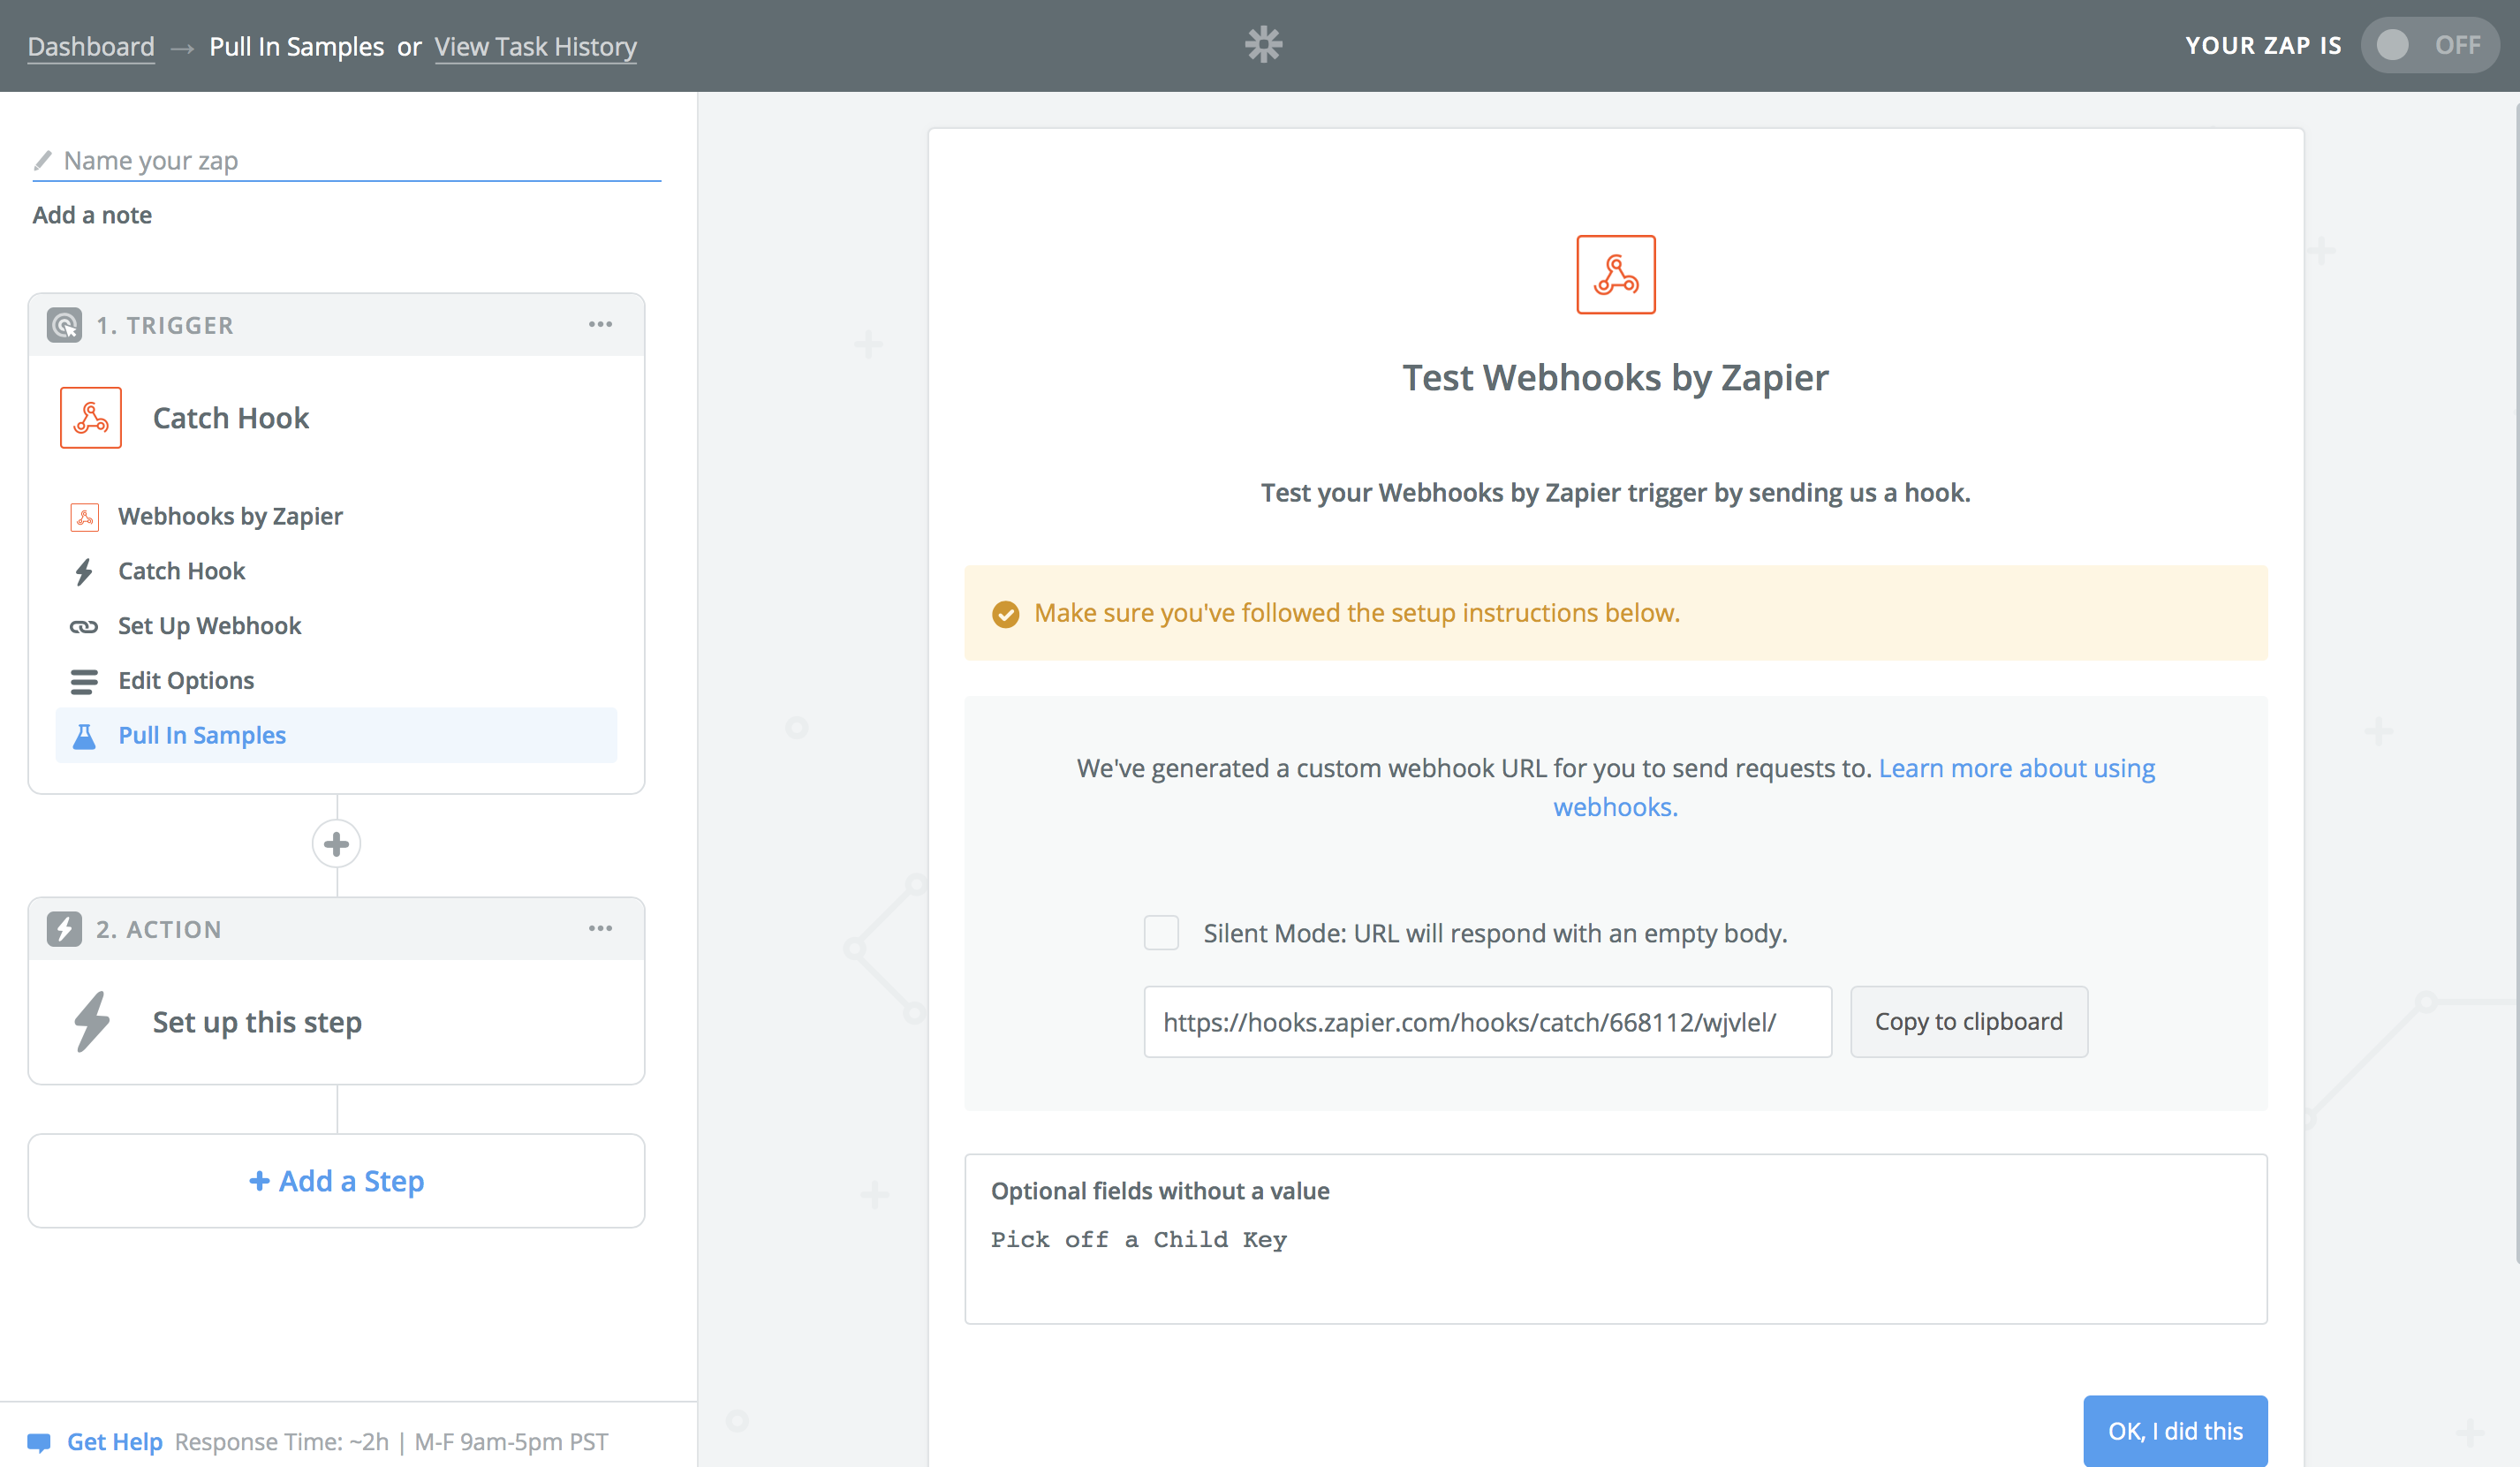
- In the Pull in Samples step, copy the URL to be used in the init function.
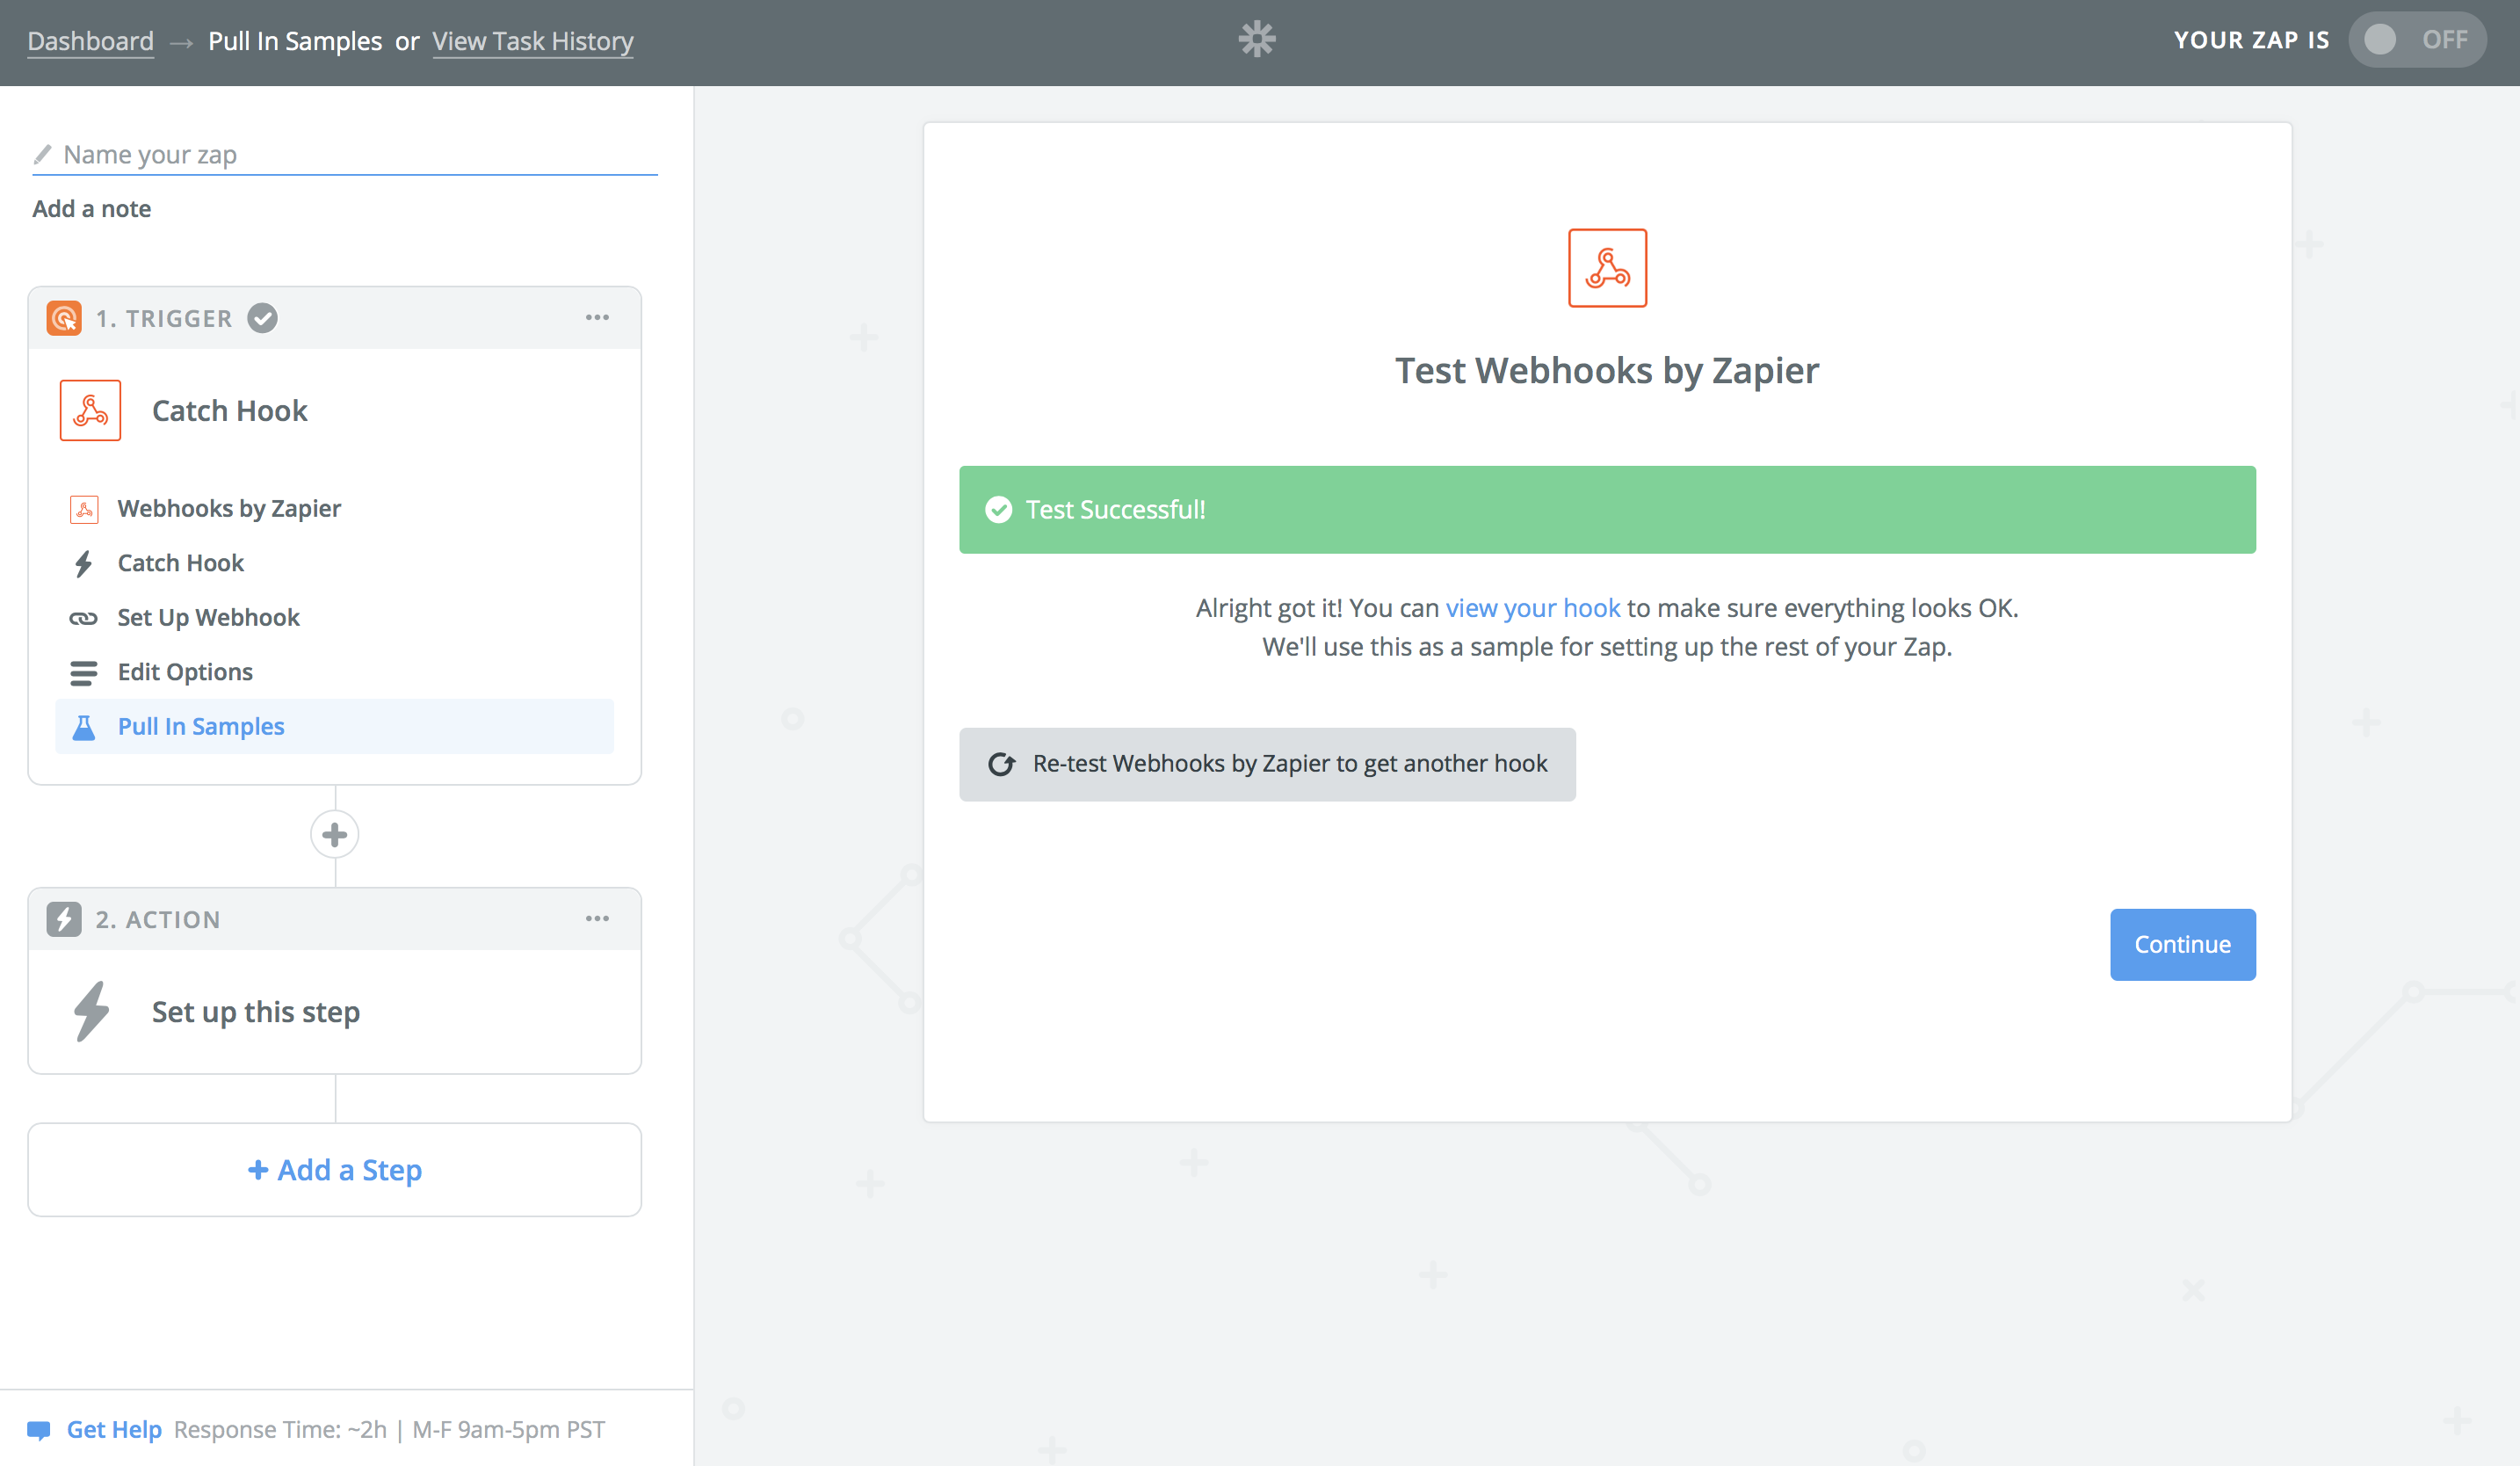
- While you're still at the same step, try sending a sample bug report. You should then see the success message as displayed below.
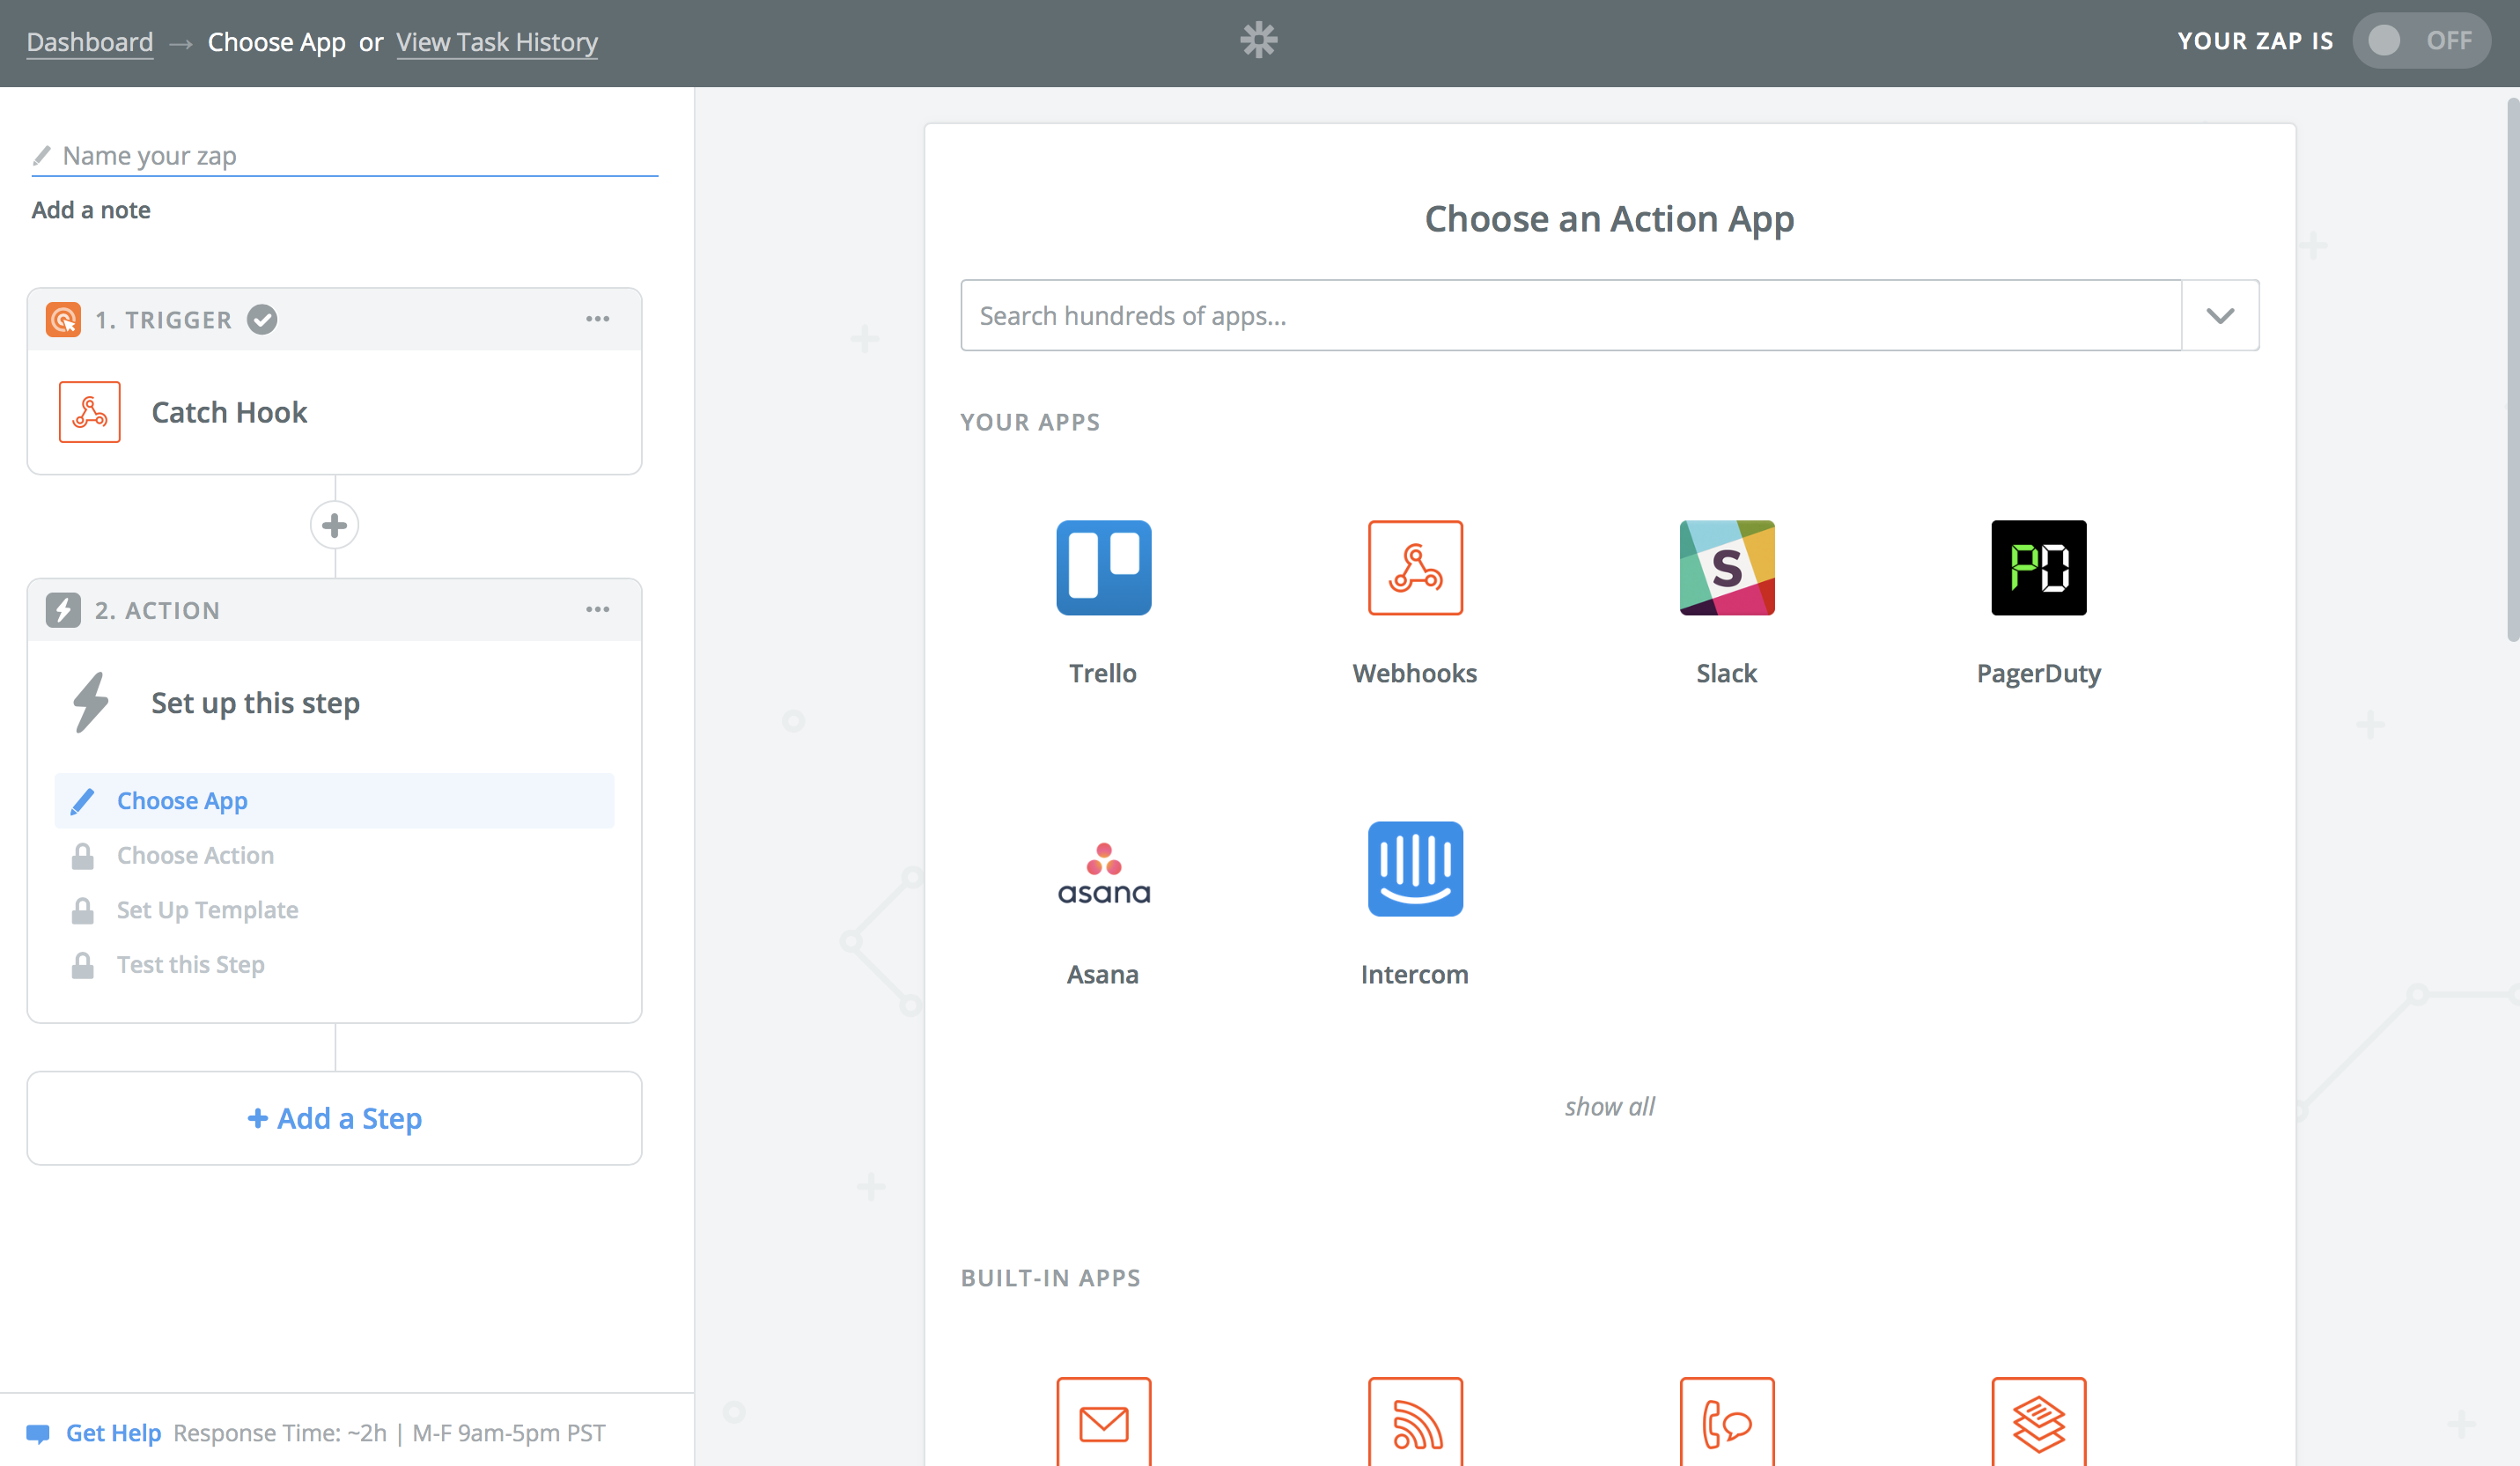
- Now, you're ready to set up the action. Pick the app you prefer and follow its required steps. In this guide, we're using Slack as an example.
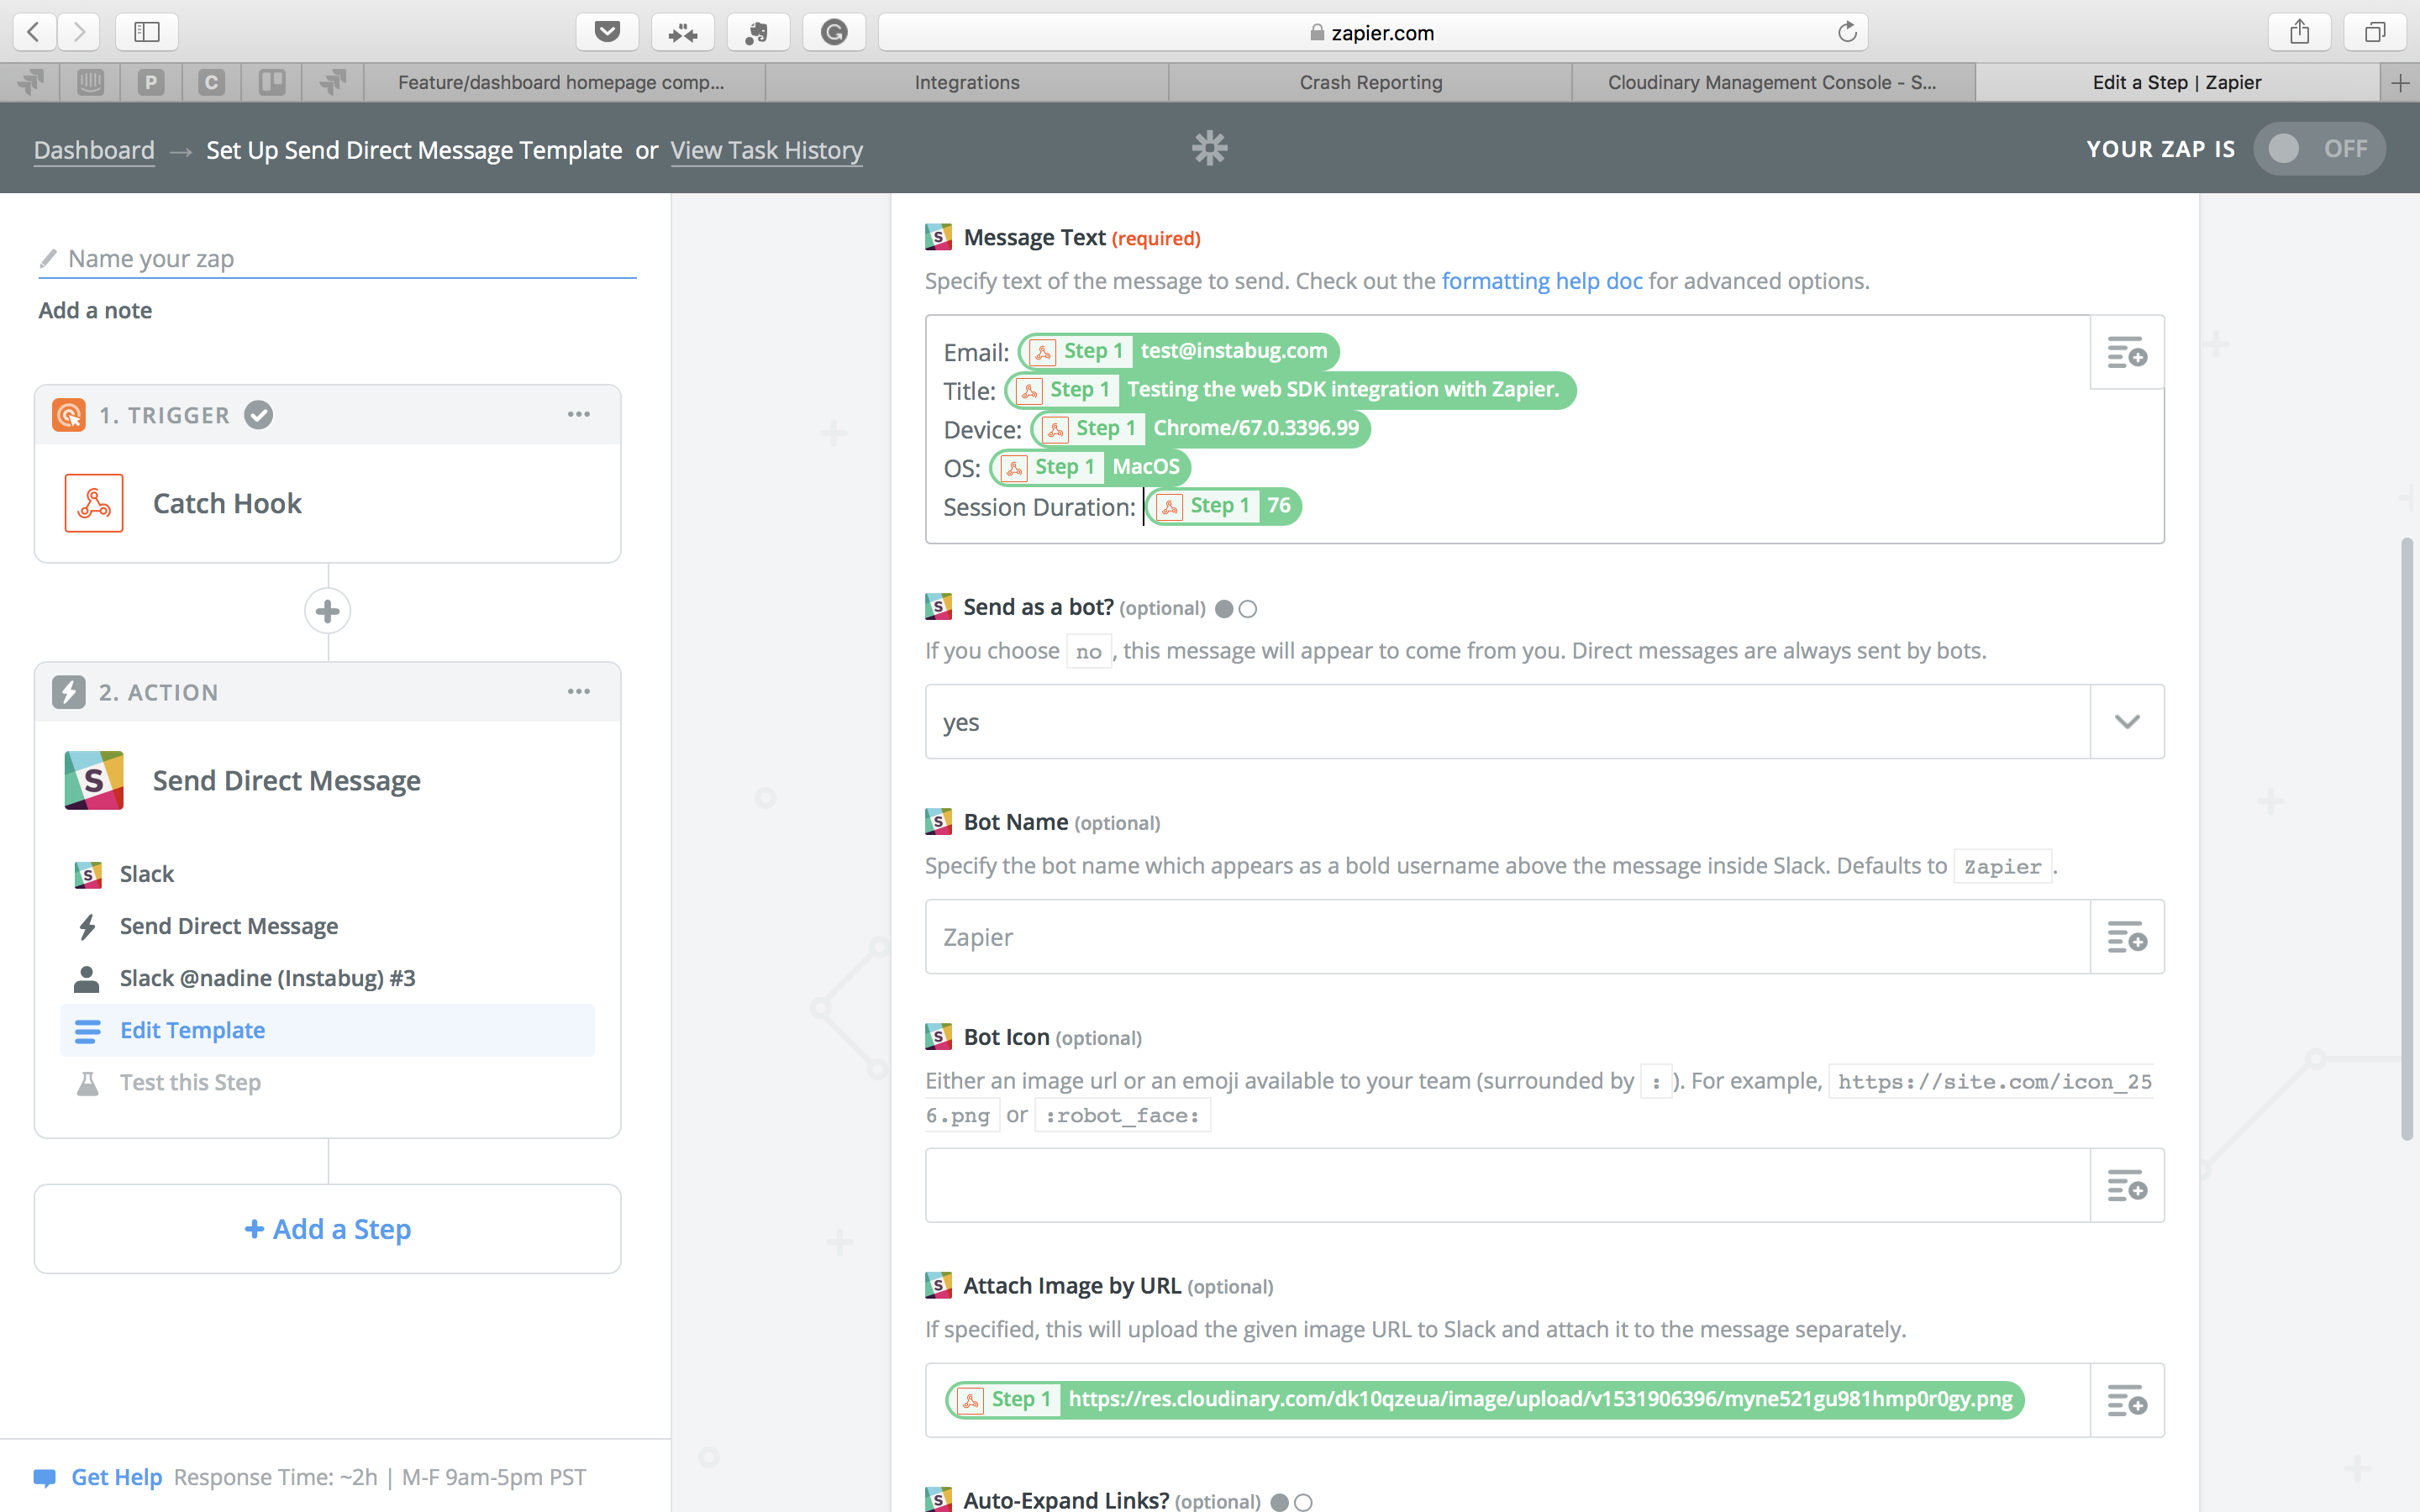
- In the Edit Template step, you can customize the format of the bug report you will be receiving.
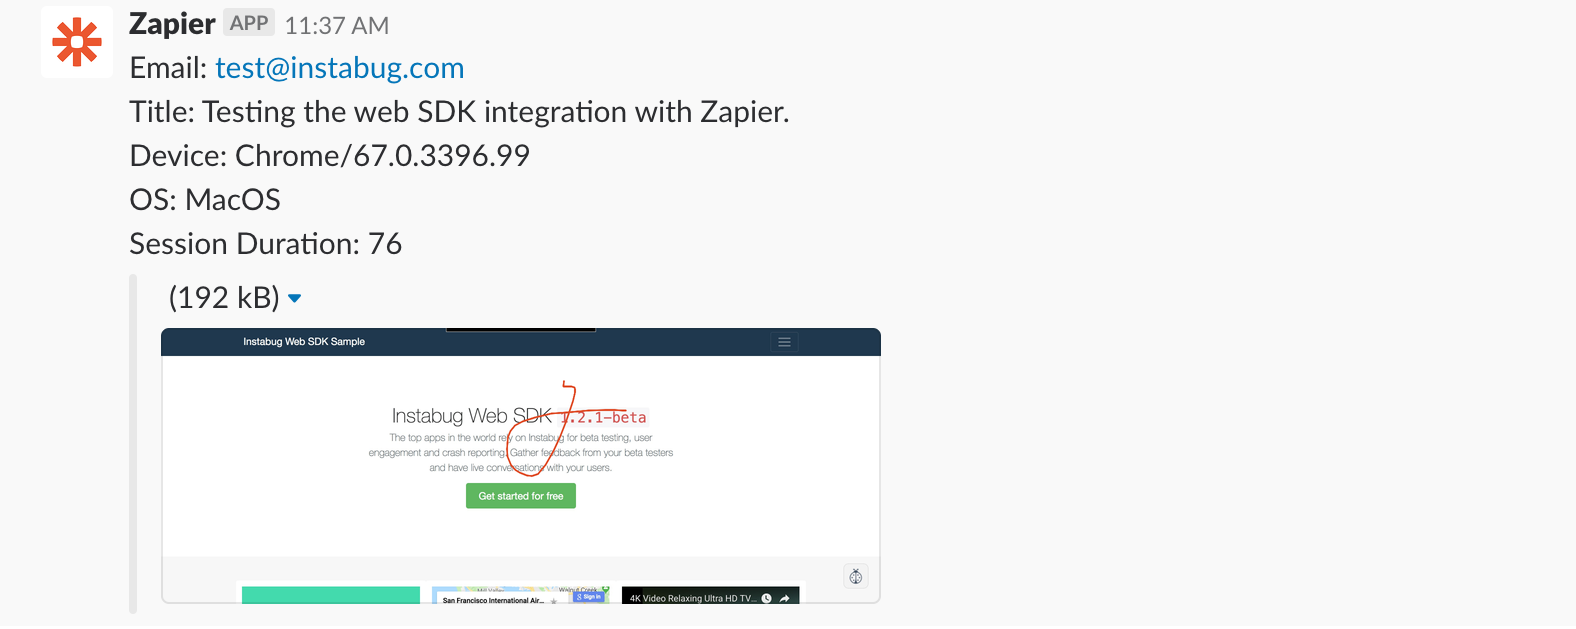
- Test your Zap to make sure everything is working as expected.
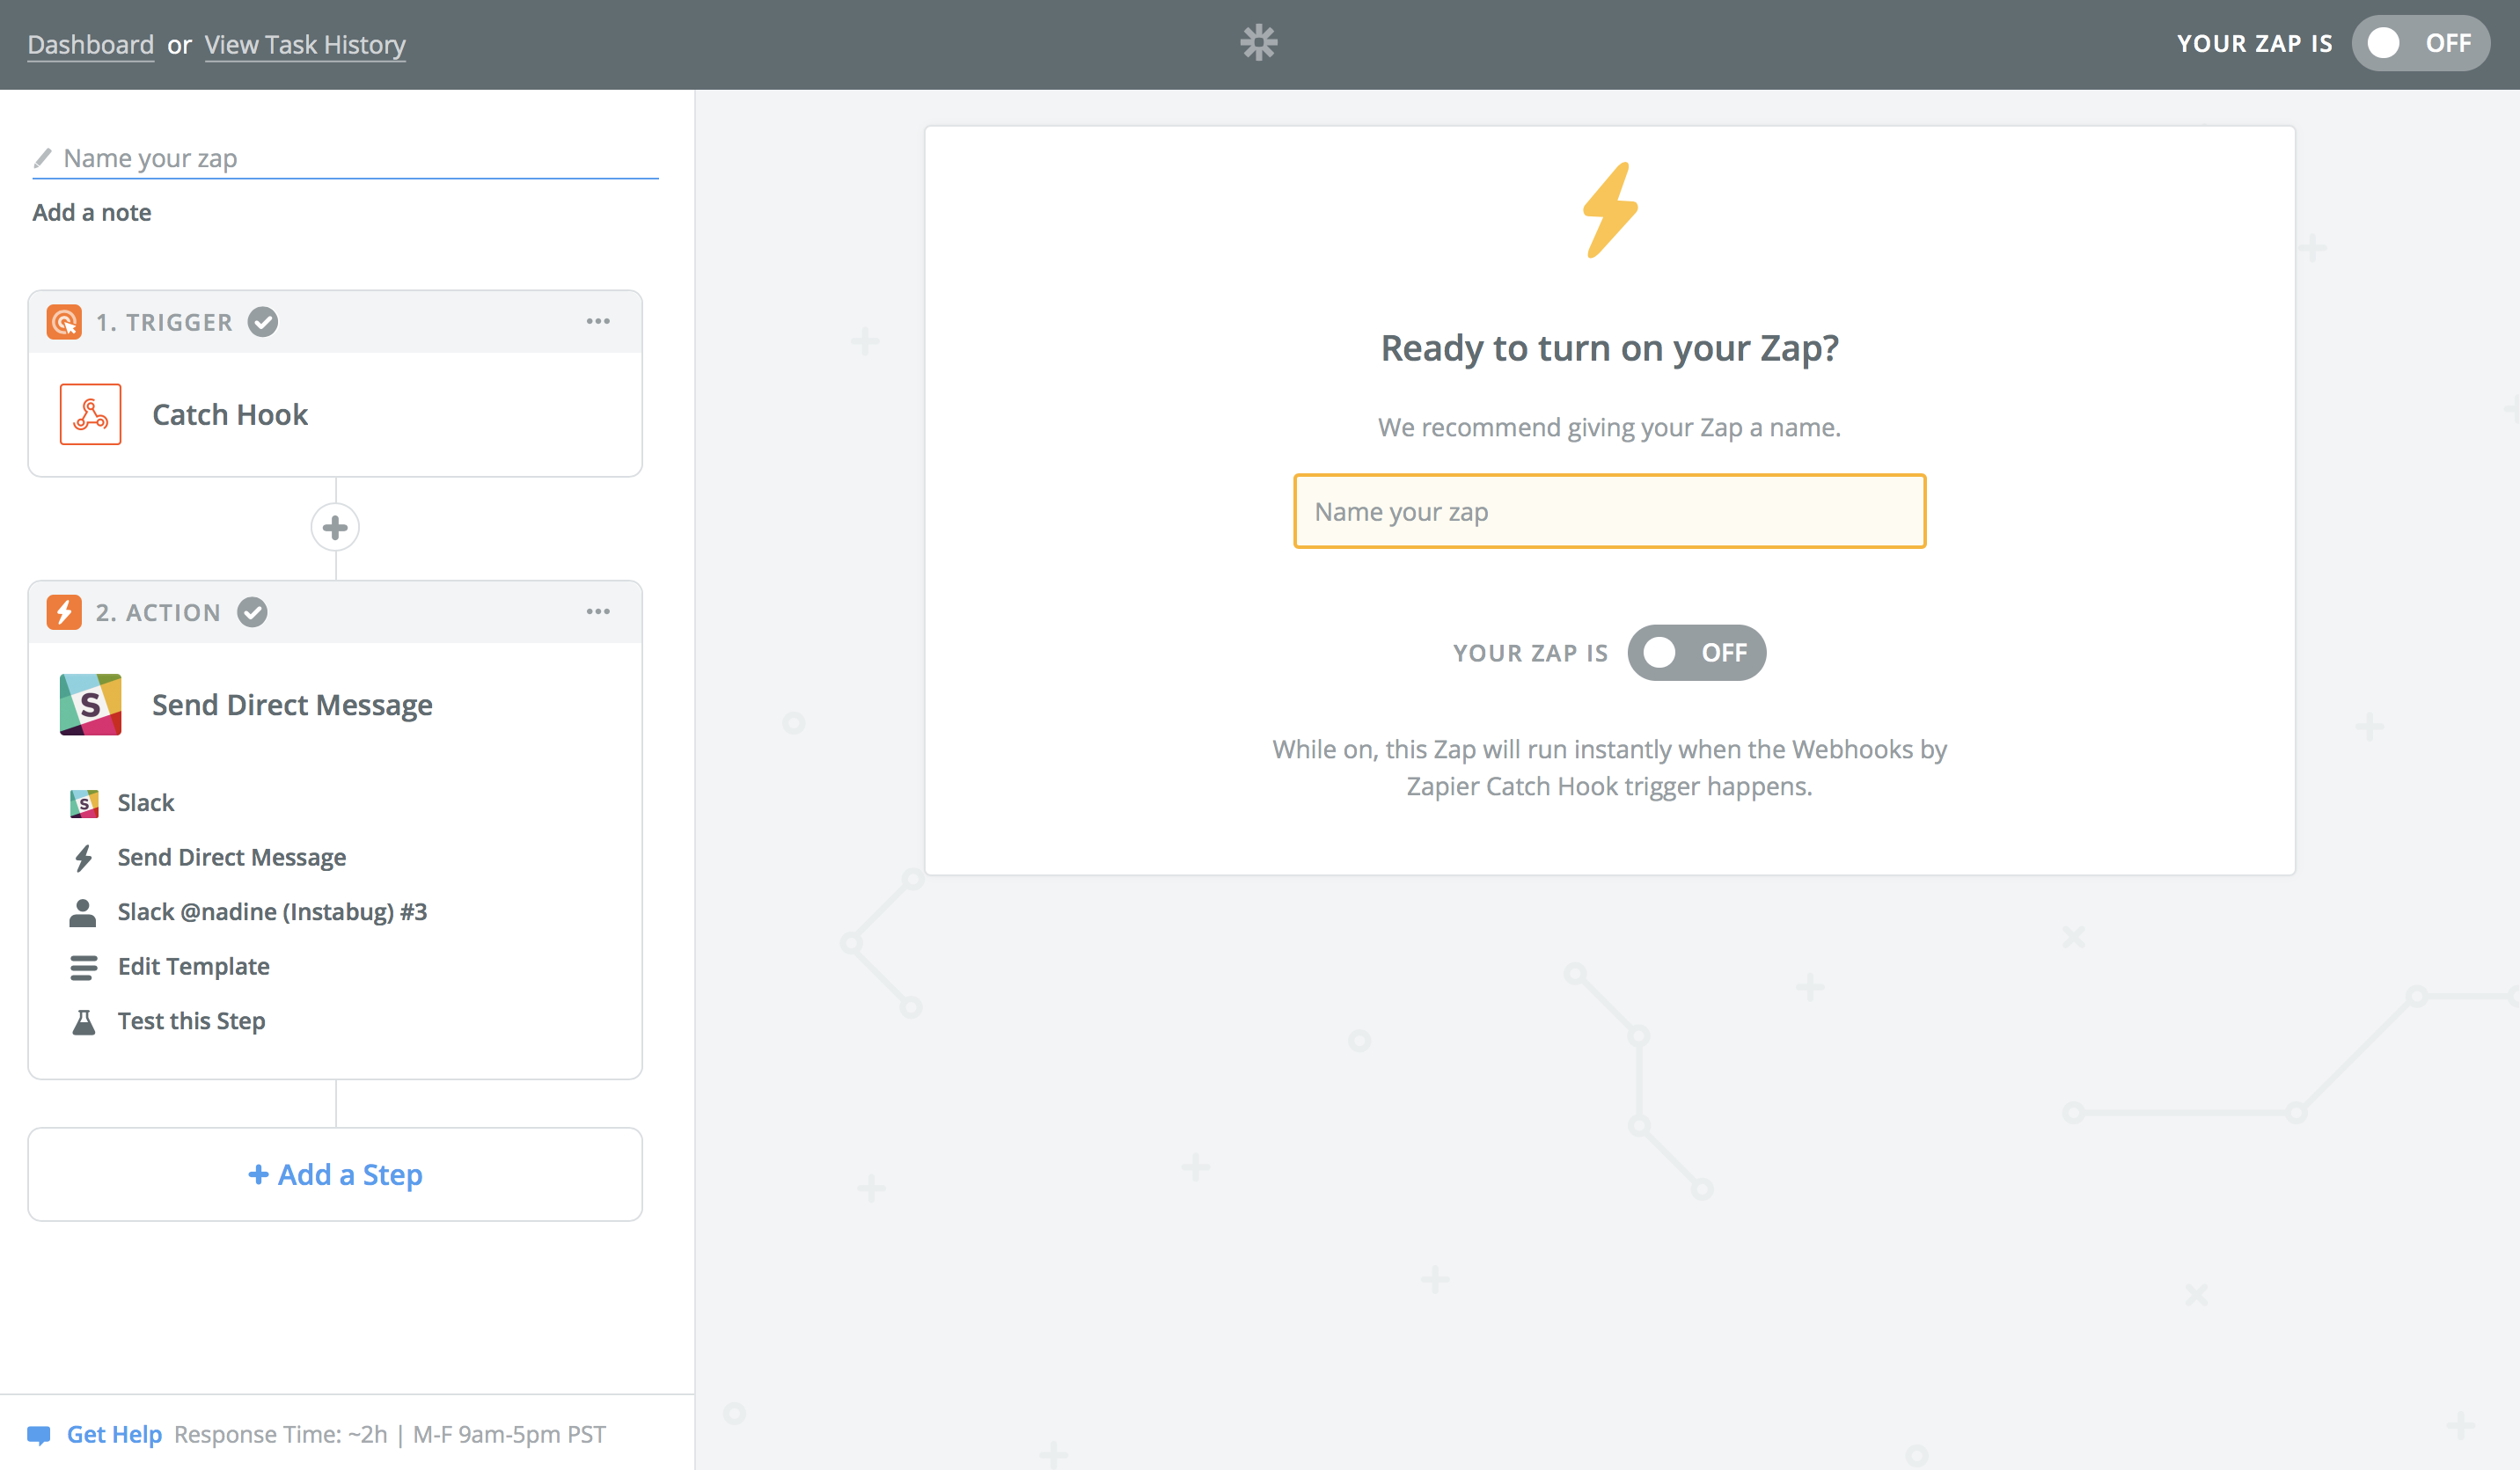
- Last, give a name to your Zap and turn it on.
Updated almost 2 years ago
