
Launchdarkly
Integrate Instabug with Launchdarkly
With the integration, you will be able to monitor and control your feature flags from within Instabug in addition to various automations that can be set up on feature flags.
SDK Setup
Whenever you use a feature flag in Launchdarkly, make sure to call Instabug’s addFeatureFlag API, explained here. This ensures that any feature flags in any session are correctly counted and monitored from both within Instabug and Launchdarkly.
Example of the code snippet
LDClient.init(application, ldConfig, context)

// Boolean flag
val BOOLEAN_FLAG_KEY = "sample-flag"

val featureEnabled = LDClient.get().boolVariation(BOOLEAN_FLAG_KEY, false)
if (featureEnabled) {
    Instabug.addFeatureFlag(IBGFeatureFlag(BOOLEAN_FLAG_KEY))
    // logic to execute if flag enabled
} else {
    Instabug.removeFeatureFlag(BOOLEAN_FLAG_KEY)
}

// Multivariats flag
val STRING_FLAG_KEY = "sample-string-flag"

val stringFlag = LDClient.get().stringVariation(STRING_FLAG_KEY, null)

if (stringFlag != null) {
    Instabug.addFeatureFlag(IBGFeatureFlag(STRING_FLAG_KEY, stringFlag))
} else {
    Instabug.removeFeatureFlag(STRING_FLAG_KEY)
}
Another approach would be using the following snippet which allows Instabug to listen to all feature flags coming of Launchdarkly’s client. However, this may result in inaccurate data if you are not using the same enabled feature flags in you code.
LDClient.init(application, ldConfig, context)
// Get all mobile enabled feature flags
for ((key, value) in LDClient.get().allFlags()) {
    if (value.type == LDValueType.BOOLEAN && value.booleanValue()) {
        Instabug.addFeatureFlag(IBGFeatureFlag(key))
    } else if (value.type == LDValueType.STRING || value.type == LDValueType.NUMBER) {
        Instabug.addFeatureFlag(IBGFeatureFlag(key, value.toString().replace("\"", "")))
    }
}
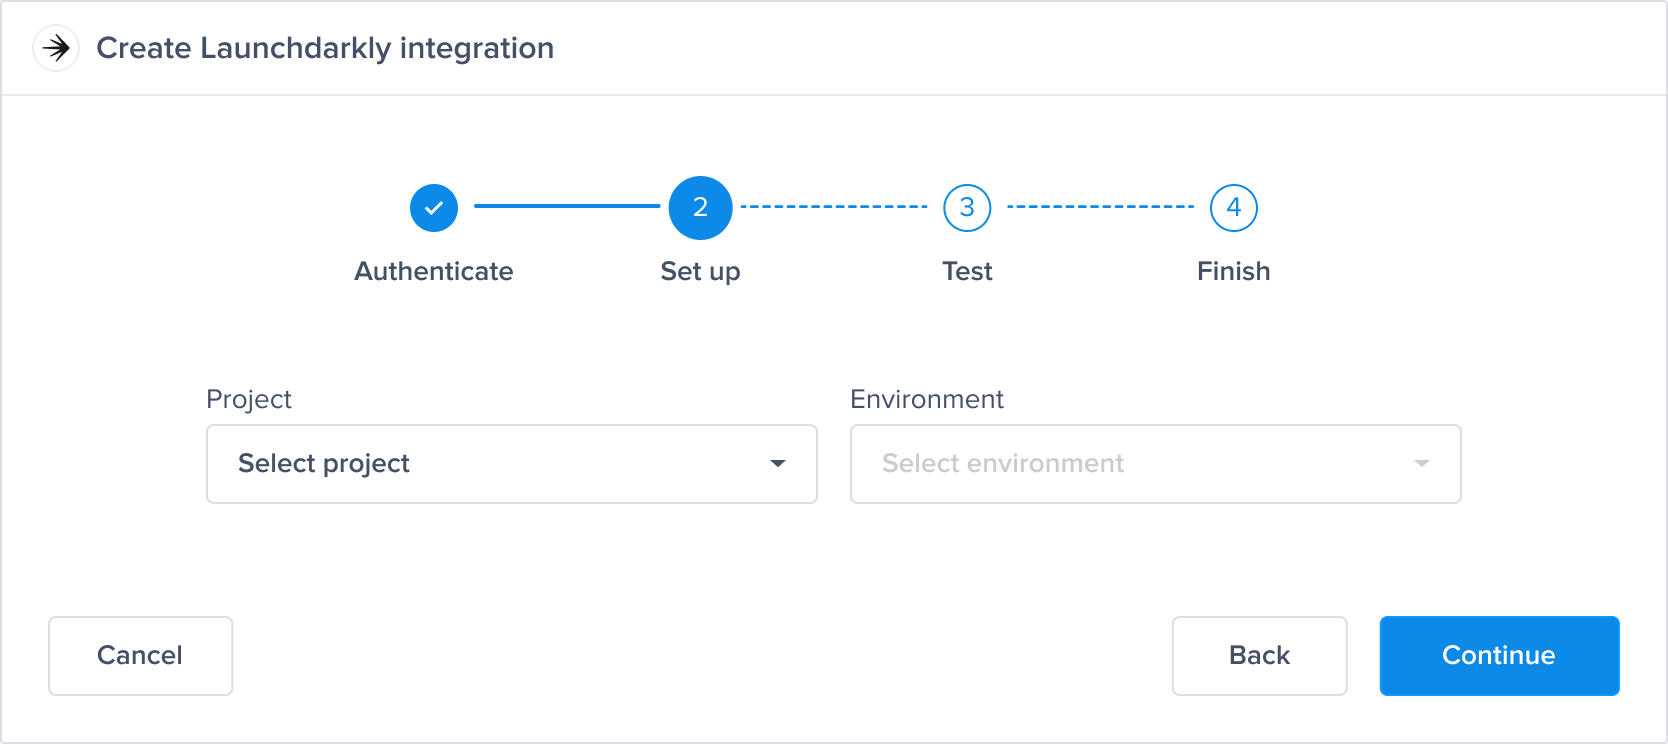
Dashboard Setup
Within the Settings tab, you will find Launchdarkly integration in the list of integrations available.
- Get your launchDarkly integration token, and add it

- Select your project and environment that you want to control feature flags in.
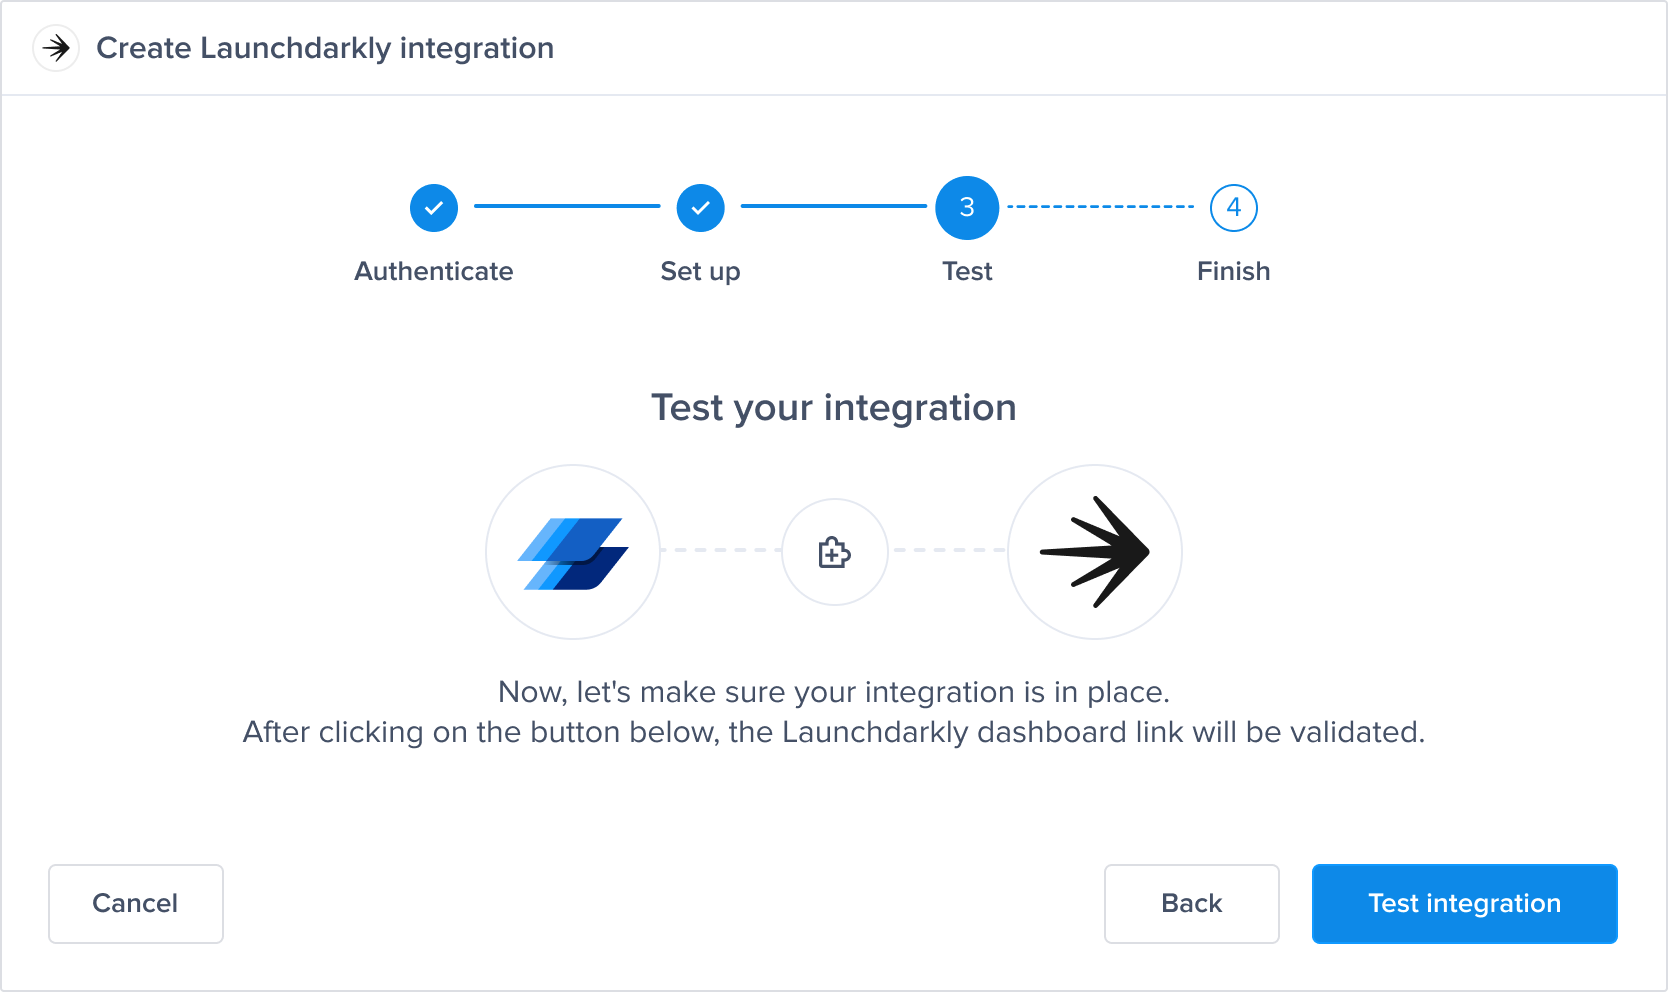
- At this point, we just need to test your integration so that we're sure everything is working smoothly.
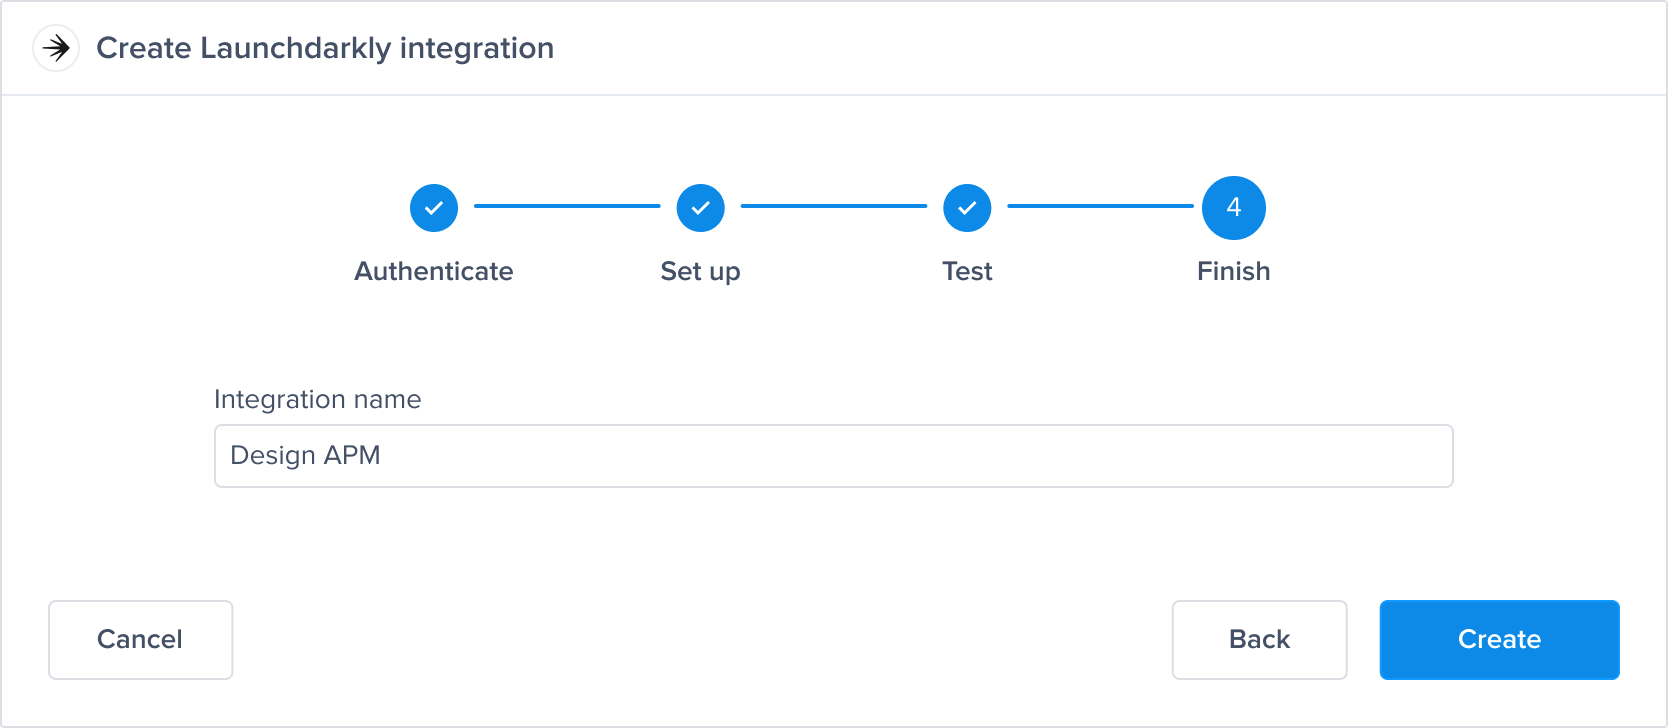
- All done! Your integration is now set up, just give your integration a name and you're ready to go.
Control Feature Flags
After the setup, you can now create rules on a specific feature flag to turn it off whenever it passes a certain threshold of a specific metric.
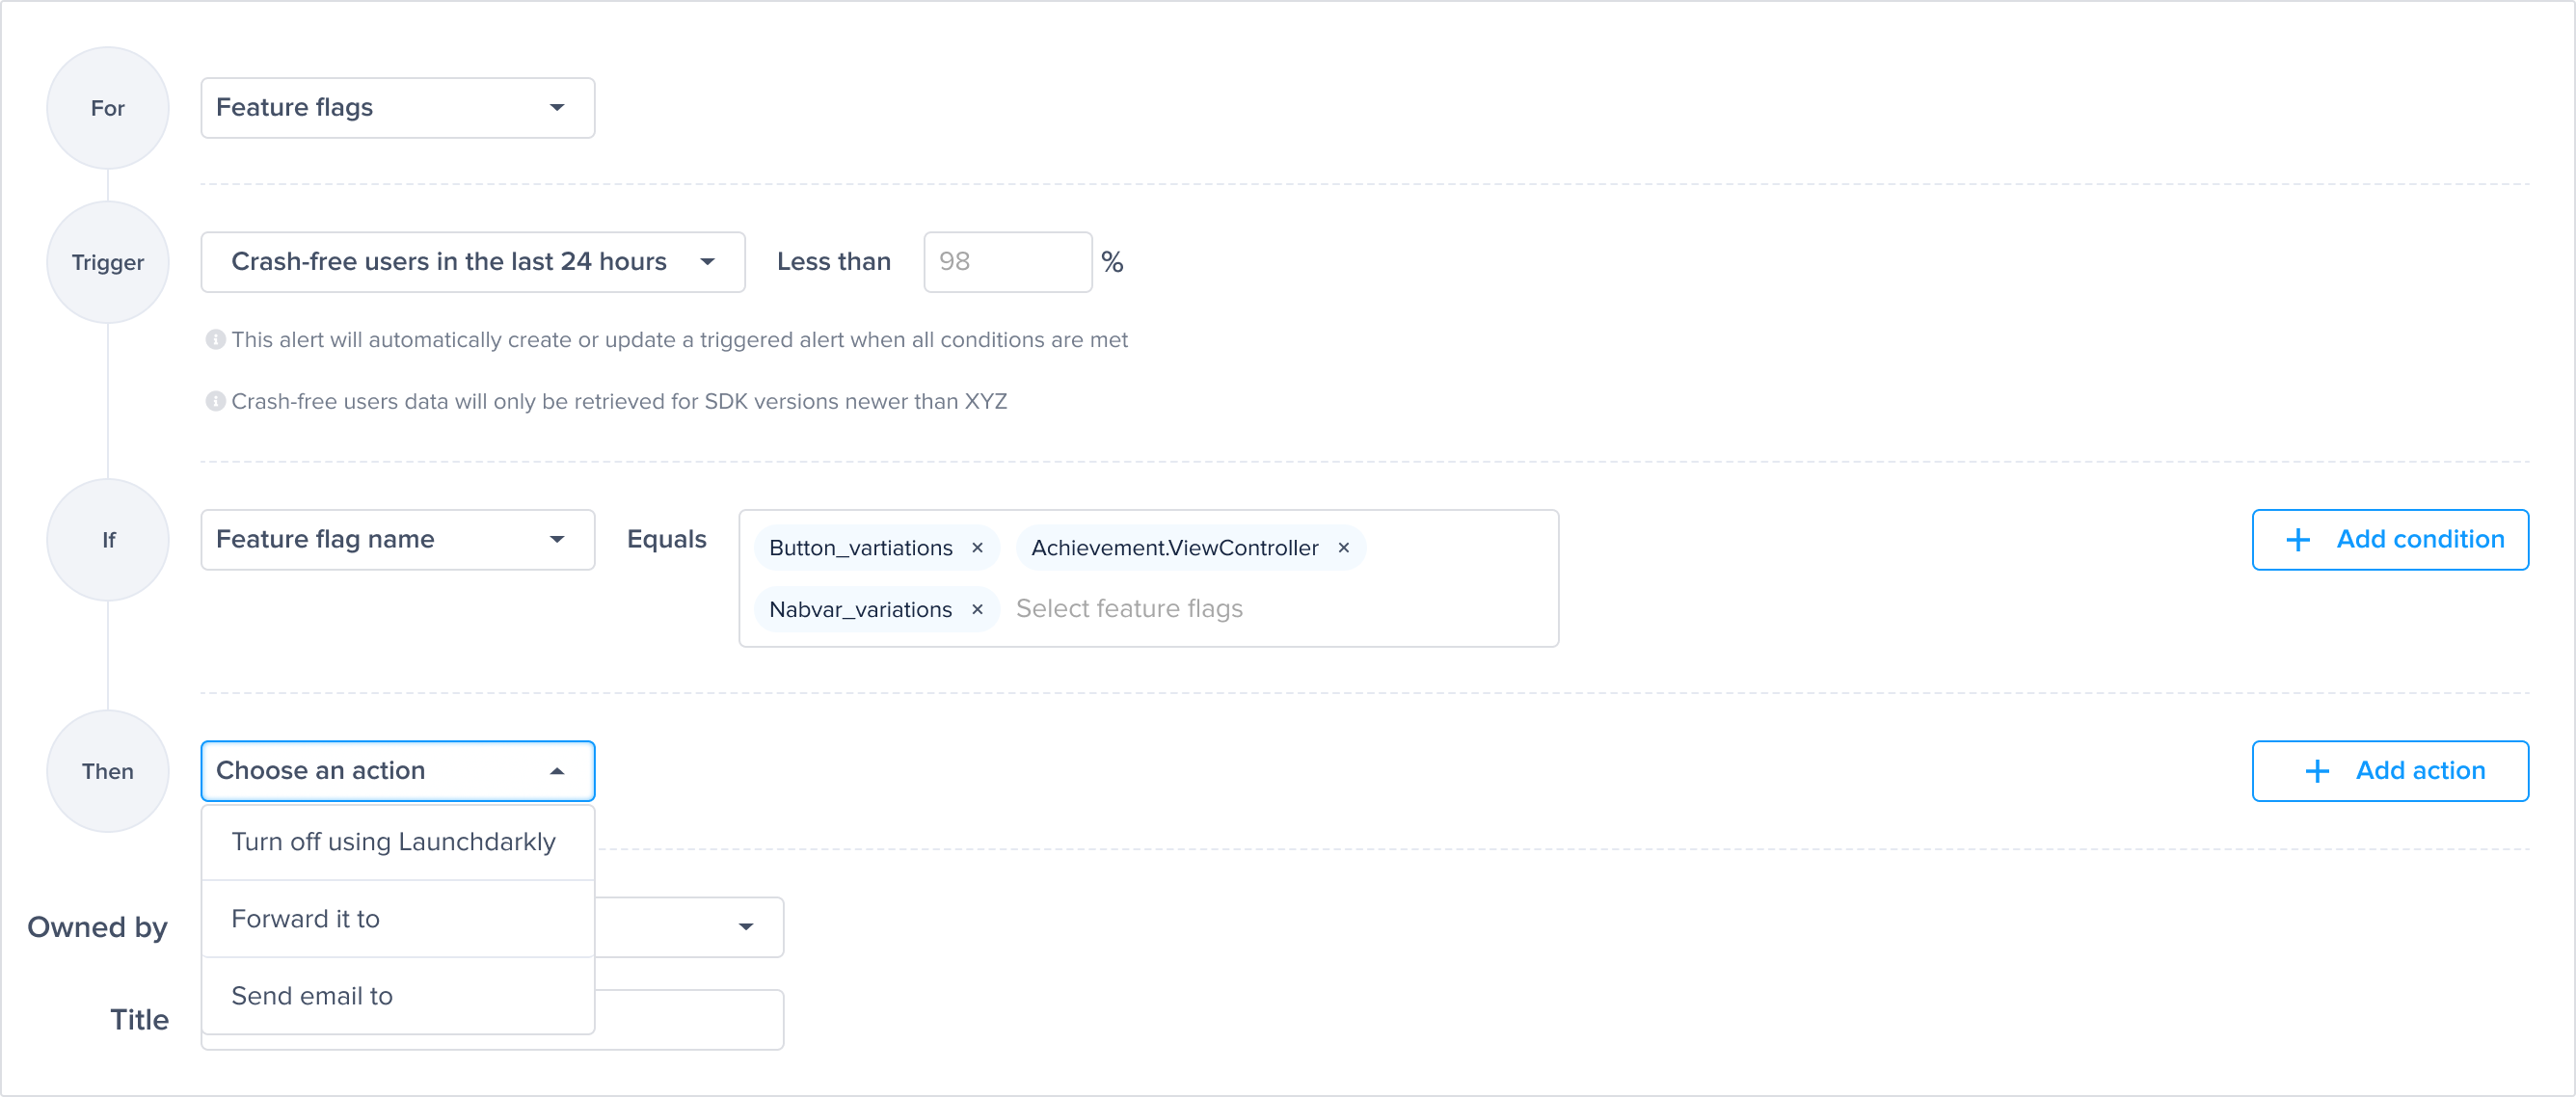
Notes:
- To use the action of Turn off using Launchdarkly, you must add a condition of feature flag names.
- The action of Turn off using launchdarkly send a value of OFF to Launchdarkly for the specific feature flag that passed the threshold added.
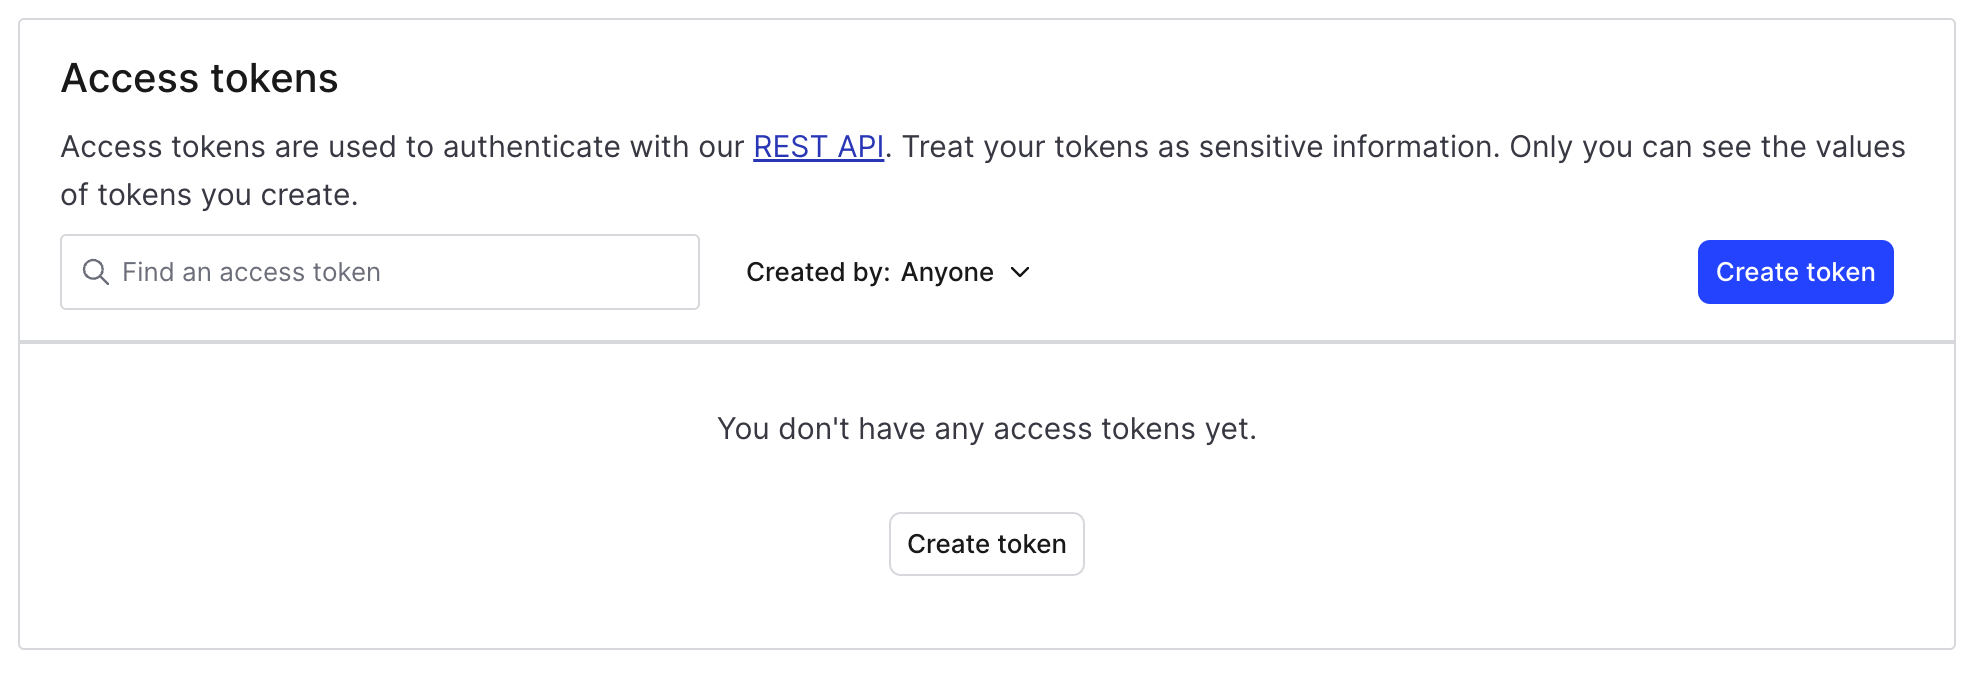
Get Launchdarkly API token
- Go to Settings → Authorization page.
- From Access Tokens section, click create token.
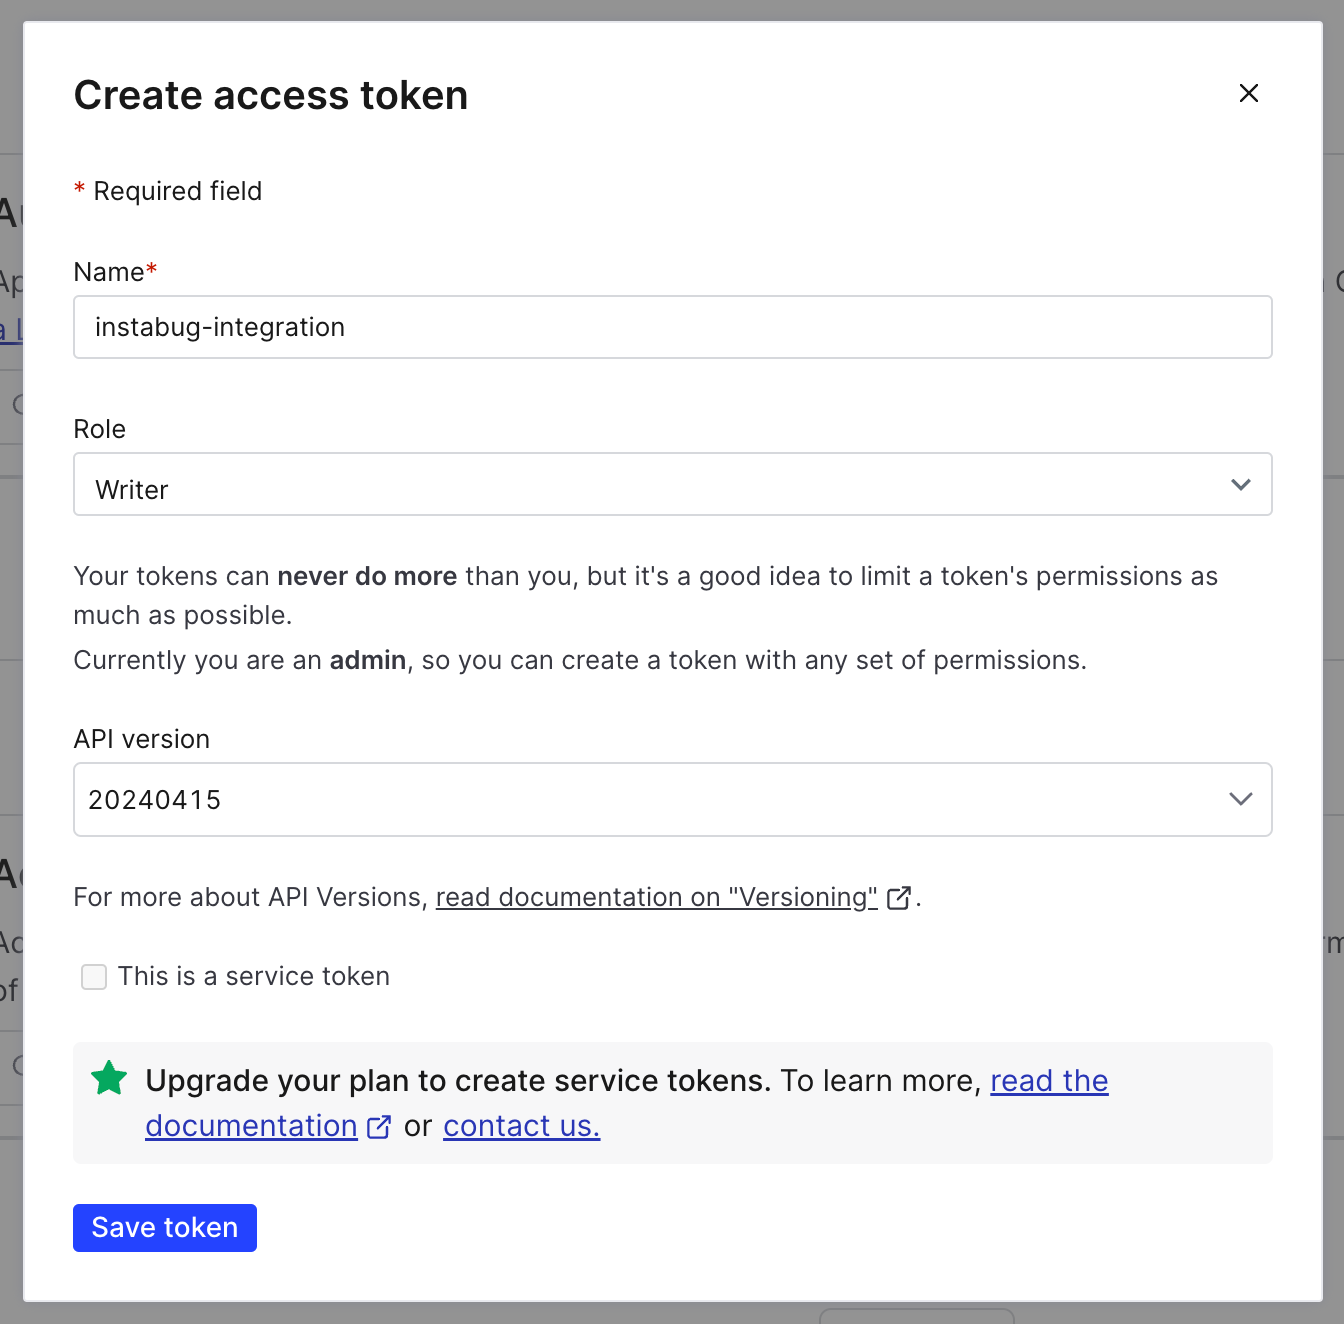
- Enter the integration name, make sure to select Writer role, and select API version to 20240415, then Save.
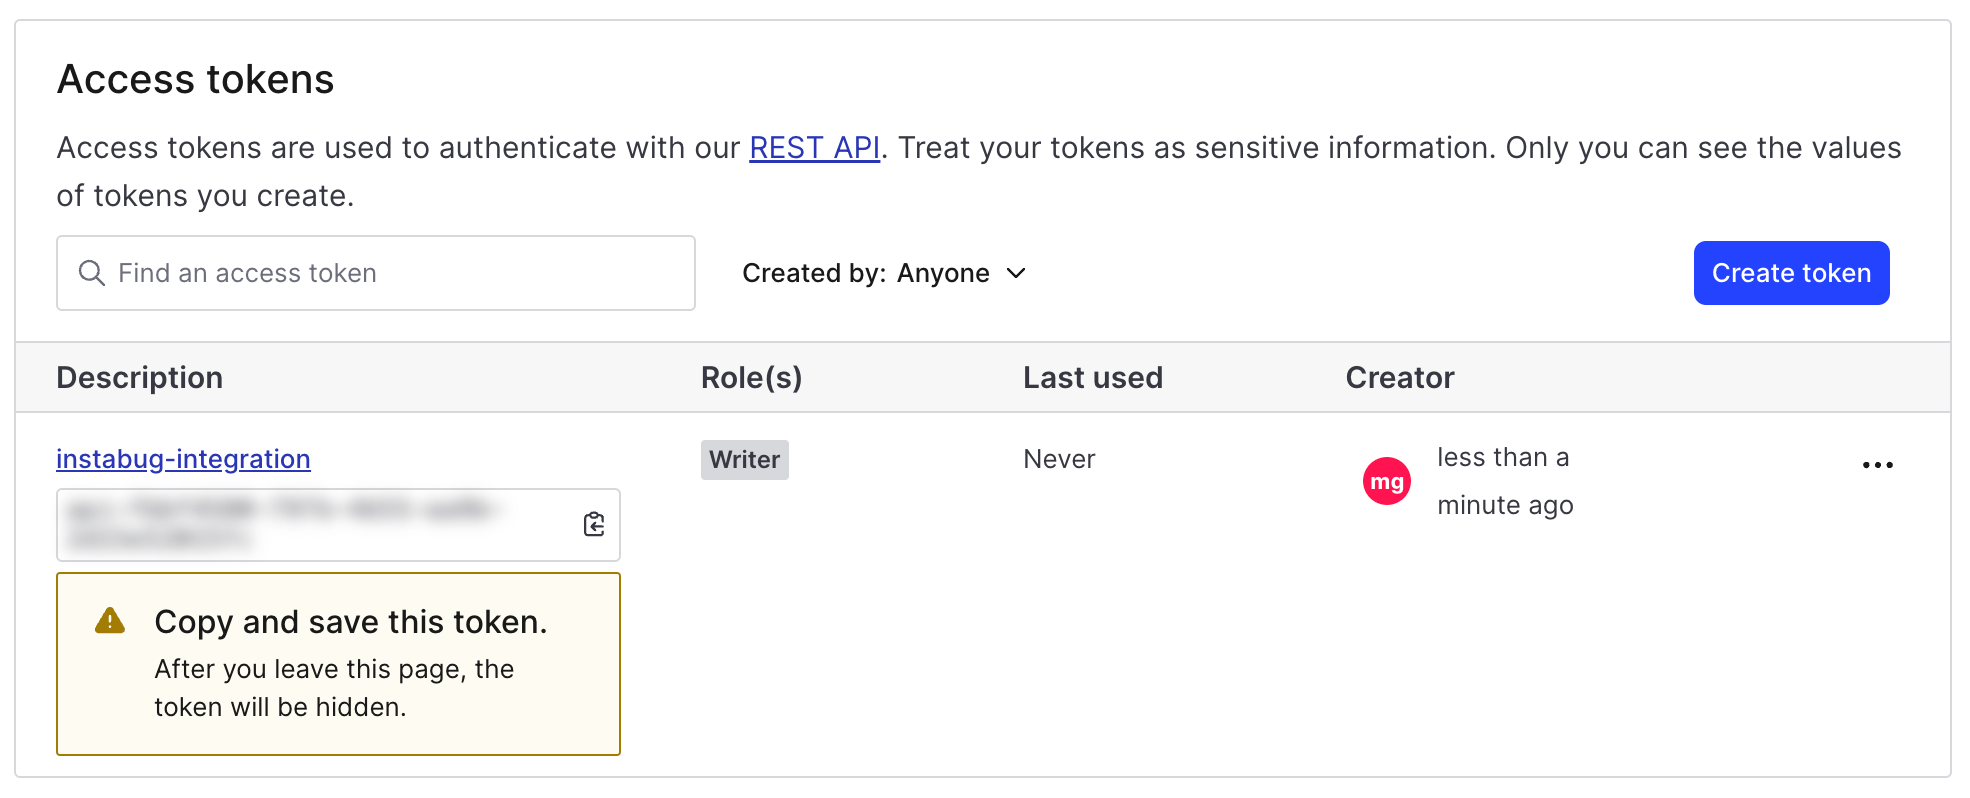
- Copy the generated token before leaving the page, to use it in integration step.
Updated about 1 year ago